Ingredients and steps on one page. Print it, or choose “Save as PDF” in the print dialog.
Sekai Gohan
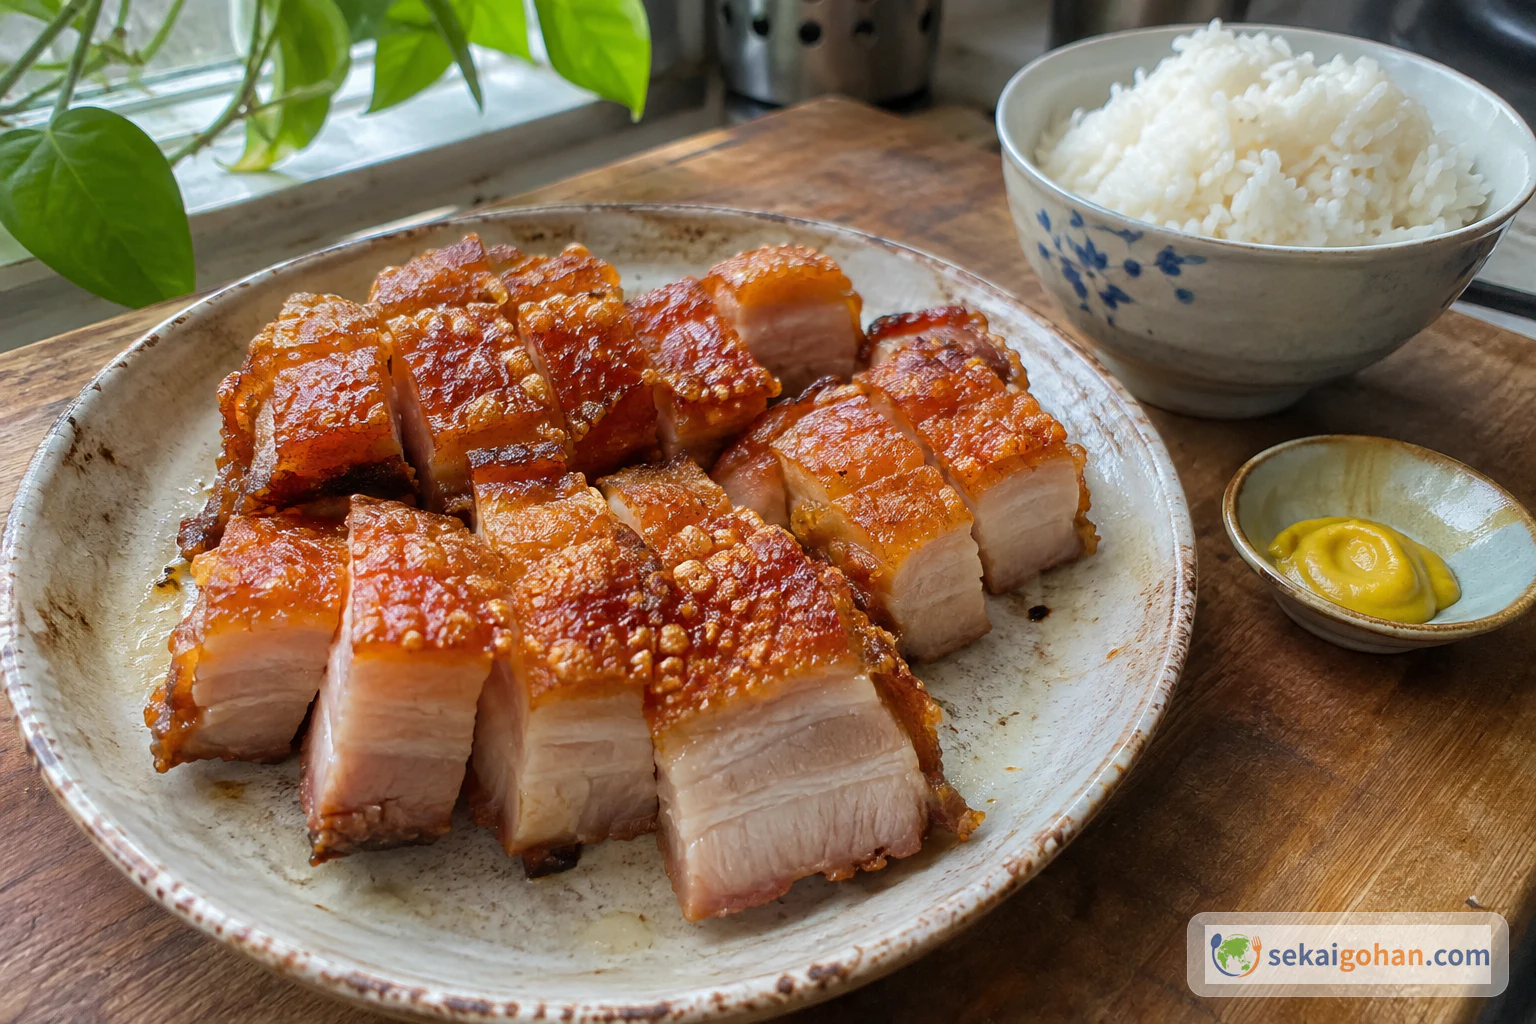
Siu Yuk: Cantonese Crispy-Skin Roast Pork Belly
Ingredients
| Ingredient | Amount | Role |
|---|---|---|
| Skin-on pork belly, one block (ng faa juk, 五花肉腩) | 1⅝ lb (about 740 g) | The whole dish: skin, fat and meat in layers |
| Water, for blanching | 2 cups (about 470 ml), enough to cover the pork | Firms the skin and makes cleaning easier |
| Salt, for the skin | 1 tbsp | Draws moisture out of the skin; wiped off before drying |
| White rice vinegar (or white vinegar) | 1 tsp | Helps the skin dry and puff |
| Five-spice powder (五香粉) | ½ tsp | Dry rub; the roast-shop aroma |
| Black pepper | ⅓ tsp | Dry rub; fragrance and a little bite |
| White pepper | ¼ tsp | Dry rub; warm heat that suits the fat |
| Garlic salt | 1 tsp | Dry rub; salt and garlic for the meat side |
| Salt | ½ tsp | Dry rub; seasons the meat |
| Ground bean sauce (磨豉醬) | 2 tsp | Marinade; deep, fermented savouriness |
| Sugar | 1 tsp | Marinade; rounds out the bean sauce |
| Water, for the pan | ½ cup (120 ml) | Sits under the rack to stop the drippings scorching |
Steps
1Blanch the skin, then the meat side
Put the water in a pot deep enough to cover the pork and bring it to a full boil over high heat. Have a bowl of cold water ready beside the stove while it heats. When the whole surface is rolling, lower the pork in skin-side down and boil for about 1 minute, until the skin changes colour. Turn it meat-side down and boil for 30 to 45 seconds more. The skin should look paler and feel tight and firm.
2Cool the pork and scrape the skin clean
Lift the pork into the cold water and leave it until it is cool enough to handle. Lay it skin-side up on the board. Hold the knife upright, blade across the skin, and scrape it sideways over the whole surface to take off stray hairs and debris. Do not cut into the skin. When you are done, the skin looks smooth and even, with no dark specks or bristles.
3Dry the skin and prick it all over
Pat the pork completely dry with paper towels, skin and sides. Prick the skin all over with a toothpick, fork or pointed metal skewer; a pointed metal skewer works better than a meat tenderizer. Push through the skin but stop before the meat. The more holes you make, the more the skin puffs, so keep going until the whole surface is pocked with tiny holes and no moisture shows.
Wet skin is the first thing that goes wrongMoisture on the skin is the most common reason siu yuk fails to crackle. Dry it before pricking, dry it again if it weeps, and never move on with the skin damp.
4Score the meat side and rub in the spices
Turn the pork skin-side down. Make two long cuts down the length of the meat, then two across them to form a grid, stopping short of the skin. Mix the five-spice, black pepper, white pepper, garlic salt and ½ tsp salt in a small bowl. Rub the mixture over the whole meat side and into the cuts; you do not have to use all of it. The grooves should look filled with brown spice.
5Spread the bean sauce on the meat and build a foil wall
Stir 2 tsp ground bean sauce and 1 tsp sugar into the leftover rub and spread it over the meat side only. Keep both rub and sauce off the skin, where they stop it drying and puffing. Tear off a sheet of foil larger than the pork, set the pork in the middle skin-side up, and fold the edges up around it into a wall, doubling the folds. Wash your hands, board and knife after handling the raw pork. The meat sides should be sealed in foil, with only the clean, bare skin showing.
6Salt the skin, wipe it off and add the vinegar
Rub 1 tbsp salt over the skin and leave it for 5 minutes. The skin turns damp and glossy as the salt draws water out. Wipe away all the salt and moisture with paper towels, and scrape off any grains that cling with the back of the knife. Pour 1 tsp vinegar over the skin and spread it across the whole surface. You should see a thin sheen of vinegar and no salt grains left.
7Dry uncovered in the refrigerator overnight
Set the foil-walled pork on a refrigerator shelf, skin up and uncovered. Leave it for 10 to 12 hours or longer. Do not cover or wrap it, because the cold, moving air is what dries the skin. The next morning, the skin feels hard, dry and leathery to the touch.
8Start the roast at the lower temperature
Preheat the oven to 375°F (190°C). Pour ½ cup water into the rimmed baking pan, set the rack over it, and place the foil-walled pork on the rack skin-side up. Put it in the oven and turn the heat down to 350°F (176°C) for 20 to 25 minutes. In a toaster oven, preheat to 400°F (205°C) and roast at 375°F (190°C) for 20 to 25 minutes. At the end of this stage the skin is still mostly pale, just colouring at the edges.
9Raise the heat to blister the skin
Turn the oven up to 400°F (205°C) and roast for 30 to 35 minutes; in a toaster oven, roast at 425°F (218°C) for 30 to 35 minutes. Check the skin 10 to 15 minutes before the end with the oven light and through the window, keeping the door shut. Keep an eye on the water in the pan as it boils away and spatters. The pork is done when the skin is deep golden and covered in small blisters from edge to edge.
Keep the door closedEvery opening lets heat and steam out at the moment the skin is starting to blister. Watch through the glass and open the oven only to take the pork out.
Hot water and steamThe pan holds very hot water and the oven fills with steam. When you open the door, stand back from the first rush of steam, and lift the pan out level with dry oven mitts so the water does not slosh.
10Rest for an hour, then cut along the scores
Let the pork rest on the rack for 1 hour before cutting. Cutting straight from the oven lets the juices run out onto the board. Turn it skin-side up and chop down firmly along the score lines from step 4, cutting through the skin in one stroke. The skin breaks with a sharp crack, and the cut faces show clean layers of meat and rendered fat.