Ingredients and steps on one page. Print it, or choose “Save as PDF” in the print dialog.
Sekai Gohan
Snow Skin Mooncake: Hong Kong Steamed No-Bake Rice Flour Mooncakes
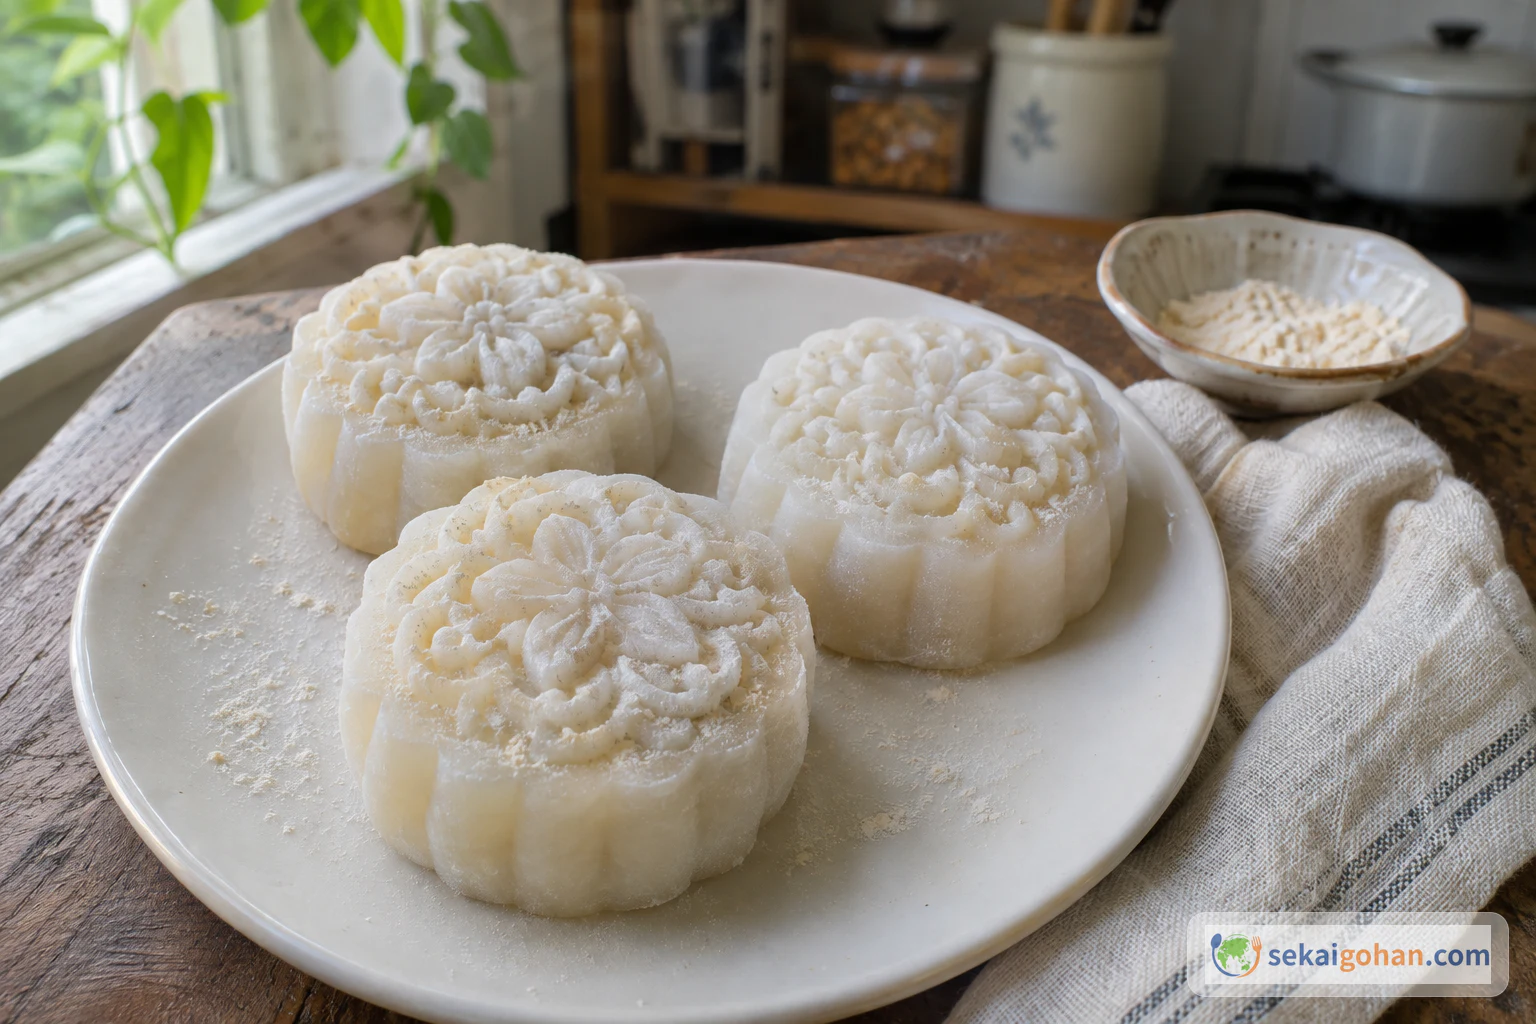
Ingredients
| Ingredient | Amount | Role |
|---|---|---|
| Powdered sugar | 2 oz (60 g) | Sweetens the skin; mixed with the milk and oil first |
| Whole milk | 7¾ oz (215 g) | The liquid of the skin and its milky flavor |
| Neutral vegetable oil | scant 1 oz (25 g) | Makes the steamed dough smooth and supple |
| Glutinous rice flour (sweet rice flour) | 1¾ oz (50 g) | The chew of the skin |
| Glutinous rice flour, for dusting | scant 1 oz (25 g) | Toasted and used only on the mold and counter, never in the dough |
| Rice flour (regular, non-glutinous) | 1¼ oz (35 g) | Body, so the skin holds its shape |
| Wheat starch (澄麵 / 澄粉) | 1¼ oz (35 g) | Turns the skin translucent when steamed |
| Smooth red bean paste, or another soft filling | 14 oz (400 g) | The filling; must be soft and already cooked |
Steps
1Chill the filling
Get the 14 oz (400 g) of filling ready and put it in the refrigerator, covered. If you make your own, cook it the day before so it has time to firm up overnight. Store-bought paste benefits from chilling too. A cold filling rolls cleanly and holds its shape inside the soft skin. It is ready when it is cold and firm enough to roll into balls.
2Mix the batter and sift in the flours
In a large bowl, whisk the powdered sugar, milk and oil together until the sugar disappears. Hold a fine sieve over the bowl and sift in the glutinous rice flour, rice flour and wheat starch. Stir until no lumps remain. Lumps left now steam into hard white spots later, so take the time here. The batter is ready when it is smooth, pourable and evenly milky, with no visible specks of flour.
3Rest the batter for 30 minutes
Pour the batter into a heatproof bowl. Cover it tightly with plastic wrap. Leave it on the counter for 30 minutes. During this time the flours take up the liquid evenly. When you lift the wrap, the batter looks smooth and uniformly white.
4Steam from cold water on high heat for 25 minutes
Fill the steamer with enough water to last 25 minutes of steaming. Put the bowl in while the water is still cold, with the plastic wrap still on, which keeps dripping condensation out of the dough. Keep the wrap clear of the hot metal sides of the steamer. Cover, turn the heat to high and steam for 25 minutes. Keep the steam rising steadily until the 25 minutes are up.
Hot steamSteam burns faster than boiling water. Turn off the heat before lifting the lid, open it away from your face and use oven mitts to take out the bowl.
5Check that the dough is fully translucent
Peel back the wrap and look at both the edge and the center of the bowl. The dough is done when it has turned from opaque to completely translucent all the way through. A little oil pooling on the surface is normal. If any cloudy white patches remain, put the wrap back and steam for 5 more minutes on high heat. The cue is a pale ivory dough with no white core anywhere.
6Cool and knead with gloves
Take the bowl off the heat and stir the dough gently to let the heat out. When it is cool enough to touch, put on food-safe gloves. Knead it for a few minutes to work the surface oil back in. Bare hands stick badly to this dough, and gloves keep it clean. It is ready when it gathers into one glossy, elastic mass with an even, smooth surface.
7Wrap and chill the dough for 1 to 2 hours
Wrap the kneaded dough in plastic wrap. Refrigerate it for 1 to 2 hours. Do not skip or shorten this: warm dough is too soft and sticky to shape. The dough is ready when it feels firm and cool and comes away from the wrap cleanly.
8Toast the dusting flour
Put the 25 g of glutinous rice flour for dusting in a clean, completely dry skillet. Toast it over medium-low heat for 6 to 7 minutes, stirring often. Raw flour is never used for dusting: it tastes floury and has not been cooked. Stop when the flour turns a faint beige and smells toasty, and let it cool completely before using it.
9Portion and roll the filling
Put on gloves and take the filling out of the fridge. Divide it to match your mold: for a 50 g mold, weigh scant 1 oz (25 g) portions, which gives 16. For a 100 g mold, weigh 50 g portions for 8. Roll each portion into a smooth ball. They are ready when every ball is the same weight and has no cracks.
10Divide the dough and press it into discs
Divide the chilled dough into the same number and weight of portions as the filling, and roll each into a ball. Lay a sheet of plastic wrap on the counter. Press each ball flat with your palm into a disc no wider than 3 inches (7.5 cm) for a 50 g mold, or 4 inches (10 cm) for a 100 g mold. If you use a rolling pin, sandwich the dough between two sheets of plastic wrap. The disc is right when it is even in thickness, soft at the edge and faintly translucent.
11Wrap the filling and press out the air
Set a ball of filling in the center of a disc. Pick the whole thing up and turn it over. Gently press out the air trapped around the filling, then turn it back and draw the edges up around the opening. Pinch them closed, easing the skin so its thickness stays even. A closed ball has no visible seam gap and no dark patches where the filling shows through.
Push the air out before you sealTrapped air is what blows holes in the skin when the mold presses down. Press it out around the filling before the edges meet, and close the seam slowly.
12Dust the mold and press out the mooncakes
Brush toasted flour over the whole inside of the mold, into every groove of the pattern, then tap out the excess. Drop a filled ball into the mold, seam side up, without forcing it in. Set the mold opening-down on plastic wrap and press the plunger gently until you feel resistance. Lift the mold and press the plunger again to release the mooncake. A clean, sharp pattern with no torn edges means the dusting and the pressure were right.
Dust thoroughly, press lightlyThe pattern comes from flour in the grooves, not from force. Brush every corner of the carving, shake off the loose excess and stop pressing at the first resistance.
13Chill the finished mooncakes
Move the mooncakes to a covered container and put them in the refrigerator right away. Chill them for a few hours before eating. The skin firms up and the pattern sets. They are ready when they feel cold all the way through and the surface is smooth and matte.