Ingredients and steps on one page. Print it, or choose “Save as PDF” in the print dialog.
Sekai Gohan
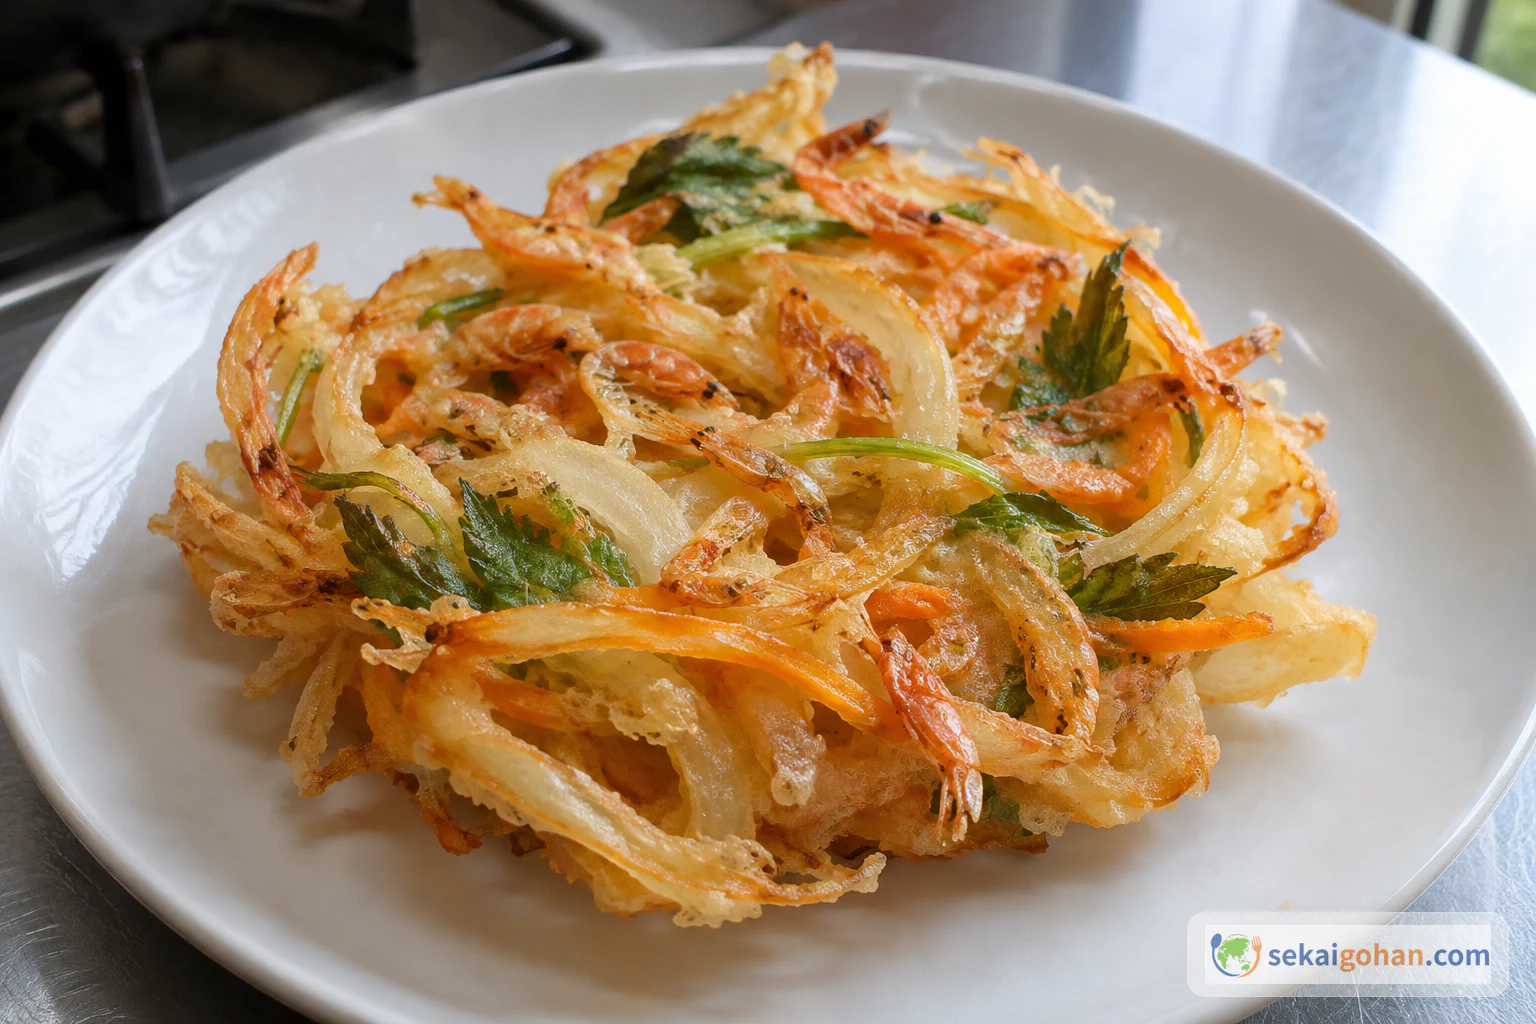
Kakiage: Crisp Japanese Fritters of Onion, Carrot and Sakura Shrimp (かき揚げ)
Ingredients
| Ingredient | Amount | Role |
|---|---|---|
| Dried sakura shrimp (乾燥桜えび, sakura ebi) | 2 tbsp | Aroma and savory seafood flavor |
| Onion (玉ねぎ, tamanegi) | 1 | Sweetness and the main body of the cluster |
| Carrot (にんじん, ninjin) | 1 | Color and bite |
| Mitsuba (三つ葉) | about 20 stems | Fresh, herbal aroma |
| Soft wheat flour (薄力粉, hakurikiko) | as needed | Coats the ingredients and binds the batter |
| Chilled water (冷水) | as needed | Turns the flour coating into a light batter |
| Frying oil (揚げ油) | as needed | For deep-frying |
| Salt (塩) | to taste | Optional, served on the side |
Steps
1Cut the onion
Cut the onion in half lengthwise, from top to root. Lay each half cut-side down and slice it thinly. The slices should be thin and even, ready to form the body of the kakiage.
2Cut the carrot and mitsuba
Cut the carrot into fine, thin strips. Cut off the root ends of the mitsuba, keeping the stems and leaves, then cut the stems and leaves into lengths of about 1 inch (3 cm). The carrot should be in fine strips and the mitsuba in short, even lengths.
3Coat the vegetables and shrimp in flour
Put the onion, carrot and mitsuba in a bowl and add the dried sakura shrimp. Sprinkle soft wheat flour over the top, without adding water yet. Toss lightly so every piece is dusted with flour, adding a little more flour if bare pieces remain. The mixture should look dry and loose, with every piece lightly coated.
4Add chilled water and mix lightly
Pour in a small amount of chilled water, adding it gradually rather than all at once. Mix lightly with chopsticks until the flour is moistened and the pieces start to cling together. Stop while small lumps of flour remain; don't stir it into a smooth paste or a runny batter. If dry flour is still visible, add a little more chilled water and mix lightly again.
5Heat the oil
Pour frying oil into a deep pan and heat it. Stay with the pan the whole time it is on the heat.
6Fry the kakiage until crisp
Gather a bite-size portion of the mixture on a spoon or with chopsticks, bring it close to the oil surface, and slide it in gently. Don't drop it from a height, and fry a few portions at a time. While the batter sets, gently hold each cluster in shape with chopsticks so the pieces don't scatter, keeping your hands out of the oil. Keep frying until the kakiage is cooked through and crisp, with golden edges.
7Drain and repeat
Lift the kakiage out with a slotted spoon and hold it above the pan so the oil drips back. Set it on a wire rack to drain off excess oil. Repeat the lowering, frying and draining with the rest of the mixture. Each kakiage should rest on the rack, dry-looking and crisp.
8Serve with salt
Serve the kakiage freshly fried, with a little salt on the side to taste.