Ingredients and steps on one page. Print it, or choose “Save as PDF” in the print dialog.
Sekai Gohan
Tamagoyaki: Japanese Rolled Omelette with Dashi and Potato Starch
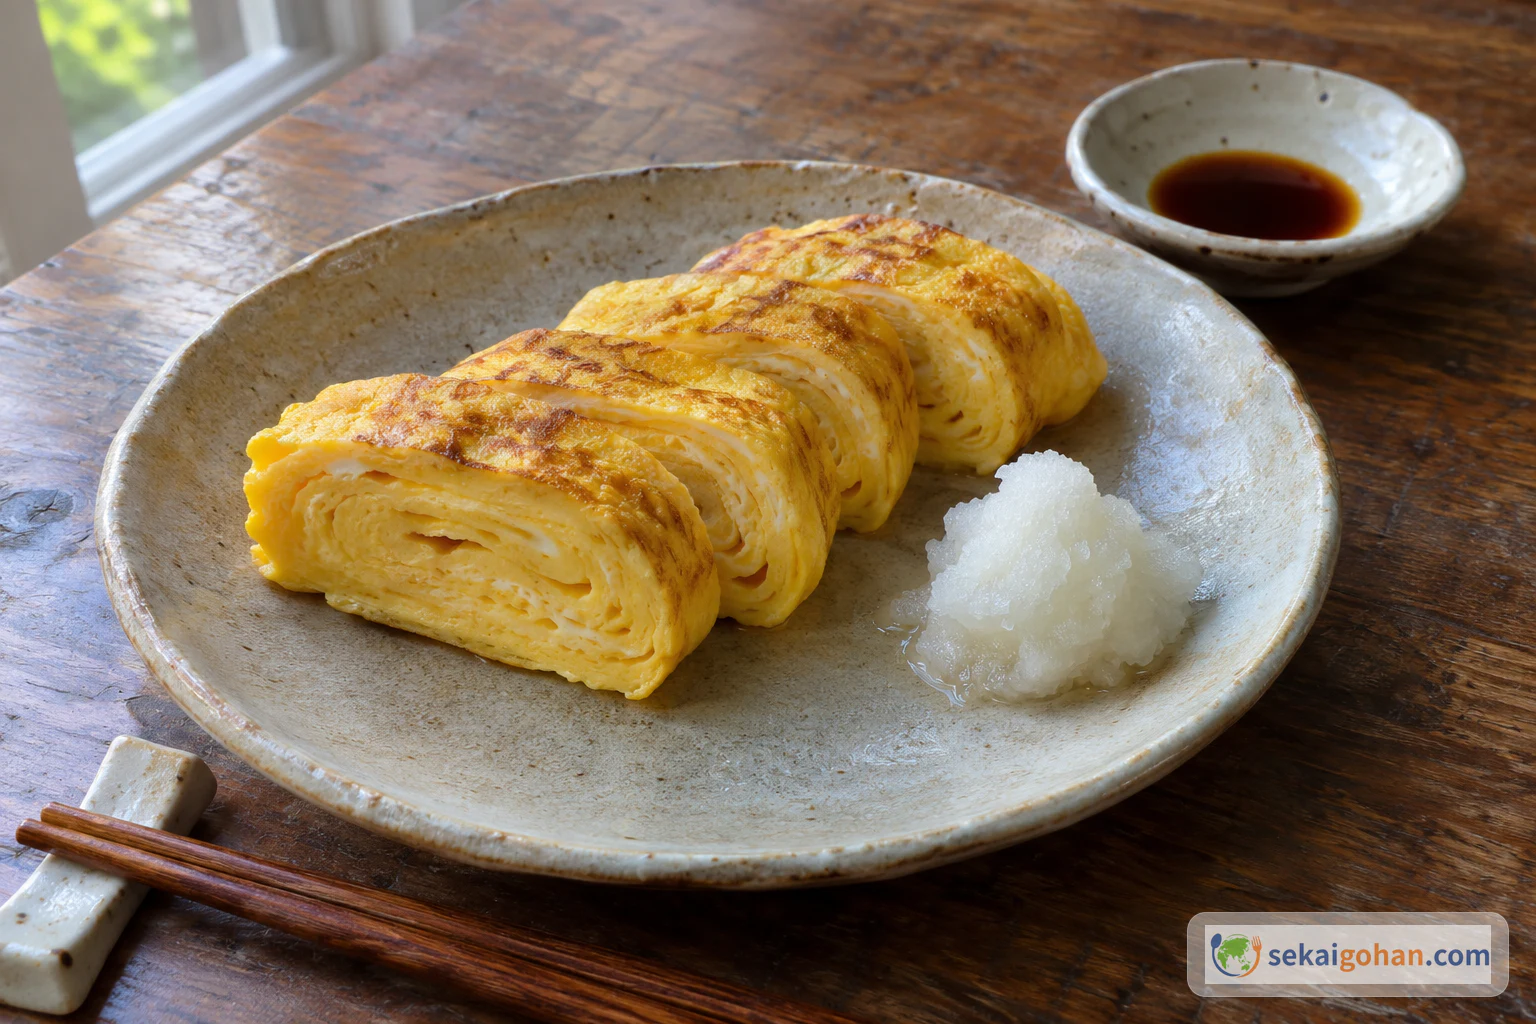
Ingredients
| Ingredient | Amount | Role |
|---|---|---|
| Eggs (tamago) | 2 | The body of the roll |
| Mirin | 2 tbsp | Sweetness and a light gloss |
| Soy sauce (shōyu) | ½ tbsp | Salt and savory depth |
| Sugar | 1½ tbsp | Sweetness and a rounder taste |
| Dashi | 2 tbsp | The broth flavor that runs through each layer |
| Potato starch (katakuriko) or kudzu starch (kuzuko) | 2 tsp | Holds the dashi in the egg and keeps the slices moist |
| Cooking oil | As needed | Soaked into a folded paper towel for wiping the pan |
| Grated daikon (daikon oroshi) | As needed | Served alongside, never mixed into the egg |
Steps
1Mix the egg liquid without whipping
Crack the eggs into the bowl and add the mirin, soy sauce, sugar, dashi and potato starch all at once. Stir with cooking chopsticks in a cutting motion, keeping the tips near the bottom of the bowl and slicing through the whites rather than beating them. Whipping folds air into the egg, and that air leaves pockmarks on the cooked surface and holes between the layers. The liquid is ready when the whites are broken up, the color is an even pale amber and the surface carries almost no foam.
Lumps of starchIf the potato starch clumps, dissolve it in the cold dashi in a small cup first, then stir that into the eggs with the other seasonings. The amounts stay the same.
2Heat the pan and wipe it with oil
Set the tamagoyaki pan over medium heat. Wipe the base with the oil-soaked paper towel, pushing it into all four corners so a thin film covers the metal. A pan that is too cool grabs the egg, and the sheet tears when you try to roll it. Drop a little egg liquid in to test. When it sets at once with a sizzle, the pan is ready.
3Pour the first third and pop the bubbles
Pour in one third of the egg liquid and tilt the pan so it spreads thinly over the whole base. Bubbles will push up from underneath. Pop each one with the chopstick tips so it does not set into a hole. Move on when the edges have set and the top is still glossy and wet.
4Roll from the far side toward you
Slip the chopsticks under the far edge of the sheet and fold it toward you. Keep folding, turn over turn, until the whole sheet is gathered in a loose log at the near edge of the pan. A moist top glues each fold to the next, while a dried top cracks when it bends. The log is soft and uneven at this point, and its outside should still shine.
Roll before it driesThe moment to roll is shorter than it looks. If you wait until the top looks dry, you have waited too long. Start folding while it still shines.
5Slide the roll back and pour the second third
Lift the pan off the heat and tilt it up so you can push the roll to the far end with the chopsticks. Wipe the empty front of the pan with the oiled towel. Return the pan to medium heat, pour in the second third, and lift the roll so the liquid runs underneath it. Pop the bubbles and roll toward you again. The new layer should wrap the first one with no gap at the seam.
Off the heat to workLift the pan off the burner every time you slide or roll. Your hands slow down, the egg stops cooking while you work, and the outside does not scorch.
6Repeat with the last third
Repeat the same moves with the rest of the liquid. Lift the pan off the heat, slide the roll back, oil the front and pour, then run the liquid under the roll, pop the bubbles and roll toward you. Keep the heat at medium, and lift the pan away if the underside browns faster than you can roll. You are done when all the liquid is used, the roll holds its shape when you lift it, and no liquid egg shows at the ends.
7Shape the roll in the bamboo mat
Tip the hot roll onto the bamboo mat. Wrap the mat around it and press gently with both hands to square the sides, then secure it with the rubber band. A warm roll takes the shape of the mat, which gives clean, even slices. Leave it wrapped until the mat feels only warm, and when you unwrap it the roll should keep its straight sides.
8Slice and serve with grated daikon
Unwrap the roll and cut it into bite-size pieces with a sharp knife. A roll that has cooled a little slices more cleanly than a hot one. Check the first cut face, which should be moist but set throughout, with no raw egg running out. Arrange the slices with the grated daikon, and add a drop of soy sauce to the daikon at the table.