Ingredients and steps on one page. Print it, or choose “Save as PDF” in the print dialog.
Sekai Gohan
Yanagawa Nabe: Edo-Style Loach and Burdock Set in Egg
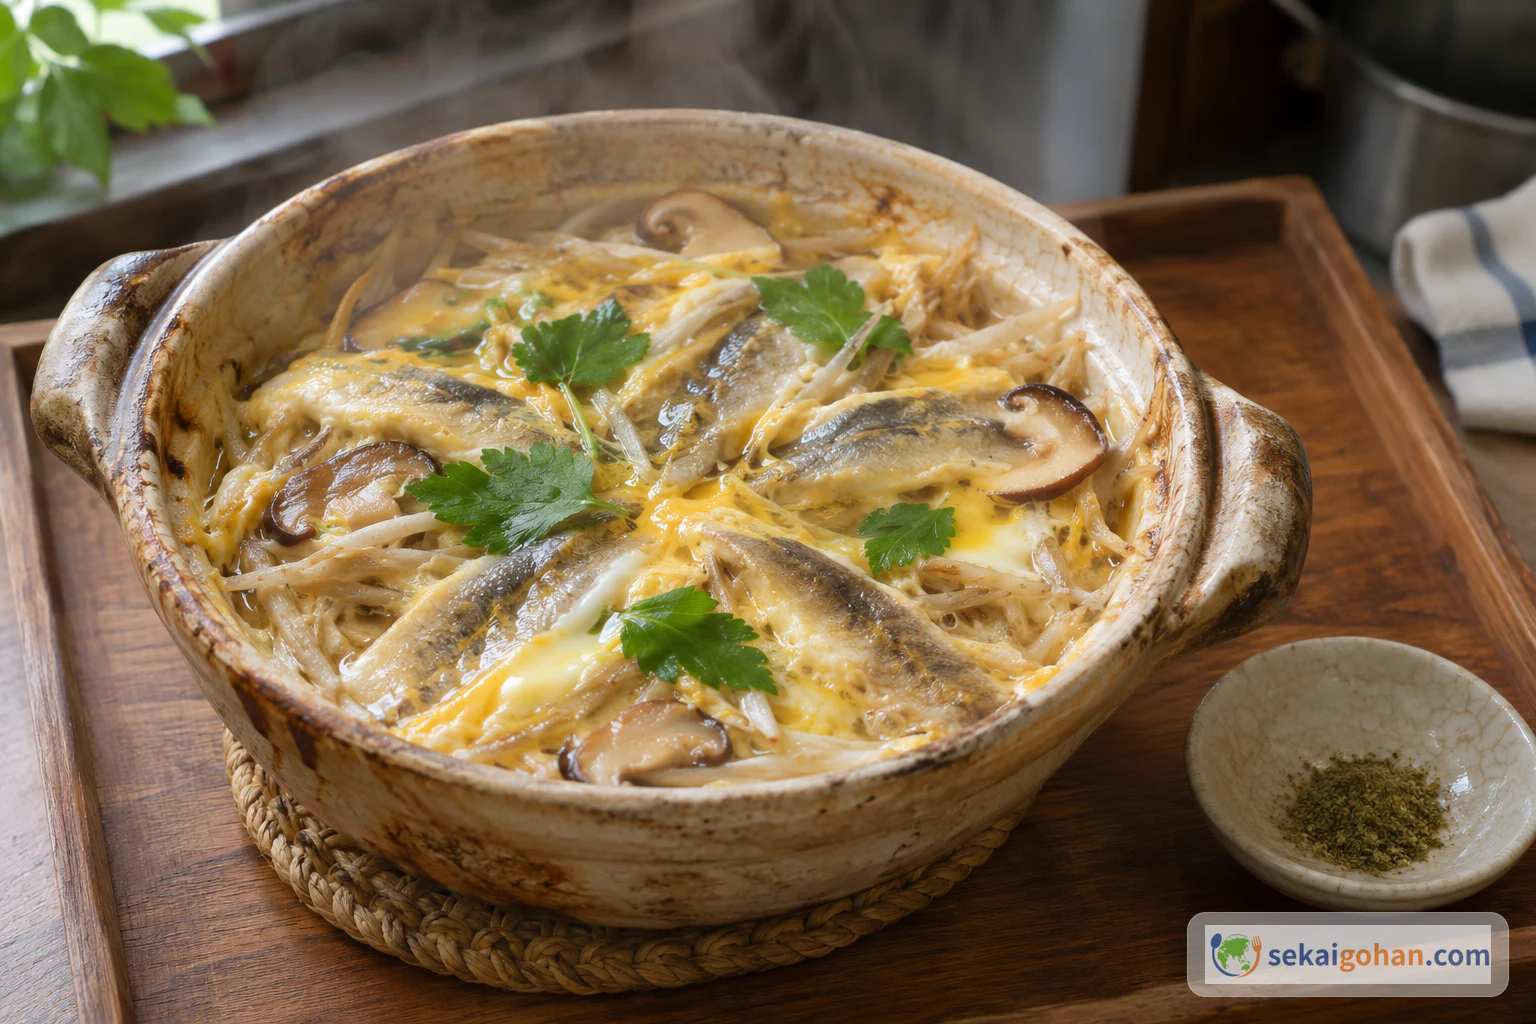
Ingredients
| Ingredient | Amount | Role |
|---|---|---|
| Loach, butterflied (dojō, hiraki) | 20 fillets | The main ingredient. Mild flesh and savory skin |
| Burdock, scrubbed (arai gobō) | 2 roots | Shaved into slivers. Aroma, crunch and the bed of the pot |
| Fresh shiitake mushrooms (nama shiitake) | 1 pack | Sliced thin. Savoriness and a soft chew |
| Mitsuba | 1 bunch | Leaves and stems scattered at the end for fragrance and color |
| Eggs | 4 | Beaten. One for each pot, to bind |
| Ground sansho pepper (kona sanshō) | a little | A citrusy, numbing finish at the table |
| Dashi (dashi-jiru) | 1⅔ cups (400 ml) | The base of the simmering broth |
| Sake | scant ½ cup (100 ml) | Broth |
| Mirin | scant ½ cup (100 ml) | Gentle sweetness and gloss |
| Dark soy sauce (koikuchi shōyu) | scant ½ cup (100 ml) | Salt and deep color |
Steps
1Shave the burdock and soak it
Hold the scrubbed burdock in one hand and shave thin slivers off the end with the knife, turning the root as you go, the way you would sharpen a pencil with a blade. Keep the slivers thin and even so they cook at the same pace and feel soft in the mouth. Drop them straight into a bowl of water as you work, because the cut surface darkens and the soaking draws out harshness. Leave them only briefly, since a long soak washes away the aroma. Lift them out when the cloudiness in the water starts to thin, and drain.
2Slice the shiitake and prepare the mitsuba
Cut the stems off the shiitake and slice the caps thinly. Pluck the mitsuba leaves from the stems, then cut the stems into ⅝-inch (1.5 cm) lengths. Keep the leaves and stems in separate small dishes, since both go on at the very end. You are ready when you have a pile of evenly thin mushroom slices and two little heaps of green.
3Make the broth
Pour the dashi into a saucepan and set it over the heat. Add the sake, mirin and dark soy sauce. Bring it up to one full boil so the seasonings come together into a single broth. When the surface rolls at a boil, take it off the heat and set it aside.
4Scald the loach skin
Lay the loach fillets on a flat board, skin side up, in a single layer so none overlap. Pour boiling water from the kettle over the skin, moving the stream along so every fillet is covered. The heat firms the slime on the skin so it can be scraped away. Stop when the skin turns pale and whitish.
5Chill the loach and scrape off the slime
Move the fillets into the ice water right away so the heat stops and the flesh firms up. Lift them out one at a time onto the board. Draw a table knife lightly along the skin to scrape off the whitened slime. Use only light pressure, because the flesh is delicate and tears if you dig in. The fish is done when it feels cold and firm and the skin looks clean with no white film left.
The scald and the scrape decide the potSlime left on the skin clouds the broth and gives the egg a muddy taste. A quick scald, an immediate plunge into ice water, and a light scrape take it all off while the fish stays whole.
6Cook the loach through in the broth
Return the broth to the heat and bring it to a boil. Slide in the scraped loach and let it cook in the broth. Keep the boil gentle so the fillets hold their shape. Cook until the flesh is opaque all the way through, with no translucent patches in the thickest part. Lift the loach out and keep the broth; it goes into the clay pots next.
7Lay the burdock and shiitake bed
Toss the drained burdock and sliced shiitake together until they are well mixed. Divide the mixture among the individual clay pots. Spread it across the bottom of each pot in an even layer and press it level. This bed keeps the loach off the hot clay so it does not catch. The bed is ready when no bare clay shows through.
8Arrange the loach and add the broth
Lay five loach fillets in each pot in a radial fan over the bed. The fan cooks evenly and makes the pot easy to share out with chopsticks. Pour in the broth slowly. Stop when the broth just reaches the fish, barely covering it.
9Bring it to a boil and pour in the egg
Beat one egg for each pot. Set a pot over the heat and wait for the broth to boil, since egg poured into broth that is not yet boiling turns cloudy and loose. Once it boils, pour the egg in a slow ring around the fish. Within moments the egg sets into soft ribbons at the edges while the middle stays runny.
10Scatter the mitsuba and take it off the heat
Scatter the mitsuba leaves and stems over the egg. Turn off the heat while the egg is still half-set, and glossy. The clay holds heat and keeps cooking the egg after the flame is off, so stop early and leave the pot where it is. If you prefer your egg fully set, keep the heat on until the egg is firm all the way through. Serve with ground sansho alongside.