Ingredients and steps on one page. Print it, or choose “Save as PDF” in the print dialog.
Sekai Gohan
Medovik: Russian Layered Honey Cake with Sour Cream Filling
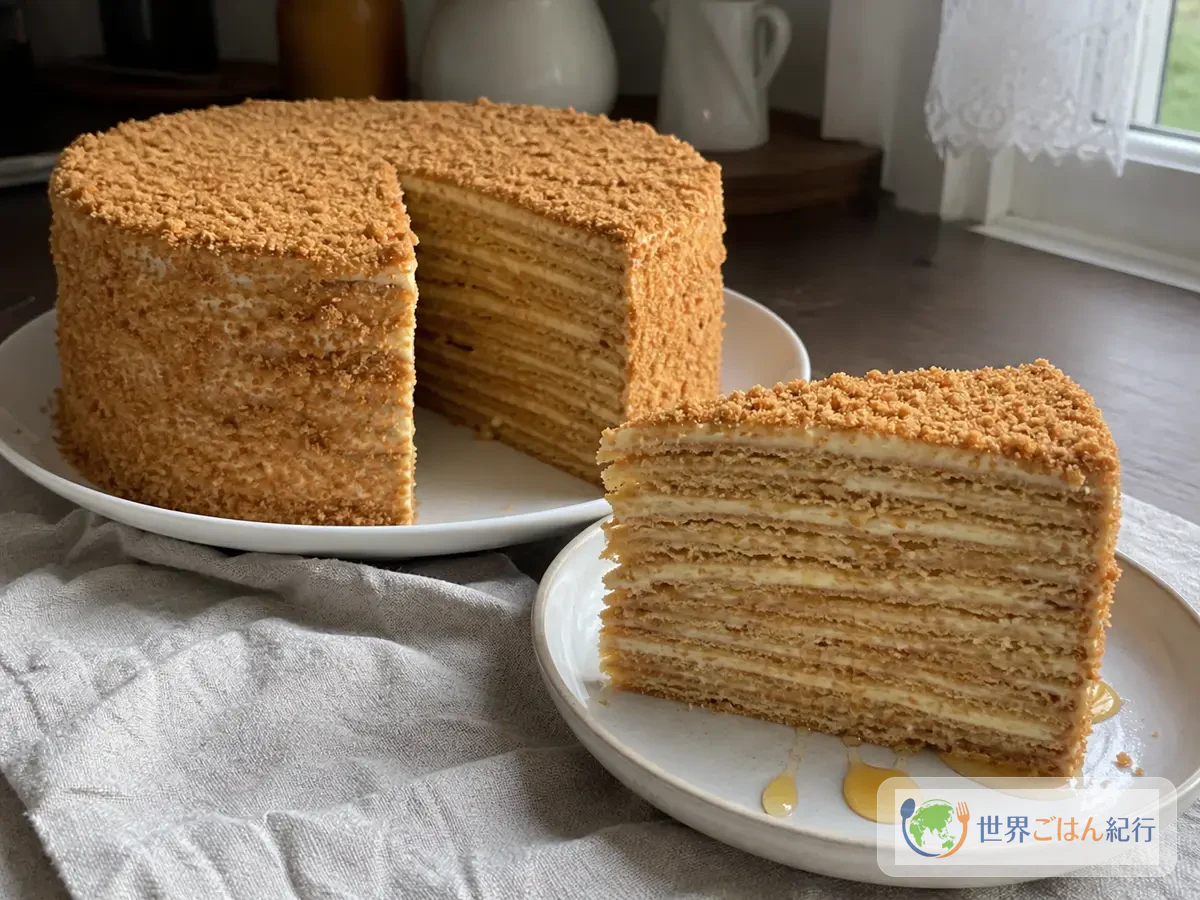
Ingredients
Honey dough
| Ingredient | Amount | Substitutes & notes |
|---|---|---|
| Cake flour | 9 oz (260 g) | Includes about 2 tbsp set aside for dusting. All-purpose flour can be used |
| Honey | 2.5 oz (70 g) | A more aromatic honey gives more flavor. Molasses-type syrups give a different result |
| Granulated sugar | 2.75 oz (80 g) | Superfine sugar also works and makes it slightly moister |
| Unsalted butter | 2 oz (55 g) | If using salted butter, omit the salt |
| Eggs | 2 | Bring to room temperature |
| Baking soda | 1 tsp | Baking powder alone doesn't develop the color and aroma of honey dough |
| Salt | A pinch (1 g) | Keeps the honey's sweetness in check |
Cream
| Ingredient | Amount | Substitutes & notes |
|---|---|---|
| Sour cream | 10.5 oz (300 g) | Stands in for smetana. Or mix with 5.5 oz (150 g) strained yogurt |
| Heavy cream | ¾ cup (200 ml) | About 35% milk fat. Don't overwhip |
| Powdered sugar | 2 oz (55 g) | Granulated sugar tends to stay gritty |
| Lemon juice | 2 tsp | Add if your sour cream isn't very tangy |
| Vanilla extract | 3 drops | Too much comes forward before the honey |
Finishing
| Ingredient | Amount | Role |
|---|---|---|
| Baked dough trimmings and leftovers | All | Grind into fine crumbs in a food processor or a bag |
| Honey | 1 tsp | A little on the plate just before eating, if you like |
| Black tea | 2 cups | Cuts the sweetness. Strong tea suits it |
Steps
1Melt the honey and butter over a double boiler
10 min
Bring about 3 cm of water to a boil in a small saucepan, then turn the heat down so small bubbles rise gently. Put 70 g honey, 80 g sugar, 55 g unsalted butter and 1 g salt in a heatproof bowl and set it over the pan without touching the water. Whisk until the butter melts, stopping while a little graininess from the sugar remains. Aim for about 60°C (140°F). Boiling hard drives off the honey's aroma and makes the eggs more likely to set when you add them.
2Add the eggs and baking soda and bring the dough together
12 min
Turn off the heat and lift the bowl off the double boiler. Beat the 2 eggs well in a separate container and mix them into the honey mixture in 3 additions. Adding them all at once can make the eggs set, so mix for about 30 seconds after each addition. When you add 1 tsp baking soda, fine bubbles appear on the surface and the color lightens a little. Add 8.5 oz (240 g) cake flour in 3 additions, folding with a spatula. The dough should be soft while hot, with no white streaks of flour, and thick enough to fall from the spatula in a heavy ribbon. Stop when there is no dry flour left at the bottom of the bowl and the surface is smooth and glossy. Too much flour makes the baked layers hard, so keep the remaining 20 g for dusting.
3Divide the dough and roll it thin
25 min
This step uses no heat. Turn the dough out onto a floured surface and divide it into 8 equal pieces. Shape each into a ball and roll it out on parchment paper to about 5.5 inches (14 cm) across and about 0.125 inch (1–2 mm) thick. Lightly press a 4.5 inches (12 cm) ring or a plate onto it to leave a margin for trimming after baking. If the dough is sticky, use a thin dusting of flour, but too much flour makes the baked layers look pale. Cover the remaining dough with plastic wrap so it doesn't dry out.
4Bake briefly at 350°F (180°C) and trim into rounds
24 min
Preheat the oven to 180°C (350°F). Transfer each rolled layer on its parchment to a baking sheet and bake for 5–6 minutes per layer. It is ready when the edges are golden brown and the center feels dry to the touch. It burns easily, so watch the color through the oven window after 3 minutes. While hot, press a 12 cm ring or plate onto it and trim it into a circle with a knife. Don't throw away the trimmings; use them for the crumbs at the end. The layers crack easily once cool, so trim within 1 minute of taking them out of the oven.
5Lightly whip the sour cream filling
10 min
This step uses no heat. Put ¾ cup (200 ml) cold heavy cream in a bowl and whip to soft peaks that barely hold (about 60% whipped). In another bowl, mix 10.5 oz (300 g) sour cream, 2 oz (55 g) powdered sugar, 2 tsp lemon juice and 3 drops vanilla. Add the whipped cream in 2 additions, folding up from the bottom with a spatula. Don't make the cream stiff enough to hold peaks; it should fall slowly from a spoon. Too stiff and it won't soak into the layers; too soft and it runs out sideways.
6Spread cream on the thin layers and stack
18 min
This step uses no heat. Place one baked layer on a plate or cake board and spread a little over 2 tbsp of cream, about 1.5 oz (45 g). Spread it thinly right to the edge, add the second layer and press gently with your palm. Pressing hard squeezes the cream out, so just level the surface from above. Stack 7–8 layers the same way and spread a thin coat of cream on the sides too. If a layer cracks along the way, use it in the middle and it won't matter. Spread a little extra cream on a cracked layer to fill the gaps.
7Crush the trimmings and coat the cake
12 min
This step uses no heat. Grind the trimmed edges and one misshapen layer finely in a food processor. You can also put them in a bag and crush them with a rolling pin. Aim for mostly sand-fine crumbs with a few pieces of about 0.125 inch (2 mm), dry enough to fall away loosely when pinched. Sprinkle the crumbs over the top and sides of the cake and press gently with your hands. It's enough when they stick thinly to the cream and no white shows. A thick coating on the sides makes the texture floury, so use just enough to hide the white cream.
8Rest overnight in the refrigerator, then slice
8 hours or more
Cover the finished cake with a lidded container or a large bowl and let it rest in the refrigerator for 8 hours or more. This step uses no heat. When it's done resting, the layer lines are visible, the knife doesn't catch, and the cut layers look moist. Take it out of the fridge 15 minutes before eating and cut the 4.5 inches (12 cm) cake into 8 thin wedges about 1 inch (3 cm) wide at the outer edge. Shape each slice so the layer lines show rather than for thickness, and wipe the knife after each cut so the cross-section isn't squashed. Left in a warm place for long, the cream softens, so refrigerate the rest right after slicing.