Ingredients and steps on one page. Print it, or choose “Save as PDF” in the print dialog.
Sekai Gohan
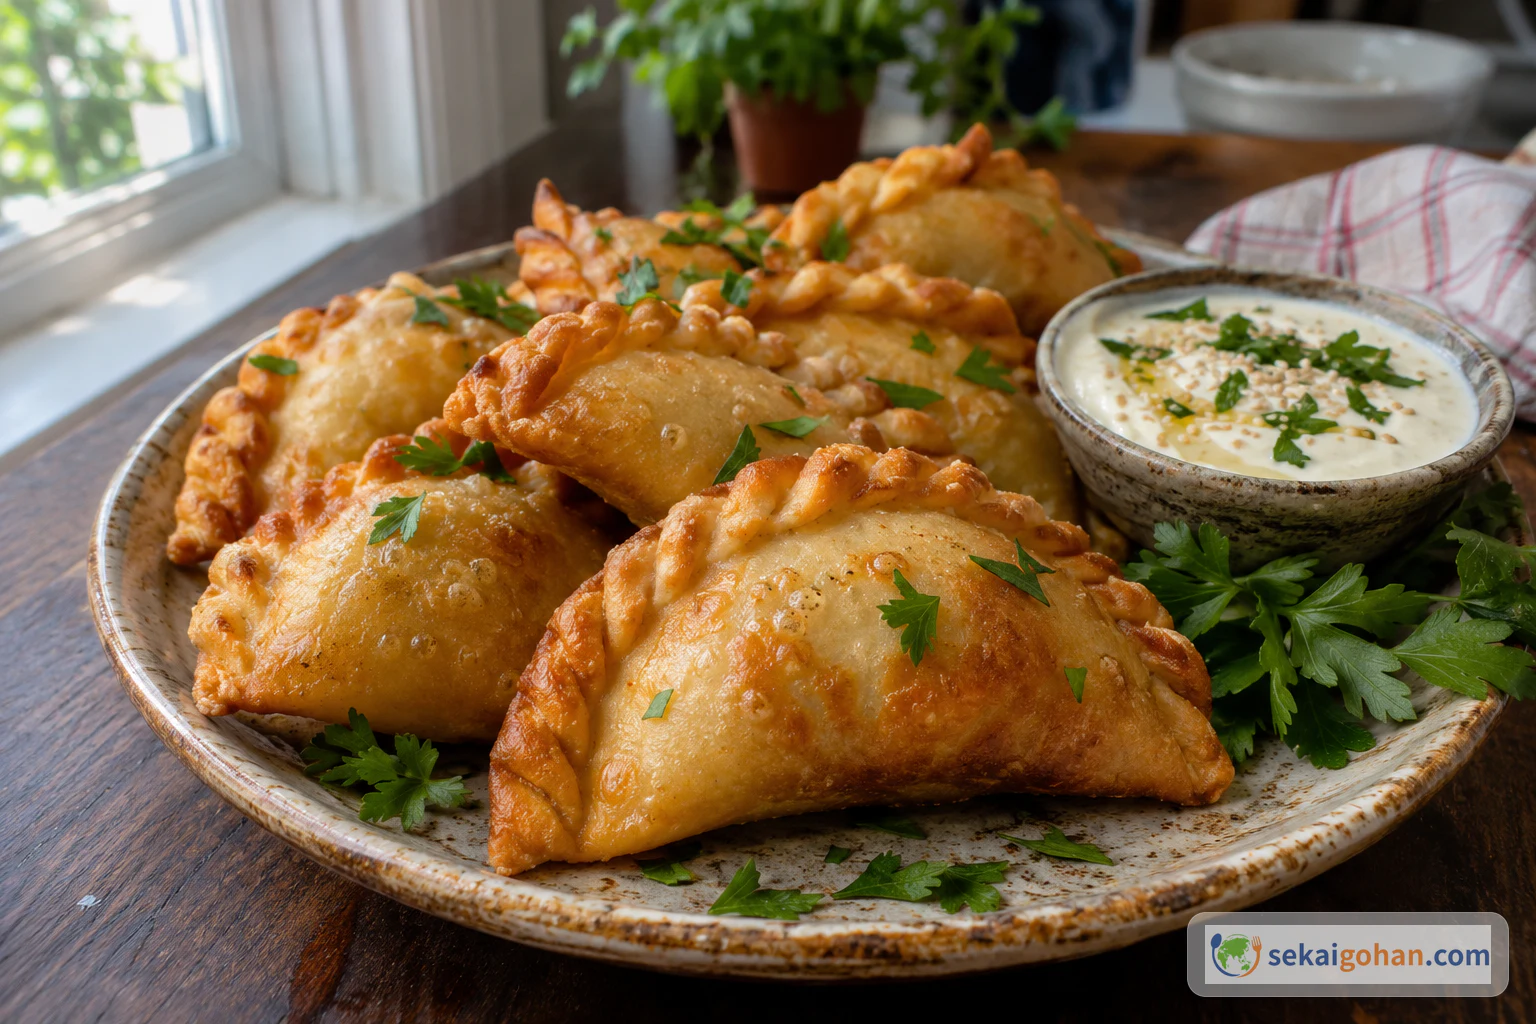
Sambousek: Lebanese Fried Half-Moon Beef and Pine Nut Pastries
Ingredients
| Ingredient | Amount | Role |
|---|---|---|
| All-purpose flour | 1½ cups | Body of the dough |
| Salt, for the dough | ½ tsp | Seasons and tightens the dough |
| Olive oil, for the dough | 3 tbsp | Rubbed into the flour for a flaky, crisp shell |
| Water | ½ cup (120 ml), most of it at first | Brings the dough together |
| Olive oil, for the filling | 2 tbsp | Toasts the pine nuts, then cooks the onion and meat |
| Pine nuts | 2 tbsp | Nutty aroma and a soft crunch in each bite |
| Onion | 1 large, finely chopped | Sweetness in the filling |
| Ground beef | 9 oz (250 g) | The main filling |
| Ground cinnamon | ¼ tsp | Warm, sweet spice |
| Ground allspice | ¼ tsp | Depth behind the cinnamon |
| Pomegranate molasses (dibs rumman), optional | 1 tsp | A faint sweet-sour note and gloss |
| Black pepper, freshly ground | 1 tsp, or to taste | Gentle heat |
| Salt, for the filling | To taste | Seasoning |
| Parsley, chopped, optional | A little | Color and freshness |
| Oil for frying | Enough to reach at least 2 inches (5 cm) deep in the pan | Frying |
Steps
1Toast the pine nuts
Heat the 2 tbsp of filling olive oil in the skillet and add the pine nuts. Stir them constantly, because they go from pale to brown in moments. When they are evenly golden and smell nutty, lift them out with a slotted spoon into a small bowl. Leave the oil in the pan for the onion.
2Cook the filling until dry, then cool it
In the same pan, fry the onion until it takes on color, then add the beef and break it up as it browns. Keep frying until every bit is browned and the pan is dry, with no liquid left. Stir in the pomegranate molasses, cinnamon, allspice, salt and pepper for a few seconds until they smell fragrant, then turn off the heat and mix in the pine nuts and parsley. Spread the filling on a tray and let it cool completely; the meat should feel crumbly and dry to the touch.
Cook the meat throughGround meat must reach 167°F (75°C) in the center. Check with a food thermometer before you add the spices. Wash your hands, board and tools after handling raw meat, and keep the raw meat away from the cooked filling.
3Rub the oil into the flour
Mix the flour and the dough salt in a large bowl. Drizzle the 3 tbsp of olive oil over the whole surface and rub it into the flour between your palms, working through every bit. Keep going until the mixture looks like coarse, damp sand. Squeeze a handful in your fist: it should clump together, then crumble as soon as you open your hand.
The rubbing makes the crustCoating every grain of flour with oil is what gives the fried shell its flaky, crisp break. Rushed rubbing leaves a crust that is tough instead of crisp, so take the time here.
4Knead and rest the dough
Add most of the water and gather the dough with a rubber spatula, holding the rest back and adding it only if dry patches remain. Knead by hand for 8 to 10 minutes. The dough is ready when it no longer feels sticky and stretches thin without tearing. Shape it into a smooth ball, cover it and let it rest for 1 hour without skipping it.
5Roll and cut the rounds
Dust the counter lightly and roll the dough from the center outward to an even sheet at least ¼ inch (6 mm) thick. Use as little flour as you can, because extra flour dries the dough and leads to tears in the oil. Cut rounds with the 3-inch (8 cm) cutter, starting at the edge to fit in as many as possible. Gather the scraps, roll them again and keep all dough covered while you work; the rounds should lift cleanly and keep their shape.
6Fill and fold
Place 1 to 2 tsp of filling on one half of each round, leaving a wide, clean border. Wipe away any crumbs of meat that land on the edge, since a single crumb in the seam is enough to make it open in the oil. Fold the other half over into a half-moon. Press gently from the filling outward to push out the air; the top should lie snug over the meat with no puffed pocket.
7Seal and set them on a tray
Press the edges together firmly with a fork or your fingers to crimp and seal them. Lay the pastries in rows on a tray lined with cling film. Freezing the tray for 10 minutes firms them and makes them easier to handle in the oil. For a make-ahead batch, freeze them solid on the tray and move them to a freezer bag; the sealed edge should feel firm and flat, with no gaps.
8Fry in small batches
Heat oil at least 2 inches (5 cm) deep in a deep pan over medium-high heat. Drop in a scrap of dough: it should sizzle at once. A thermometer reading of about 340°F (170°C) is a good guide. Fry 3 to 5 pastries at a time, spooning hot oil over their exposed tops for the first 45 seconds. Then fry for 4 to 6 minutes, turning them about once a minute, until both sides are evenly deep gold.
Hot oilUse a deep pan so the oil sits well below the rim, and lower the pastries in with a slotted spoon. Stay at the stove the whole time and keep children away from the pan.
Small batches keep the oil hotCrowding the pan drops the oil temperature, and cool oil leads to pale, greasy pastries that split open. Wait for the oil to sizzle a scrap again before each new batch.
9Drain on a rack and serve warm
Lift the pastries out with the slotted spoon onto a wire rack or mesh colander. Paper towels underneath trap steam and soften the crust, while a rack lets the oil drip away. Serve them warm. Break one open: the shell should shatter crisply around a dry, steaming filling.