Ingredients and steps on one page. Print it, or choose “Save as PDF” in the print dialog.
Sekai Gohan
Thalipeeth: Maharashtrian Roasted Grain and Lentil Flatbread
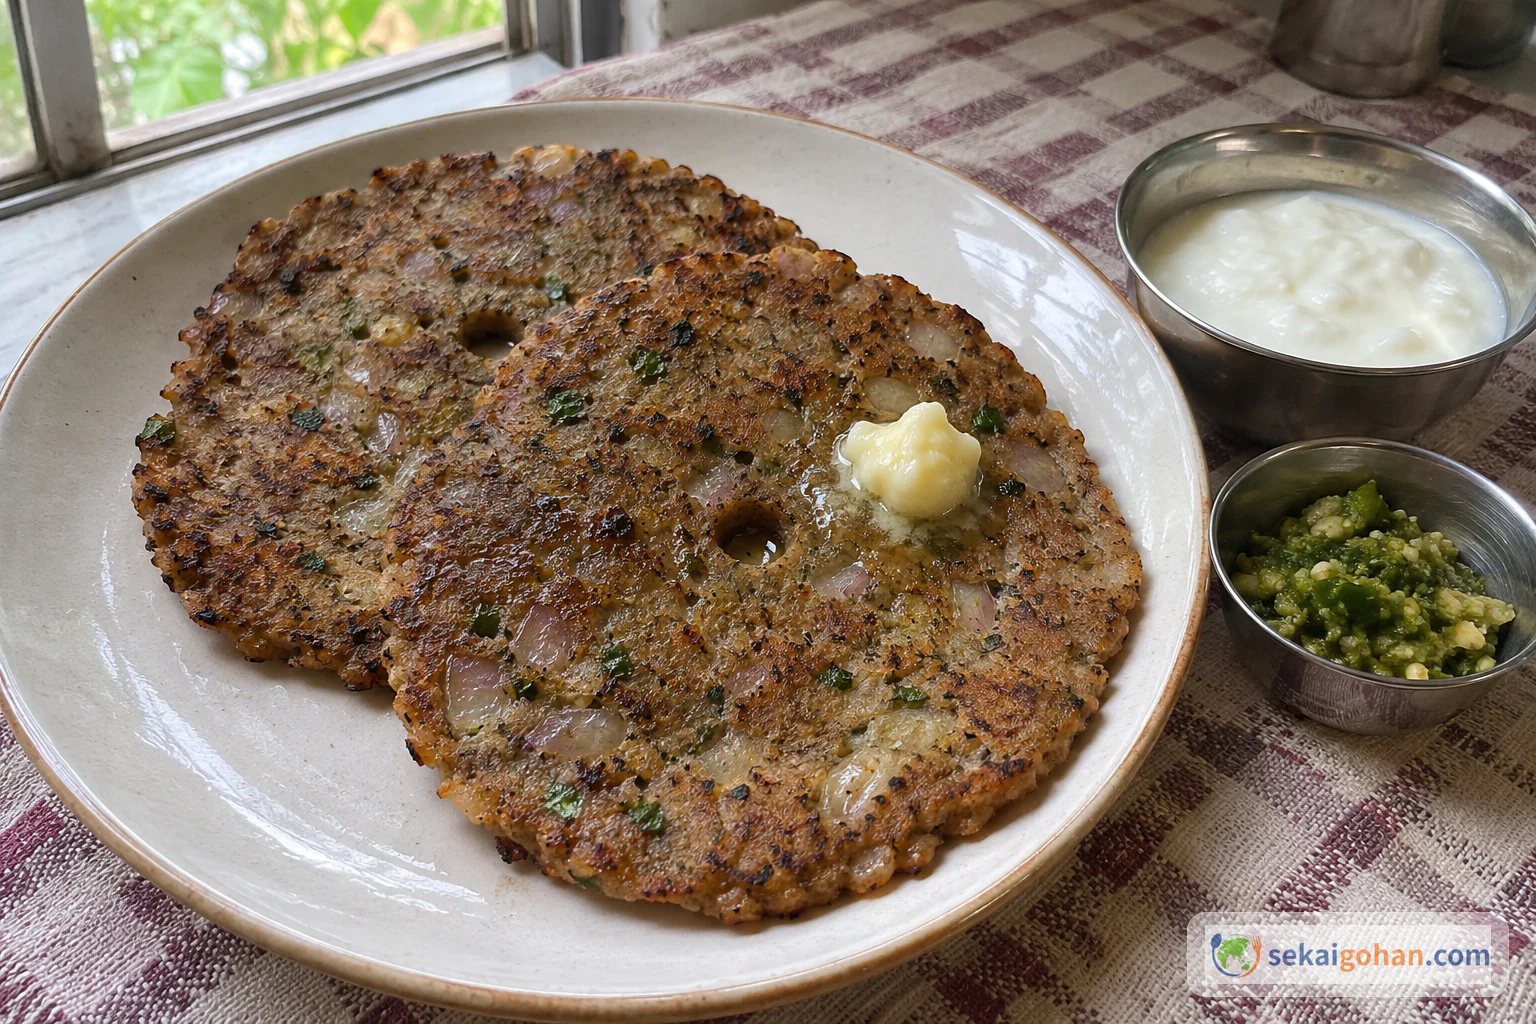
Ingredients
Thalipeeth dough
| Ingredient | Amount | Role |
|---|---|---|
| Thalipeeth bhajani (roasted multigrain flour) | 1 cup | The body and the toasted flavour |
| Onion, medium | 1 (½ cup finely chopped) | Sweetness, moisture and browning |
| Green chillies | 2–3, finely chopped | The heat |
| Fresh coriander leaves | as needed, chopped | Fresh green aroma |
| Salt | ½ tsp | Seasoning. The homemade bhajani below contains no salt |
| Water | ⅓ cup (80 ml) | Brings the dough together. Add it gradually |
| Peanut oil | as needed | For cooking only, poured around the edge and into the hole |
Homemade bhajani, small batch
| Ingredient | Amount | Role |
|---|---|---|
| Pearl millet (bajra) | 3½ oz (100 g); full batch 2.2 lb (1 kg) | The main grain |
| Rice | 1¾ oz (50 g); full batch 1.1 lb (500 g) | Lightness and crisp edges |
| Chana dal | 1¾ oz (50 g); full batch 1.1 lb (500 g) | Nutty pulse flavour and body |
| Sorghum (jowar) | 1¾ oz (50 g); full batch 1.1 lb (500 g) | Mild grain sweetness |
| Skinned mung dal | scant 1 oz (25 g); full batch 9 oz (250 g) | Pulse flavour |
| Skinned urad dal | 1 oz (30 g); full batch 10½ oz (300 g) | Binding and body |
| Coriander seeds | scant 1 oz (25 g); full batch 9 oz (250 g) | The perfume of the flour |
Steps
1Wash and dry the grains (homemade bhajani)
Rinse the bajra, rice, chana dal, jowar, mung dal and urad dal. Leave the coriander seeds dry. Drain everything in a sieve and spread it out on a cotton cloth for a few hours. Damp grain steams instead of roasting, so do not rush this. Move on when the grains run loose and dry through your fingers.
2Roast each one separately
Roast the grains one kind at a time in a kadahi, lightly, stirring all the time. The bajra and jowar are done when they start to pop. The rice and dals are done when they turn faintly pink. The coriander seeds are done as soon as they smell fragrant. Tip each batch onto the cloth as it finishes, and take it off the heat before it turns dark brown, because burnt grain makes bitter bhajani.
3Cool completely, then grind
Let the roasted grains cool all the way. Ground warm, they release moisture and the flour clumps. Grind everything together into a fine flour. A flour mill does this best. Pack the flour into an airtight jar. It is ready when it feels cool and dry and looks evenly speckled grey-tan.
4Chop the onion, chillies and coriander
Finely chop the onion until you have ½ cup. Chop the green chillies very finely, and chop the coriander leaves. Keep the pieces small, because big chunks of onion poke through the thin disc and make it split. Wash your hands as soon as the chillies are done. You are ready when the board holds three small, even piles.
5Mix the flour and aromatics dry
Put the bhajani and salt in a wide bowl. Add the onion, chillies and coriander. Toss and rub everything together with your fingertips before adding any water, so the salt and green flecks spread through all the flour instead of clumping where the water lands. Stop when the mix looks loose and dry, with flecks in every pinch.
6Add water a little at a time
Pour in part of the ⅓ cup water and press the mix together with your hand. Keep adding small splashes until it forms a soft, pliable dough. If it turns sticky, work in a spoonful more bhajani. If it still falls apart, add a few more drops of water. If the flour is old and the dough keeps cracking, knead with lukewarm water. It is right when it holds in one ball and the edge cracks only slightly when you press it.
7Divide into four balls
Cut the dough into four equal pieces. Roll each one between your palms into a plump ball. Set the tava on the heat now so it warms while you shape. You should have four balls of the same size with no deep cracks.
8Pat out on parchment
Lay a sheet of parchment on the counter and put one ball in the middle. Press it outward with your palm, turning the sheet as you go, until it is a scant ¼ inch (5 mm) thick and 4 to 6 inches (10 to 15 cm) across. It does not need to be a perfect circle. Leave the rolling pin in the drawer, because the gluten-free dough tears under it. The disc is ready when it has the same thickness from centre to edge and the ragged edge has not cracked through.
9Make one hole in the centre
Push one finger straight down through the middle of the disc. Wiggle it a little to open the hole, then lift it out. The hole lets the oil reach the centre and lets heat get through the thickest part. Check that you have one clean hole down to the parchment and that the rest of the disc is still whole.
10Flip it onto the hot tava
Lift the parchment with the disc on it and turn it over onto the preheated cast-iron tava, dough side down. Peel the sheet back slowly from one edge. Keep the parchment, since you will use it for the next three. The disc should lie flat and whole on the iron.
11Oil the edge and hole, cover and cook
Drizzle peanut oil all around the edge and into the hole. Cover with the lid. Cook until the underside is golden brown and a little crisp. Listen for the sizzle to die down, then check that the top has dried and darkened before you flip.
12Turn and cook the second side
Slide a thin spatula underneath and turn the thalipeeth over. Drizzle a little more oil around the edge. Cook until this side is golden and crisp too. If your disc came out thicker, cover again and lower the heat a little so the centre finishes. It is done when both faces are browned and the rim of the hole looks dry and cooked.
13Cook the rest, keeping the tava in check
Stack each finished thalipeeth on a plate so they stay moist. Before the next disc, lift the tava off the heat for a moment or sprinkle a few drops of water on it. Press, make the hole and flip the next ball on the same parchment. The temperature is right when the next disc sizzles gently on contact, does not stick, and browns at the same pace as the first.