Ingredients and steps on one page. Print it, or choose “Save as PDF” in the print dialog.
Sekai Gohan
Aasmi: Sri Lanka's Lacy Fried Rice-Flour Sweet
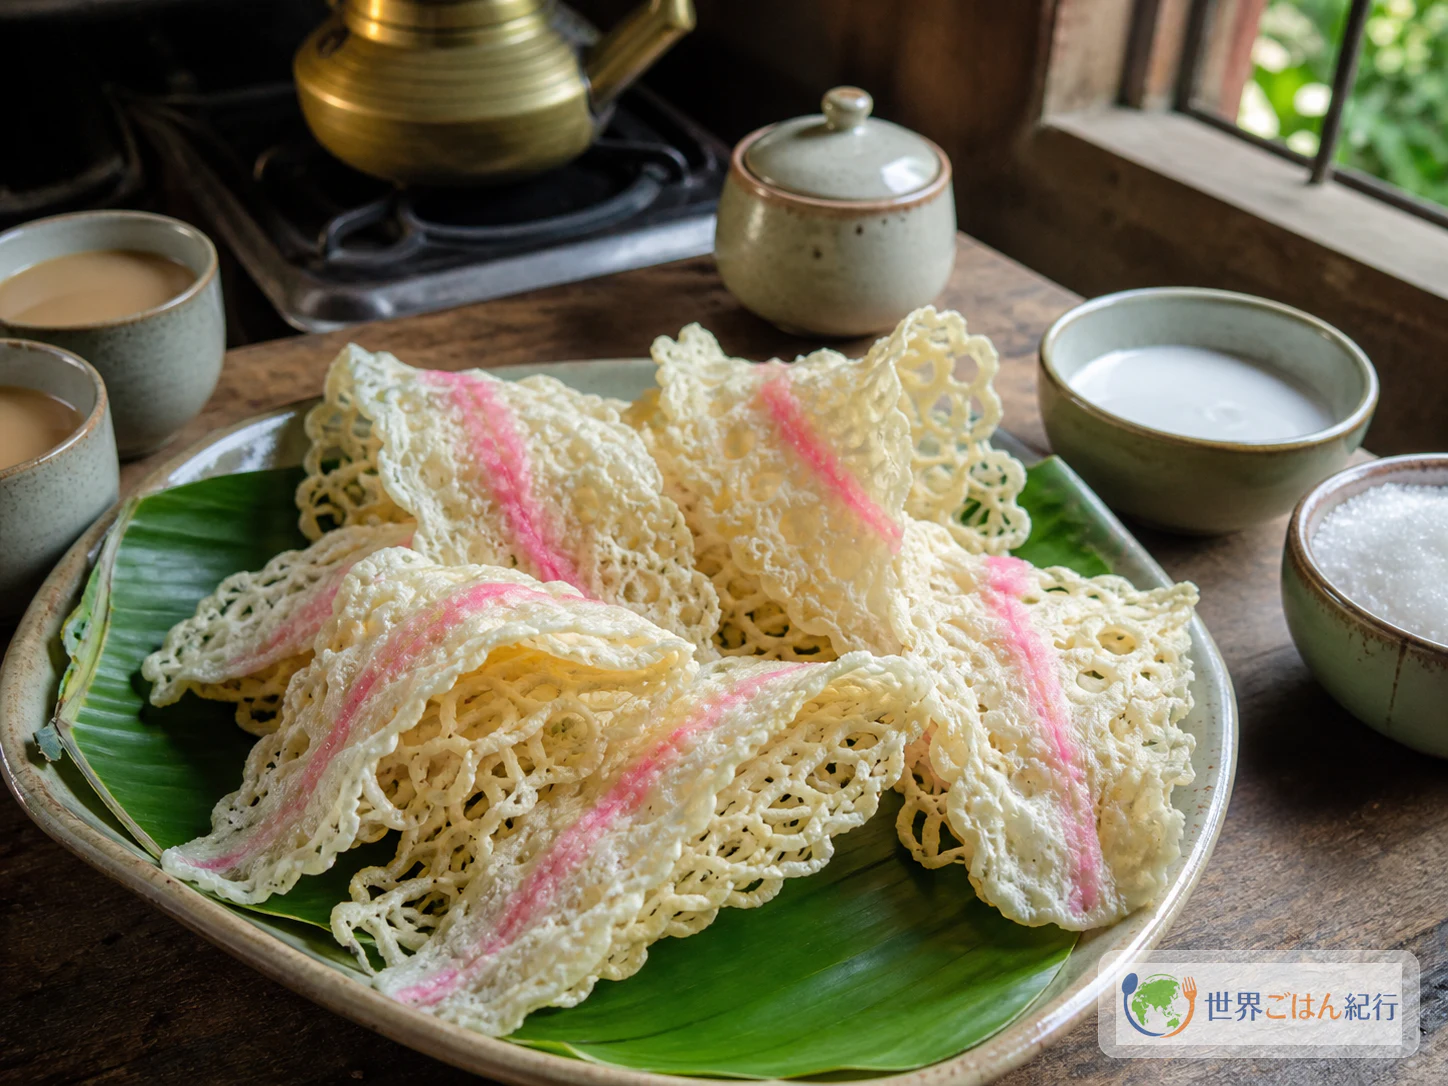
Ingredients
Batter
| Ingredient | Amount | Substitutes & notes |
|---|---|---|
| Rice flour for baking | 8 oz (220 g) | If using regular (non-glutinous) rice flour, sift it. Coarse rice flour tends to clog the holes |
| Coconut milk | 1 cup (220 ml) | Shake the can well. If the fat has separated, stir it in without heating |
| Water | About ¼ cup (80 ml) | Adjust to the thickness of the okra mucilage |
| Okra | 4 oz (120 g) | For the mucilage. Frozen is fine |
| Salt | 2 g | A little under 1/3 tsp |
| Neutral oil | As needed | For frying. At least 1.5 inches (4 cm) deep |
Finishing syrup
| Ingredient | Amount | Substitutes & notes |
|---|---|---|
| Granulated sugar | 2.75 oz (80 g) | Regular white sugar also works |
| Water | 2.5 tbsp (35 ml) | Don't reduce too far |
| Red food coloring | A very small amount | About what sticks to the tip of a toothpick. Don't overdo it |
| Lemon juice | 1/4 tsp | Makes it less likely to recrystallize. Too much brings sourness |
Steps
1Bring the rice flour together with coconut
8 min
Put 8 oz (220 g) rice flour for baking, 2 g salt and ¾ cup (180 ml) of the coconut milk in a bowl and mix with a wooden spoon until no dry flour remains. No heat is used. Stop at a white dough that is quite stiff to start with, a little firmer than an earlobe. Keep the remaining 2.5 tbsp (40 ml) of coconut milk to adjust the thickness after adding the okra mucilage. Any lump of flour 0.125 inch (2 mm) or larger will break in the oil, so crush them with your fingers until the surface is smooth with no flour grains visible.
2Extract the okra's stickiness
10 min
Slice 4 oz (120 g) okra thin, combine it with ¼ cup (80 ml) water, and rub it by hand for 2 minutes. No heat is used. When the stickiness comes out, squeeze it through a clean cloth or tea strainer to get a nearly clear mucilage. Green bits in the batter leave spots when fried and a green aroma, so use only the liquid. If the mucilage is weak, let it rest 5 minutes and rub again.
3Make the batter a thin ribbon
7 min
Add the okra mucilage to the rice-flour dough a little at a time, mixing from the bottom with a rubber spatula. No heat is used. Add the reserved coconut milk 1 tbsp at a time until the batter falls from a spoon in a thin line about 0.125 inch (2 mm) wide that holds its shape for about 1 second. The goal is a smooth consistency with no visible flour grains that flows slowly when you lift the spatula. If it falls thick and gloppy, add water 2 tsp at a time; if the line breaks right away, add rice flour 2 tsp at a time. When it's mixed, rest it for 5 minutes so the flour absorbs the liquid.
4Heat the oil to 325°F (165°C)
6 min
Pour at least 4 cm of oil into a deep skillet or wok and heat to 165°C (330°F) over medium heat. With a thermometer, hold it at 165–170°C. Dip your fingertips in the batter and, about 15 cm above the oil surface, move your hand in small motions to make a net about 14 cm across. Don't bring your hand too close to the oil surface. If that frightens you, use a fine-tipped piping bag or a dressing bottle. Thick lines make it heavy, so think of the first piece as practice.
5Fold it while it is still white
4 min
When the surface of the net has set white and the lines no longer break when you lift an edge, fold it in half with 2 chopsticks or bamboo skewers. Keep the heat at medium-low and the oil at 325–350°F (165–170°C). After folding, fry another 40–60 seconds and take it out when the surface is white and some of the translucency has gone. If you let it turn brown here, it hardens after the second fry, so stop while the color is still pale.
6Rest on a rack
30 min
Set the once-fried aasmi on a rack and rest at room temperature for 30 minutes. No heat is used. Even if you are in a hurry, leave it at least 10 minutes. The finish to look for is oil drained from the surface, no translucent dampness left on the white net, and a slight limpness when you bend it. Some traditional methods rest the pieces for several days. At home, a long wait brings humidity and oily smells, so do the second fry the same day.
7Lighten it with the second fry
8 min
Raise the oil to 170–175°C (340–350°F) over medium heat and return the once-fried aasmi one at a time. Fry 45 seconds to 1 minute, and take it out right away when the edges of the holes have dried, it feels light when lifted with chopsticks, and the surface is crisp. If the color begins to turn yellow, the heat is too high. Conversely, if there are few bubbles and it sinks as if absorbing oil, the temperature is low, so wait 30 seconds before the next piece for the oil to recover. Set them on a rack and cool completely.
8Draw the pink syrup in thin lines
9 min
Put 80 g granulated sugar, 35 ml water and 1/4 tsp lemon juice in a small saucepan and warm over medium-low heat. When it boils, lower to low and cook 2–3 minutes until it falls from a spoon in a thin thread. With a thermometer, 104–106°C (219–223°F) is the guide. Turn off the heat, stir in a very small amount of food coloring, and draw it in thin lines over the cooled aasmi. If the syrup stiffens, add 1 tsp hot water and return it to low heat; if it is too runny, cook it 30 seconds more.