Ingredients and steps on one page. Print it, or choose “Save as PDF” in the print dialog.
Sekai Gohan
Bánh Da Lợn: Southern Vietnamese Steamed Layer Cake
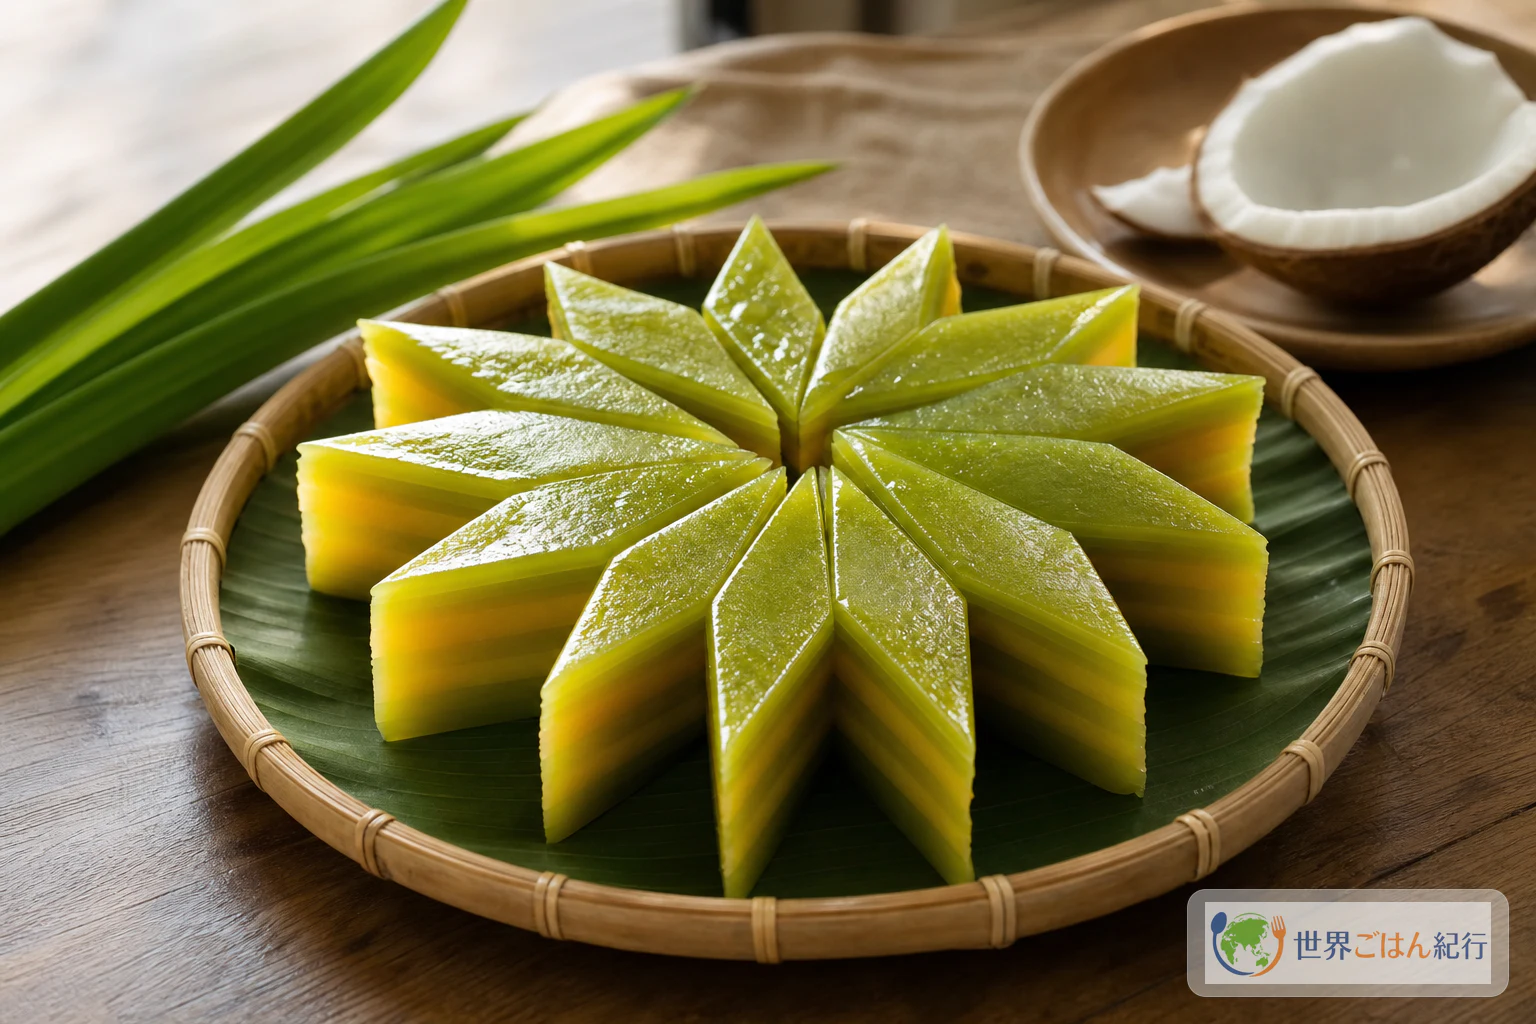
Ingredients
8 servings, one 7-inch (18 cm) square pan
| Ingredient | Amount | Role & substitutes |
|---|---|---|
| Dried split, skinned mung beans | 3.5 oz (100 g) | The yellow layer. Adzuki beans or roasted soybean flour won't give the same texture |
| Tapioca starch | 7 oz (200 g) | Translucency and spring. Up to 1.75 oz (50 g) can be replaced with potato starch |
| Rice flour | 1.75 oz (50 g) | The batter's structure. Wheat flour changes both aroma and texture |
| Coconut milk | 1¾ cups (400 ml) | Sweet aroma and rounded richness. Use unsweetened cooking coconut milk |
| Water | 1¼ cups (300 ml) | Split into ¾ cup (180 ml) for the coconut liquid and ½ cup (120 ml) for the pandan water |
| Sugar | 8 oz (220 g) | The backbone of the southern-style sweetness. You can cut it to 6.5 oz (180 g) the first time |
| Salt | 1/2 tsp | Sharpens the edge of the sweetness |
| Pandan leaves | About 1.75 oz (50 g) | Green color and a vanilla-like aroma. If using extract, 1 tsp |
| Neutral oil | 1 tsp | For the pan and the knife |
Steps
1Soak the mung beans and steam until they crush between your fingers
2 hr 20 min
Rinse 3.5 oz (100 g) dried split, skinned mung beans and soak them in plenty of water for 2 hours. Drain in a colander, spread them in a steamer basket and steam over high heat for 20 minutes.
They're done when you can pinch a bean and it's soft all the way through, crushing easily between your fingers. If they go into the blender with a hard center, fine grains will remain in the yellow layer. If you put the steamed beans in the blender without draining them, the mung bean flavor gets diluted and the boundaries between layers turn hazy.
2Make the coconut liquid and the pandan water separately
15 min
In a small saucepan, combine 1¾ cups (400 ml) coconut milk, ¾ cup (180 ml) water, 8 oz (220 g) sugar and 1/2 tsp salt and warm over low heat. Once the sugar dissolves it's enough; there's no need to boil it. Take it off the heat and let it cool until you can comfortably touch it.
Roughly chop 1.75 oz (50 g) pandan leaves and blend with ½ cup (120 ml) water for about 40 seconds. Strain out the fine fibers and measure ½ cup (120 ml) of the fragrant green liquid. If you can't get fresh leaves, use 1 tsp unsweetened pandan extract and still add the ½ cup (120 ml) water.
3Strain the batter and divide it into green and yellow
15 min
Put 7 oz (200 g) tapioca starch and 1.75 oz (50 g) rice flour in a bowl and gradually add the cooled coconut liquid. Whisk out any lumps, then pass it through a strainer until smooth.
Measure 1¼ cups (300 ml) of the batter, put it in the blender with the soft mung beans, and blend until evenly yellow. Add the pandan water to the remaining coconut batter to make the green batter. The yellow batter will be slightly heavier than the green, but as long as it falls from a spoon in a ribbon, you can keep the amount per layer consistent.
Strain each batter again and let both rest for 10 minutes. Bubbles left on the surface turn into holes inside the layers when steamed. When the batter falls from a spoon in a thin ribbon and the trail disappears in about 2 seconds, it's at a thickness that makes even pouring easy.
4Heat the pan and the steam first
10 min
Lightly oil a heatproof pan about 7 inches (18 cm) square and 2 inches (5 cm) deep. Put 1.5 quarts (1.5 L) water in a steamer or deep pot, cover and set over high heat. Wrapping a clean kitchen towel around the inside of the lid keeps condensation from dripping onto the batter.
Once steam rises steadily, set the empty pan in the steamer, cover and heat it for 5 minutes. Pour batter into a cold pan and the bottom sets heavy before the rest, so the first layer won't be even. Drop a bead of water onto the bottom of the pan; if it sizzles softly and skitters right away, you're ready.
5Stack the two batters into 8 layers
50–60 min
Stir each batter from the bottom and check that no starch has settled, it's smooth, and it falls from a spoon in an unbroken ribbon. Pour in ½ cup (100 ml) green batter first and steam over strong steam for 5 minutes. When the liquid on the surface is gone and, as you gently jiggle the pan, only the center moves slowly, you can pour the next layer.
Pour ½ cup (100 ml) yellow batter gently from low down, close to the edge of the pan, and steam for 6 minutes. Alternate green and yellow to make 8 layers in total. Aim for 4 layers of each color, 3¼ cups (800 ml) in all. The batter comes to about 1 quart (1 L) altogether, so steam any leftover the same way in a small heatproof dish and nothing goes to waste. In a 7-inch (18 cm) square pan each layer is about 0.125 inch (3 mm) thick, and 8 layers fill the pan about halfway.
From the second layer on, the trick is to pour the next one before the surface dries out too much. The moment to pour is when a bamboo skewer comes out with no liquid on it and a thin sheen remains on the surface. Pour too early and the colors mix; wait too long and the layers separate. The starch sinks, so stir each batter once from the bottom just before pouring.
After the last layer, cover and steam for 12 minutes. Insert a bamboo skewer in the center; if no raw batter clings to it, turn off the heat. If it comes out with translucent liquid, steam for 2 more minutes at a time and check again.
6Cool, then cut with an oiled knife
2 hr 30 min
Remove the steamed pan and let it cool at room temperature for 2 hours. Cut it too soon and the warm starch sticks to the knife and squashes the layers.
Once the surface is at room temperature, refrigerate it for just 30 minutes to firm up the edges. Lightly oil a knife and cut by pressing straight down rather than sawing back and forth. Wipe the blade with a towel and re-oil it after every cut, and the green and yellow of the cut face stay clean.
It's done when it's glossy, the boundaries between layers hold, and it springs back slowly when pressed with a finger. Chilling it too long makes it firm, so let it come back to room temperature for 15 minutes before eating.