Pain au Chocolat: Laminated French Chocolate Pastry (Chocolatine)

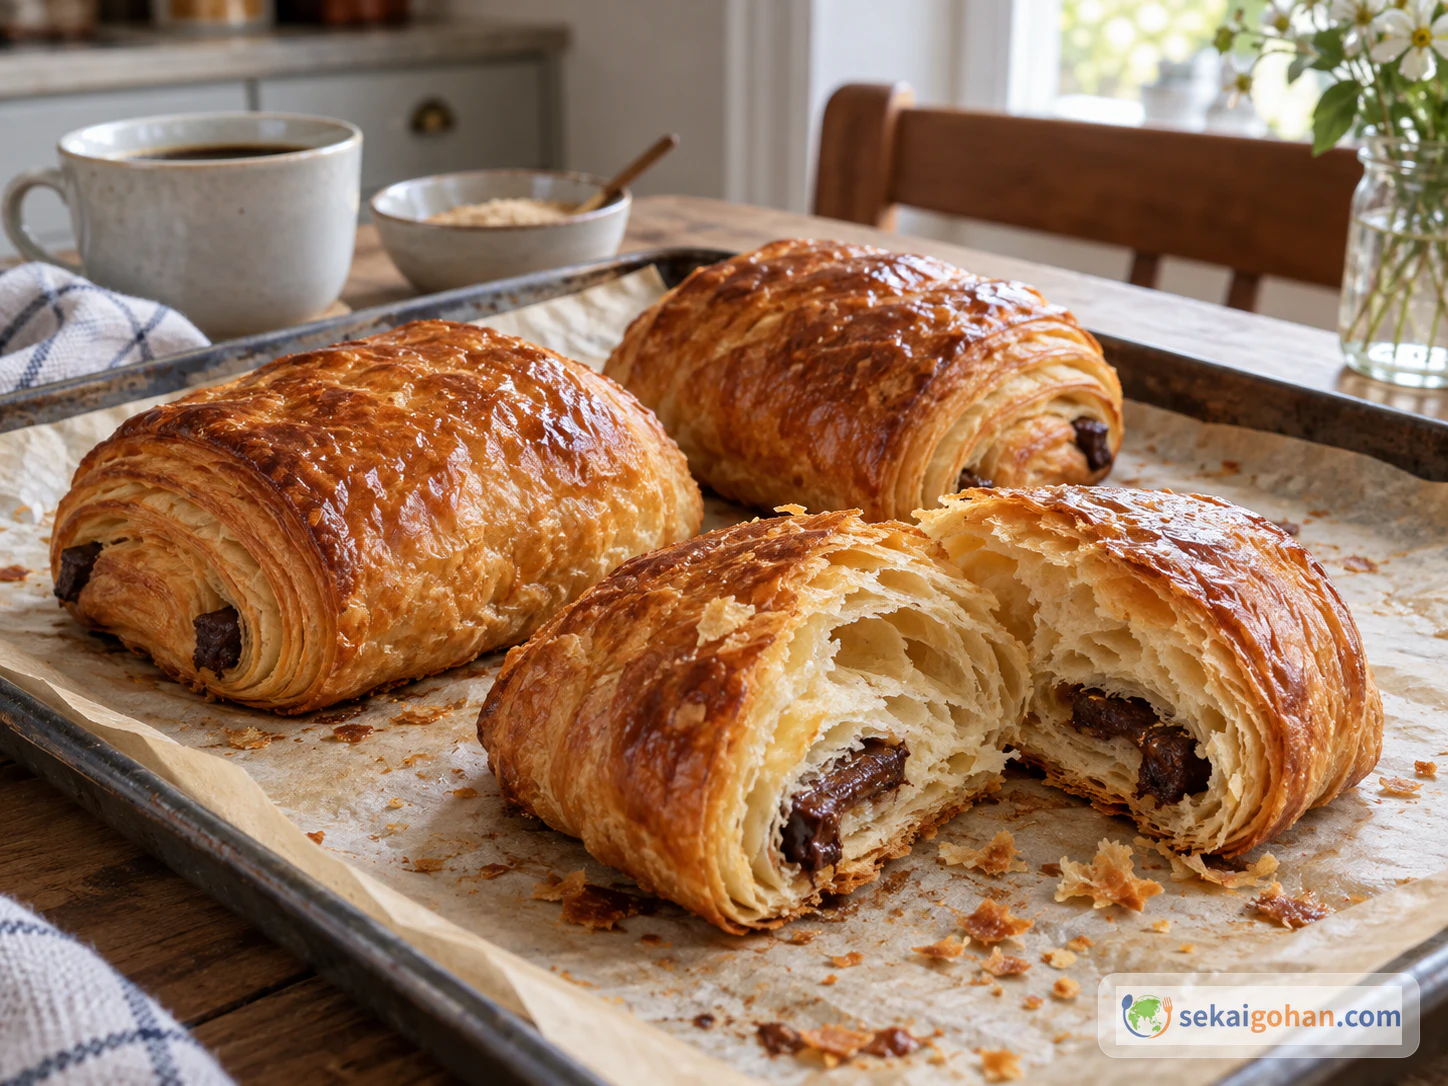
Three French-style pains au chocolat, one broken open to show the flaky layers and the chocolate inside
Level
Advanced
Cuisine
French

How to make French pain au chocolat at home from a yeasted dough laminated with butter. Covers choosing flour and butter, three letter folds with chilling, judging the final proof by volume and jiggle, and baking to a deep golden brown, with the chocolatine name question, breakfast and goûter culture, and how to fix butter that cracks or leaks.

Cooking flow

Cooking steps

STEP11 / 9

Mix and knead the dough, then chill it overnight

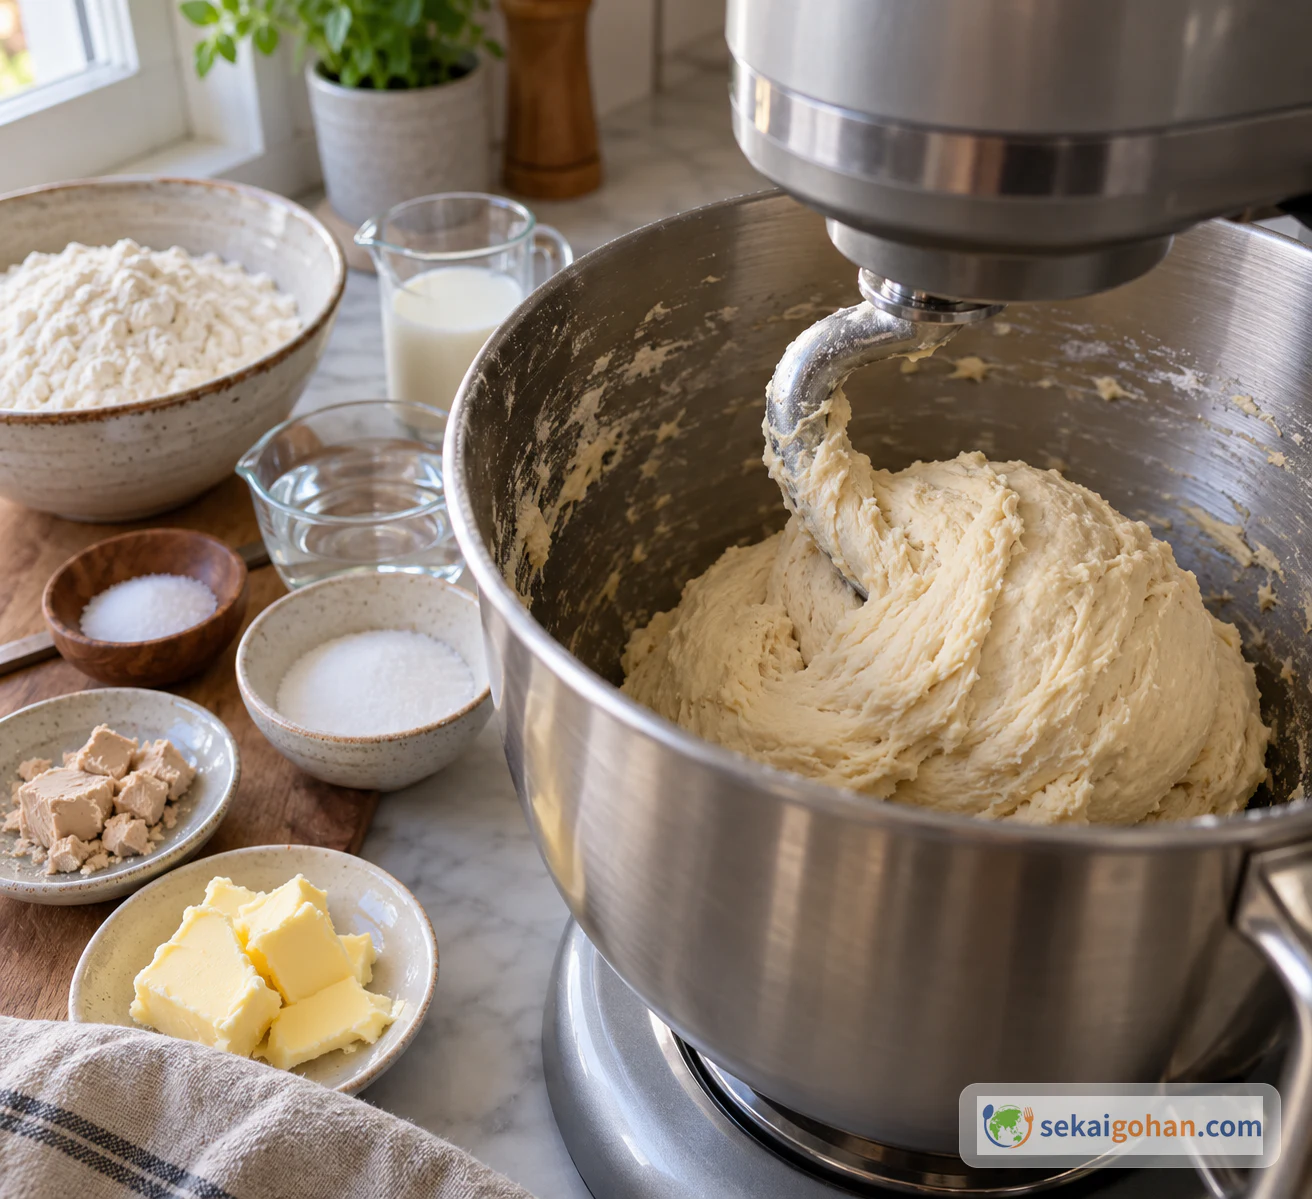
Pain au chocolat dough starting to come together after milk, water and yeast are combined with the flour
Knead until a thin, translucent film forms, then chill the dough overnight

Combine the milk at 41°F (5°C), the water at 77°F (25°C) and the fresh yeast, then add the croissant flour, plain flour, salt, sugar and the 1 oz (30g) softened butter. Knead for 8 minutes on low speed, then 7–8 minutes on medium speed as a starting point. Mixers differ, and it can take up to about 15–18 minutes in total. The dough is ready when you can stretch a small piece into a thin film that light shows through.

Shape the dough into a rectangle, wrap it in plastic wrap leaving some room for it to expand, and refrigerate for 8–15 hours, ideally 12 hours. This long cold rest builds flavor and gives you a firm, cold dough that is easier to laminate.

STEP22 / 9

Shape the butter block and chill it overnight

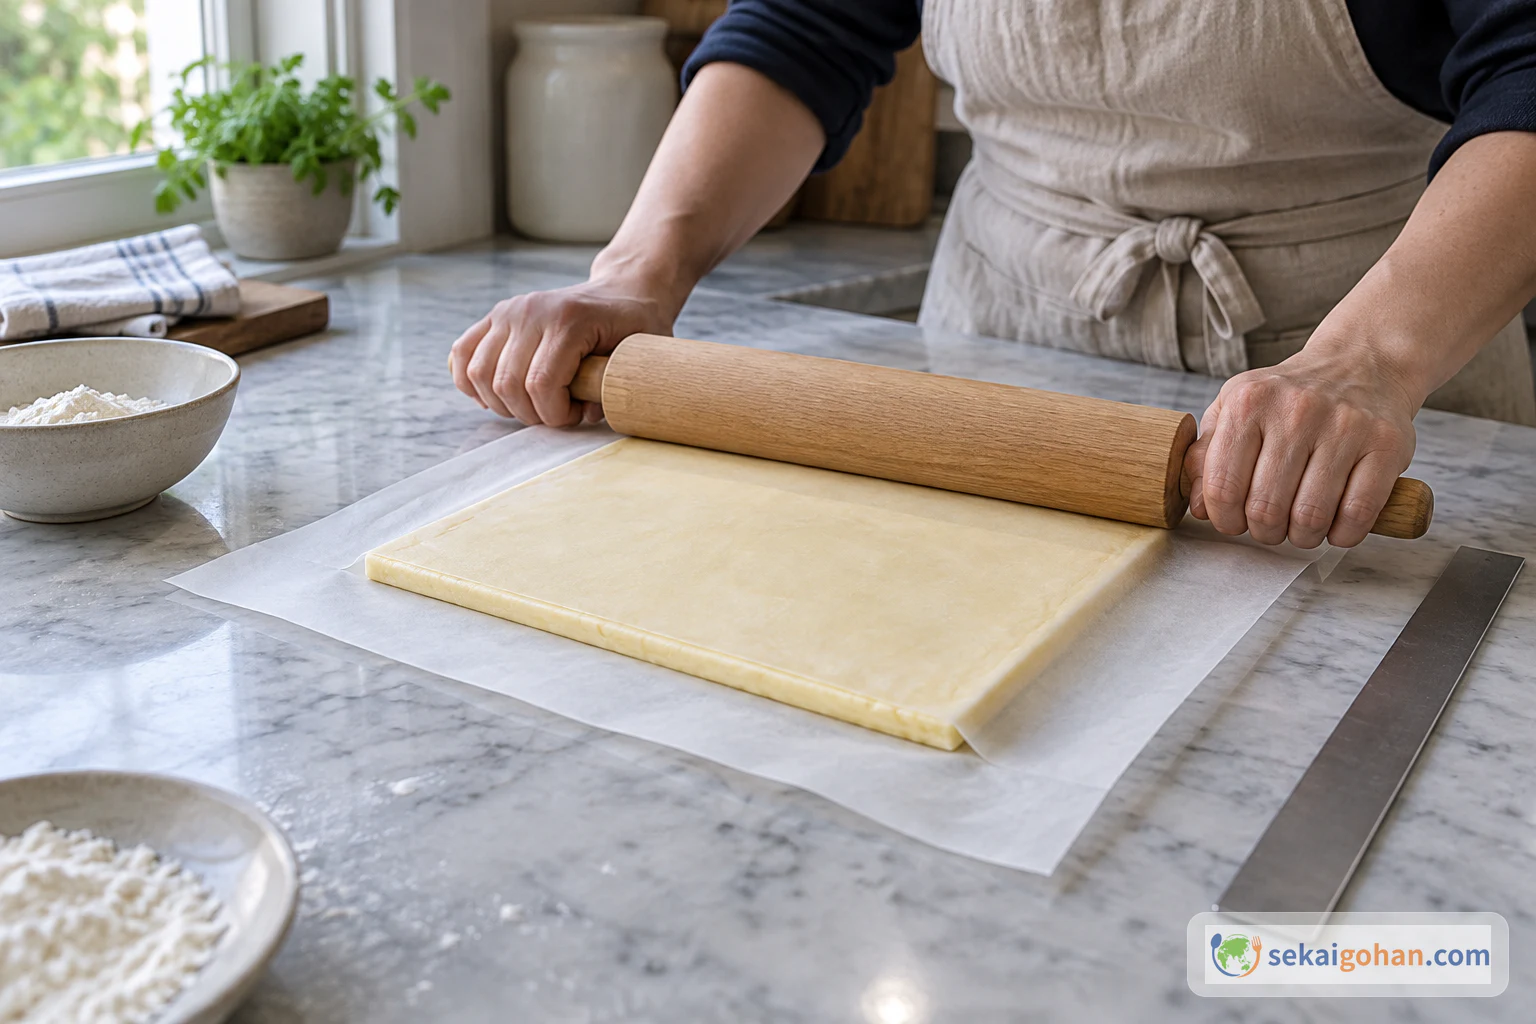
Laminating butter being rolled into an even rectangle between sheets of paper
An even 20 × 30 cm block rolls out at the same pace as the dough

Mix the 1 lb (500g) regular unsalted butter with the 1.75 oz (50g) flour, then shape it into an even sheet 12 inches (30 cm) by 20 cm. Keep the thickness uniform so it rolls out at the same rate as the dough. Refrigerate the block overnight alongside the dough.

Before laminating, let the butter reach about 11–15°C (59°F at the top of that range) as a guide. Too cold and it cracks inside the dough; too warm and it smears into the dough. You want butter that bends without breaking and without feeling greasy.

STEP33 / 9

Enclose the butter in the dough

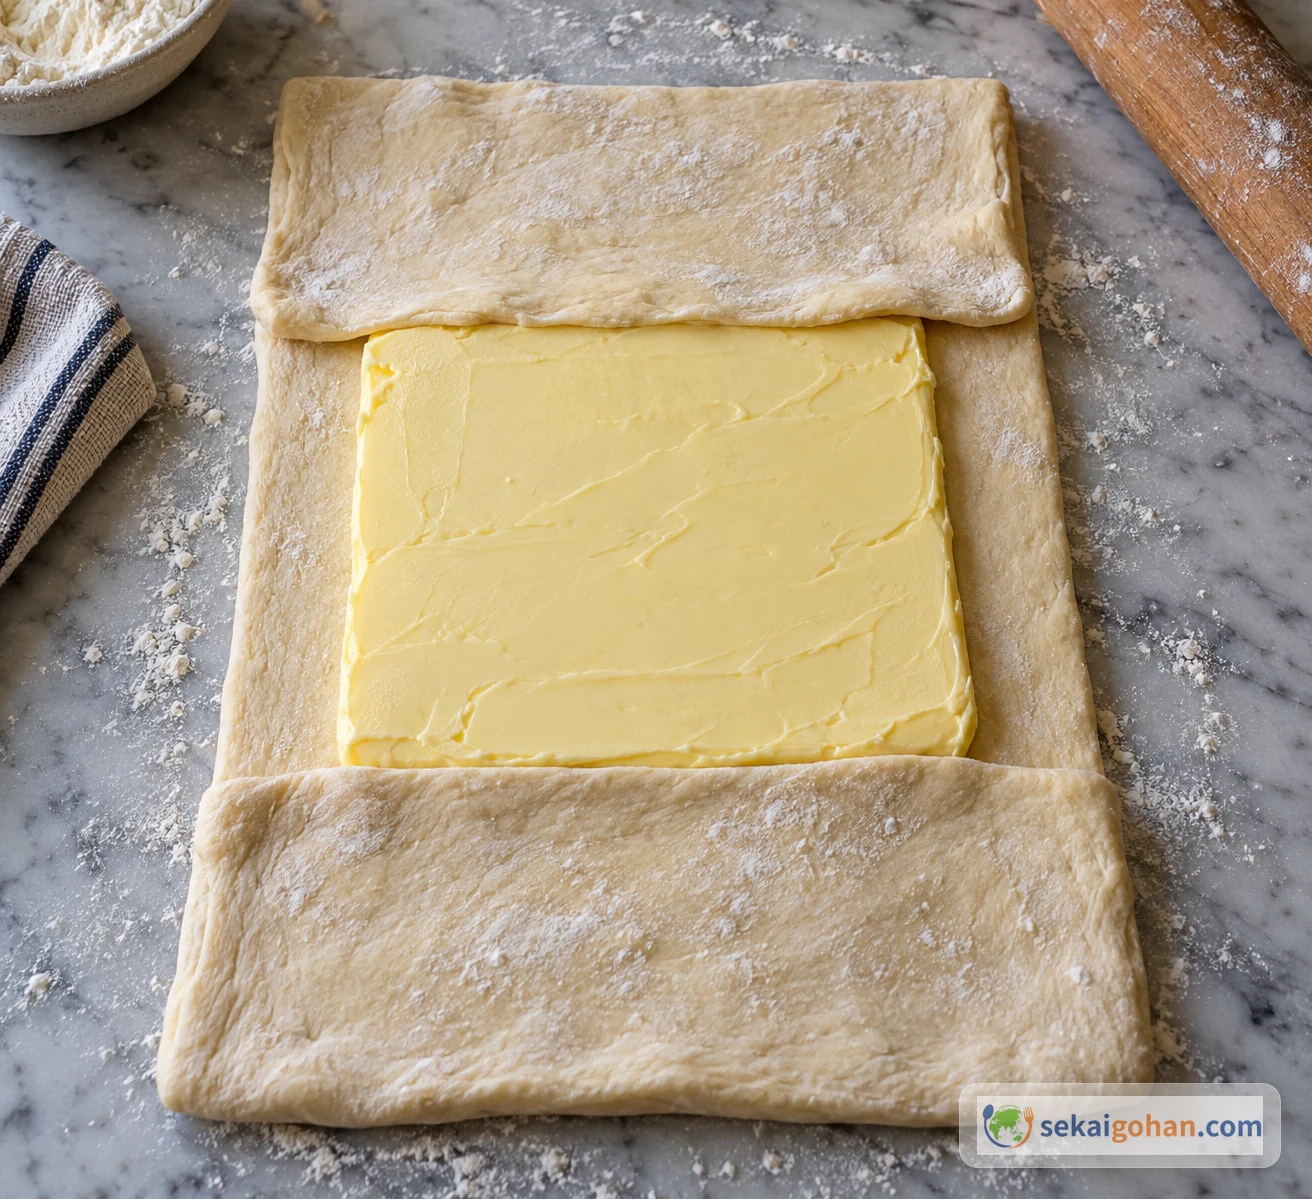
A butter block placed in the center of chilled dough, just before enclosing it
Center the butter and fold the dough over it so the edges meet

Roll the cold dough out to about twice the width of the butter block. Place the butter in the center, bring the two sides of dough over it so they meet, and seal the seam. Dust the work surface lightly; too much flour gets trapped between the layers.

STEP44 / 9

Make three letter folds, chilling between each

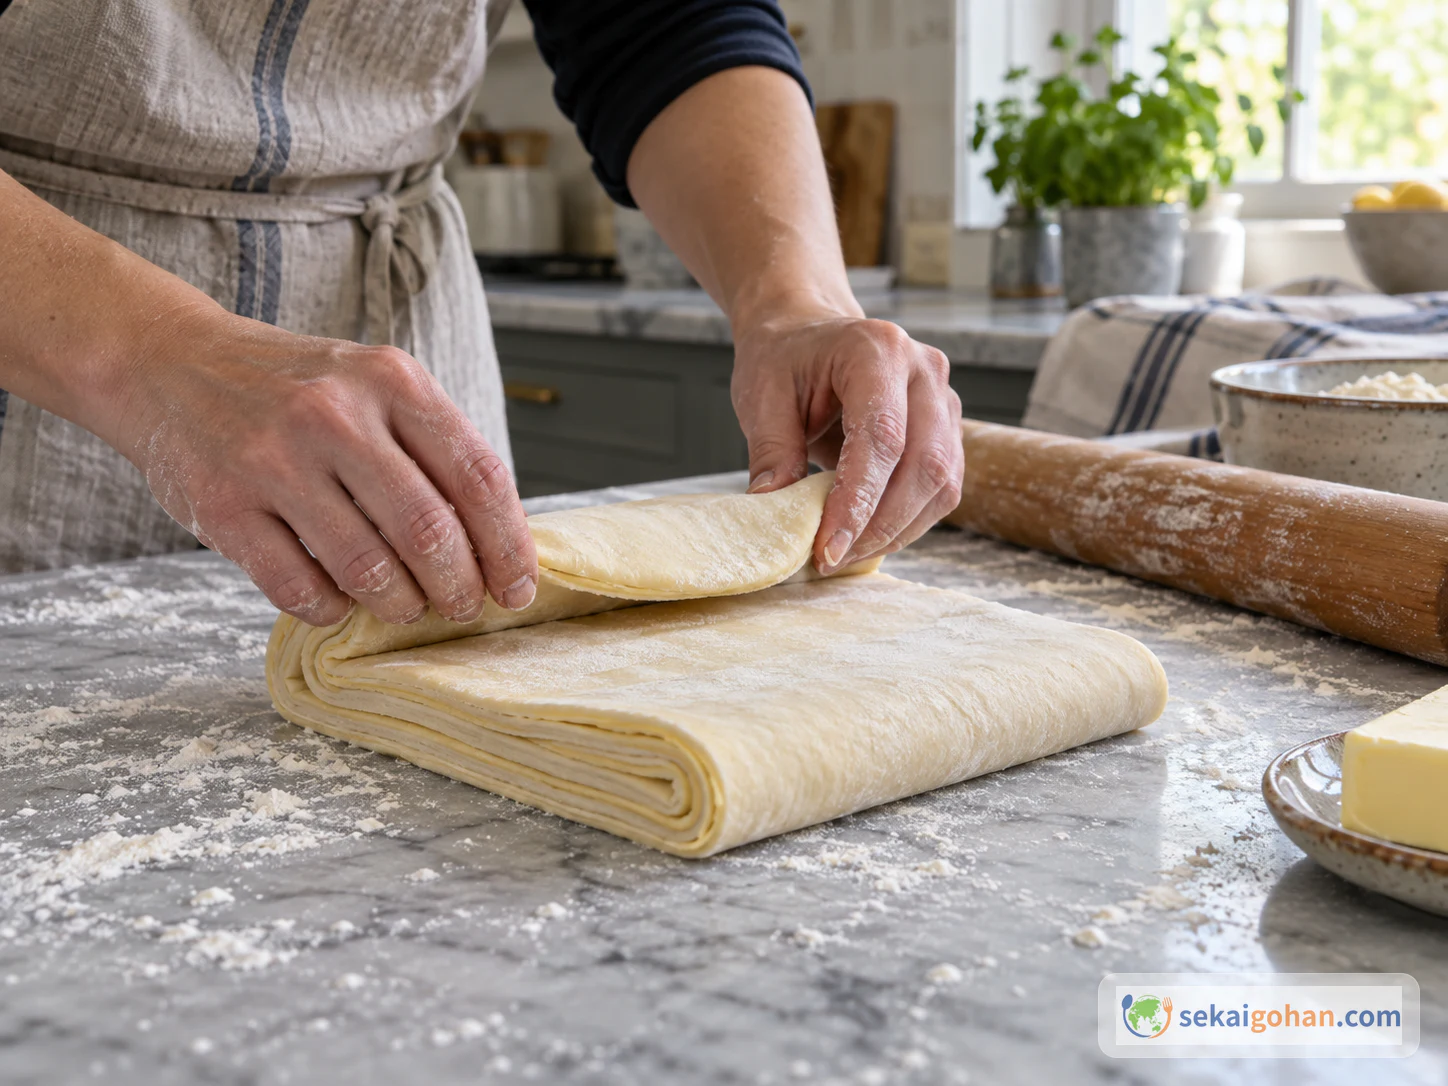
Dough folded in thirds and rolled evenly with a rolling pin
Roll evenly with steady pressure so the layers stay intact

Roll the dough into a long, even rectangle and fold it in thirds like a letter. After the first fold, freeze for 10 minutes, then refrigerate for 5 minutes. Roll and fold again; after the second fold, freeze for 15 minutes, then refrigerate for 10 minutes. Make the third fold, freeze for 15 minutes and refrigerate for 10 minutes, then refrigerate for a further 30 minutes.

If at any point the butter starts to soften and smear, or feels hard enough to crack, do not rush on. Chill the dough or let it sit briefly until the butter is pliable again.

STEP55 / 9

Roll out the final sheet and cut rectangles

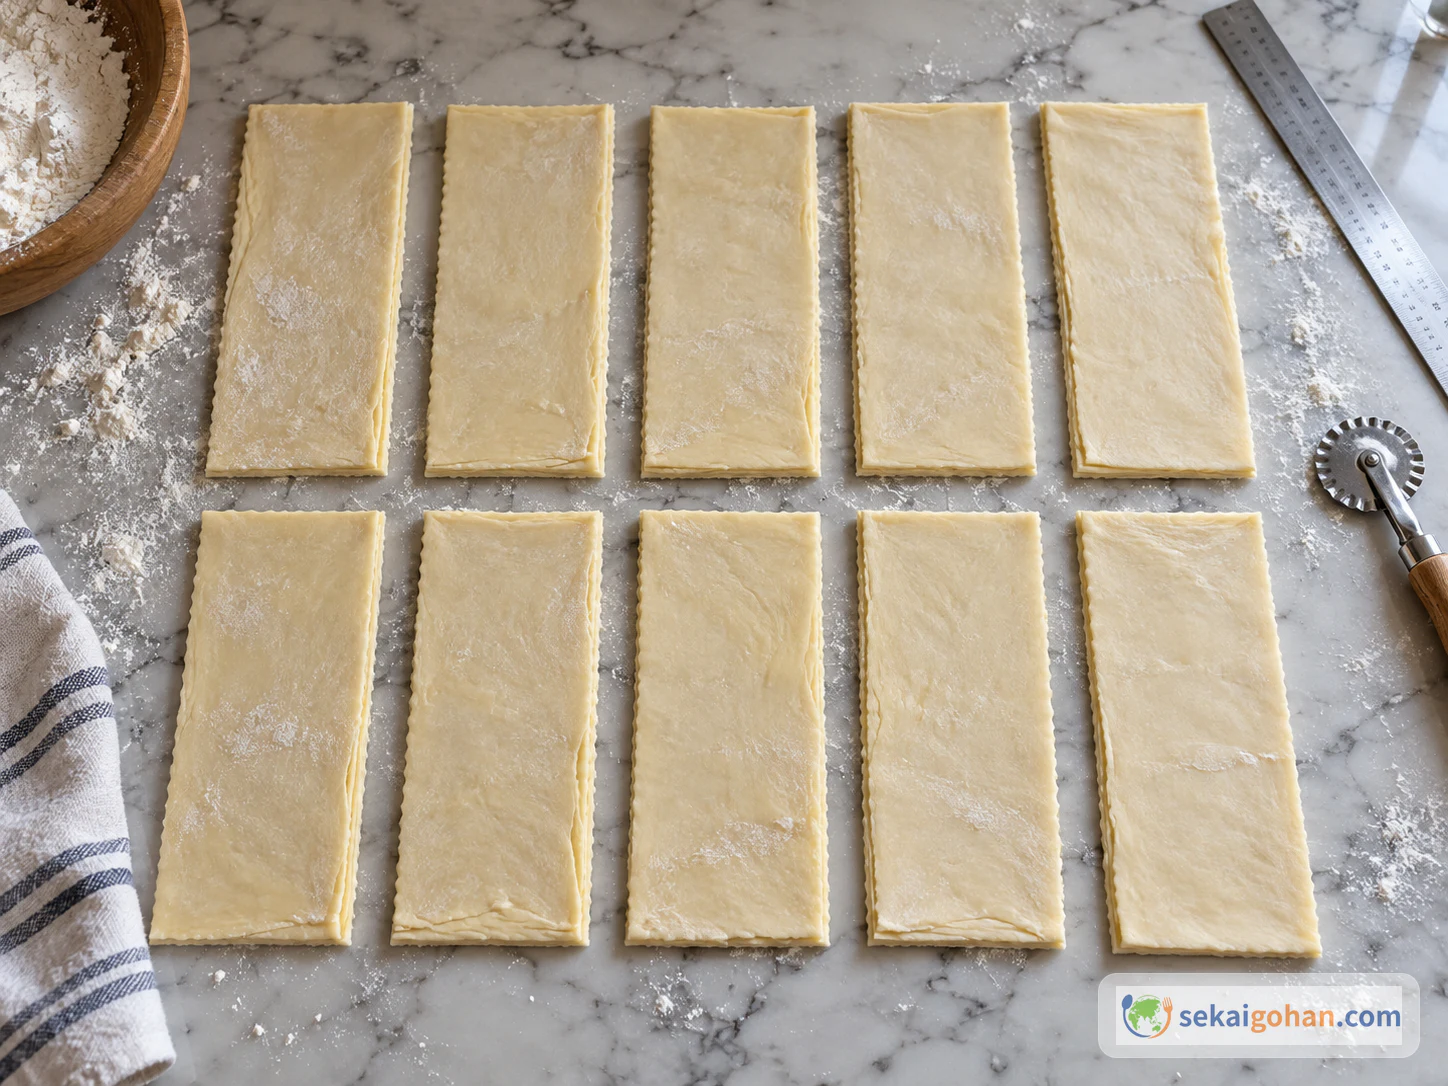
Laminated dough cut into rectangles of equal size
Measure each rectangle at 8 × 17 cm so the pastries proof and bake evenly

Roll the laminated dough to about 0.5 inches (1 cm) thick; 0.25 inch (5 mm) is ideal. Cut it into 6.5 inches (17 cm) by 8 cm rectangles with a ruler and a pastry wheel or sharp knife, cutting cleanly rather than dragging so the layers at the edges stay open.

STEP66 / 9

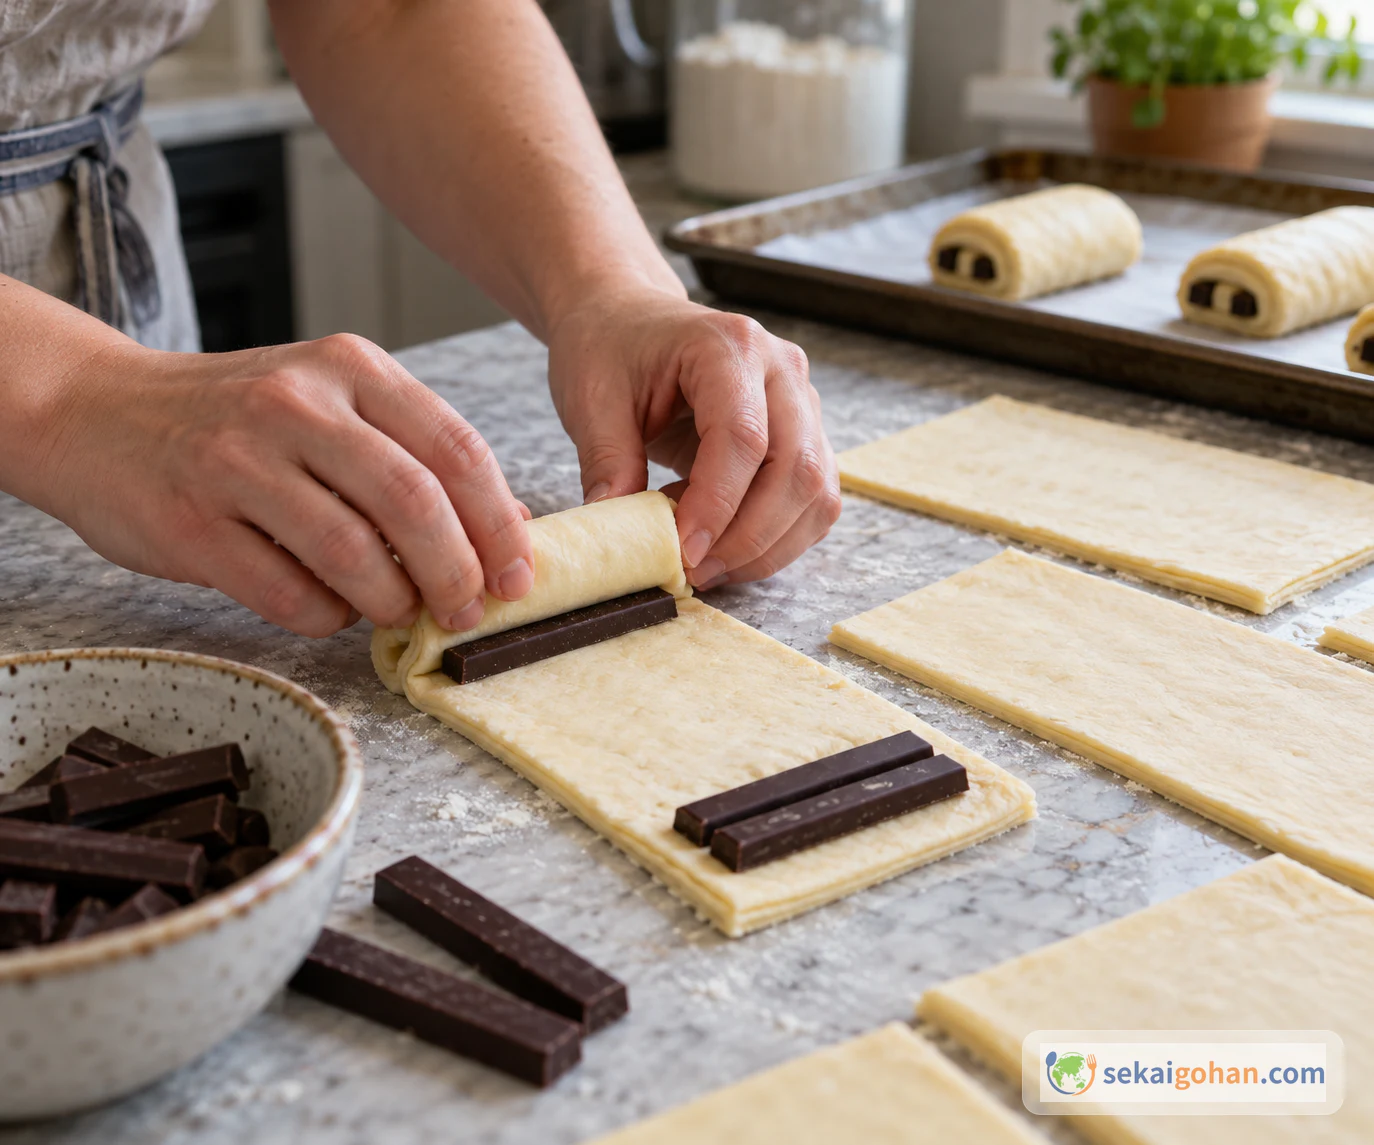
Roll each rectangle around three chocolate batons

Chocolate batons being rolled into laminated dough
Two batons at the start, the third at the first overlap, seam side down

Place two chocolate batons along the top edge of a rectangle and roll the dough over them. Lay the third baton where the first turn overlaps, then continue rolling. Set each pastry seam side down on a baking tray, leaving space between them, about 6 per tray.

STEP77 / 9

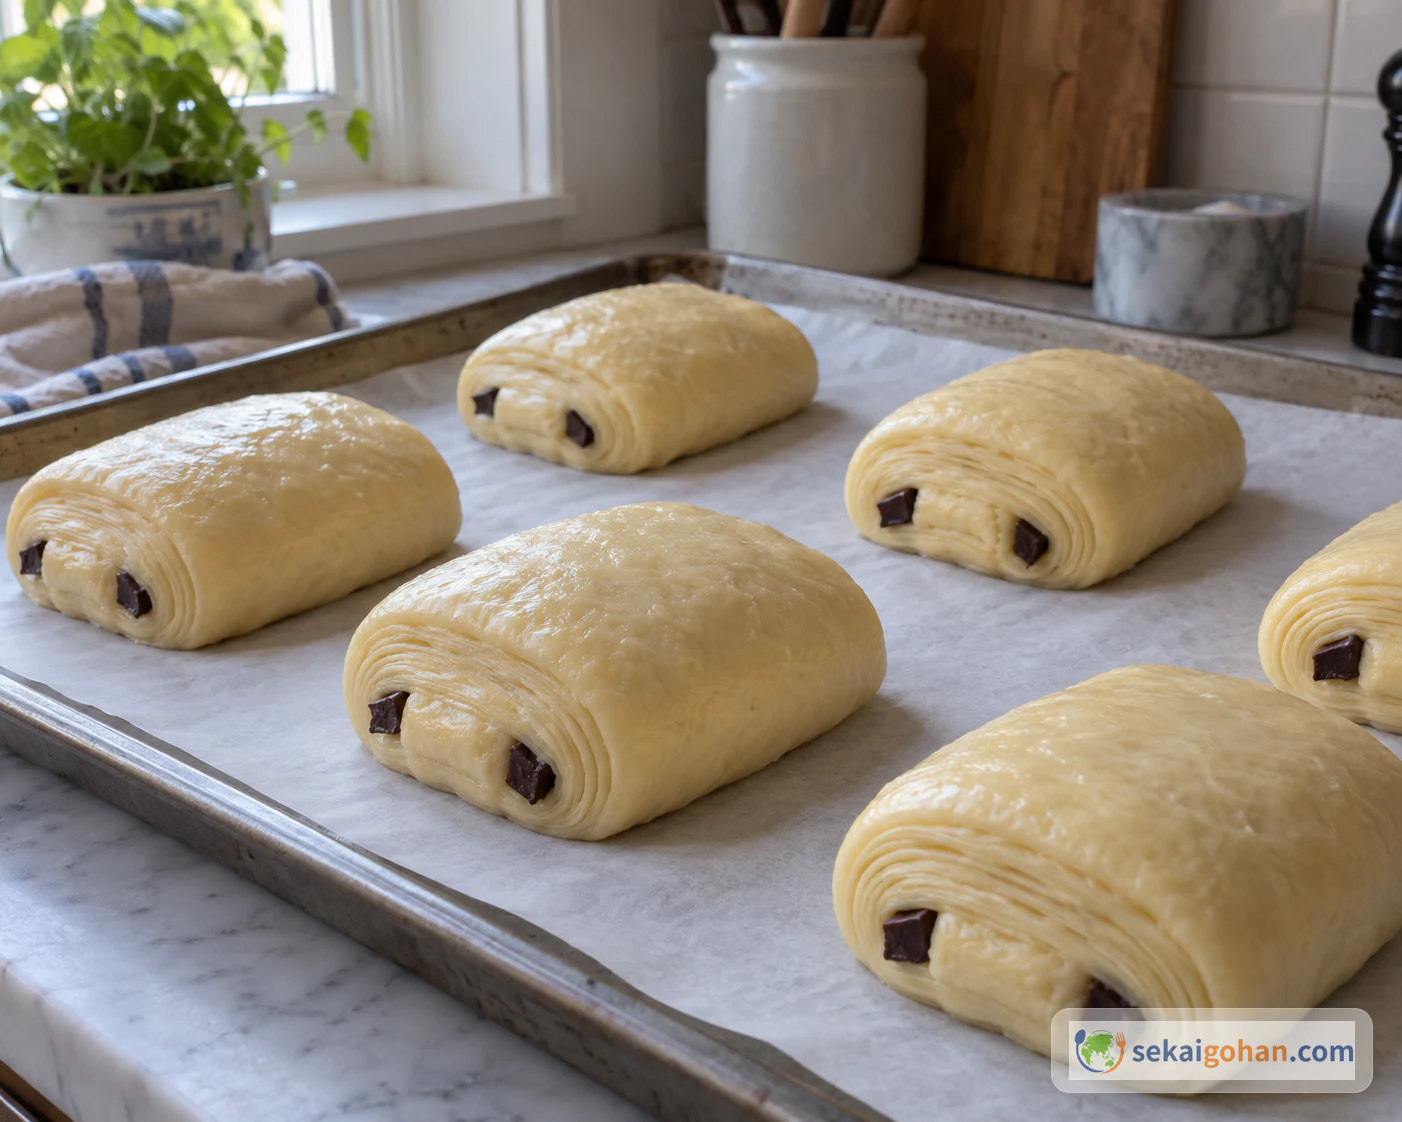
Proof until doubled and jiggly

Shaped pain au chocolat proofed until plump and about doubled
Proofed pastries look puffy and wobble slightly while keeping their shape

Proof the pastries in a switched-off oven with ½ cup (150 ml) of hot water in a container, replacing the water every 30 minutes. This water is only for the proofing environment and is separate from the dough water. Watch out: if the oven gets too warm, the butter leaks out. Check the temperature inside with a thermometer, use less hot water if it is getting warm, and if you cannot keep the space gently warm rather than hot, proof at room temperature instead.

Allow about 2.5–3 hours as a guide, though it can take as long as 5 hours depending on conditions. Judge by the pastry, not the clock: they should at least double in volume, look puffy, and jiggle gently when you move the tray.

STEP88 / 9

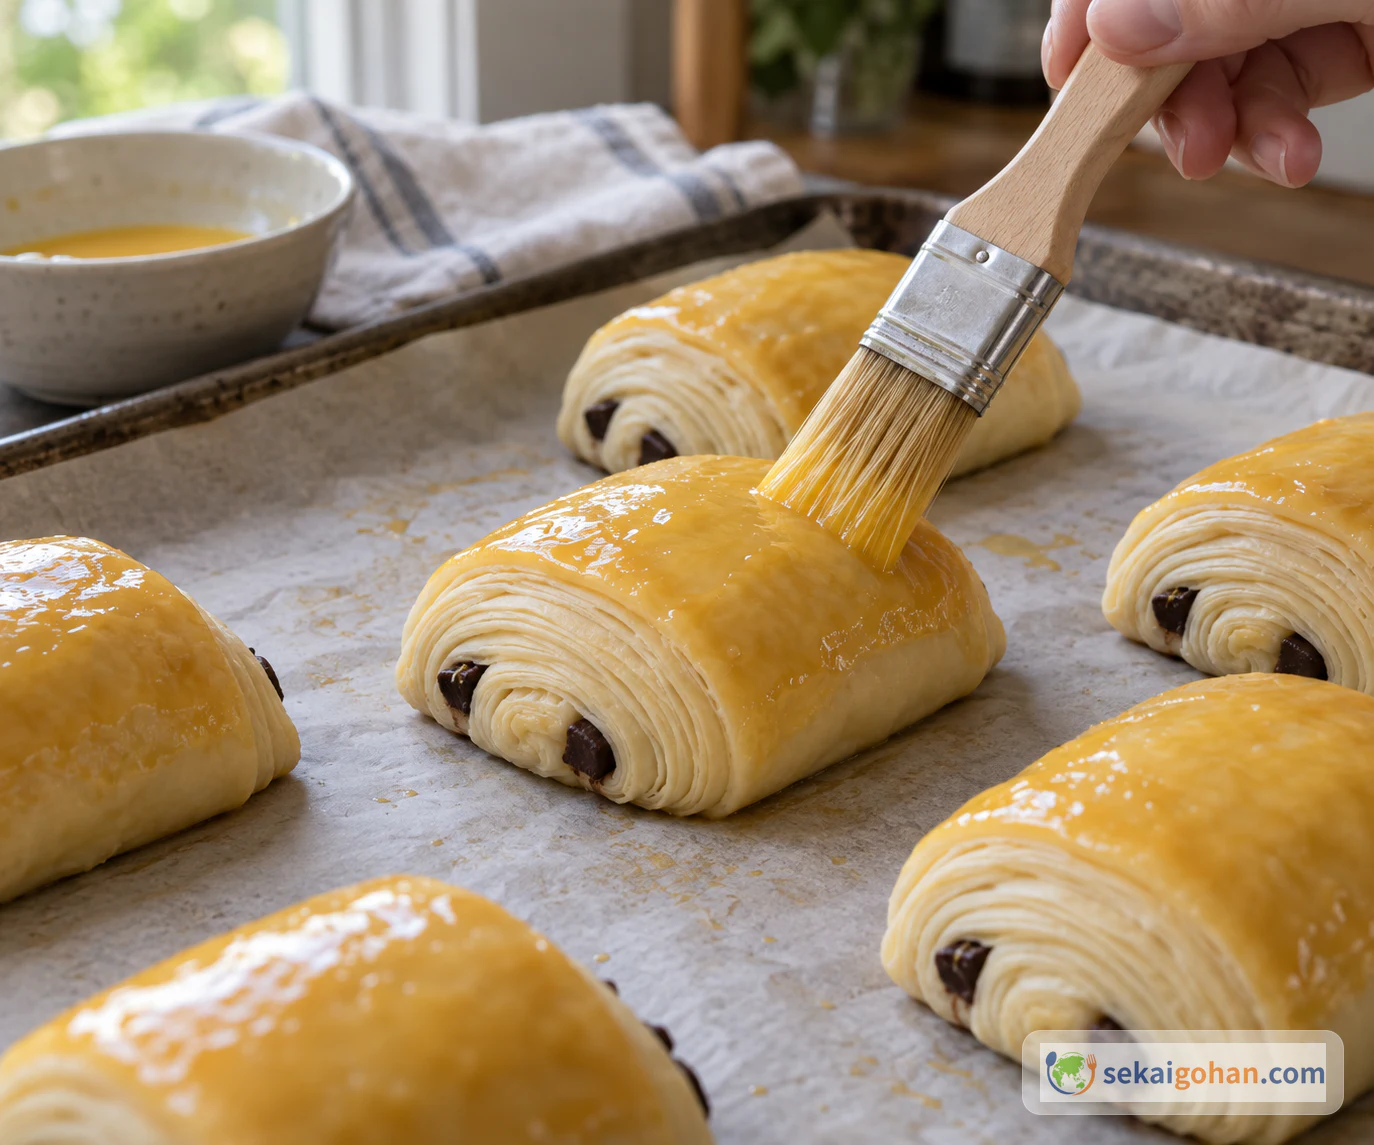
Rest for 10 minutes, then brush with egg wash

Egg wash brushed thinly over the surface of proofed dough, avoiding the cut edges
Brush only the smooth top and keep the wash off the exposed layers

Beat the 2 eggs and 2 egg yolks together. Take the proofed pastries out of the oven and leave them at room temperature for 10 minutes so the surface settles; use this time to preheat the oven to 350°F (180°C), no fan. Brush a thin coat of egg wash over the top of each pastry, avoiding the cut edges where the layers show, since wash there can glue the layers together.

STEP99 / 9

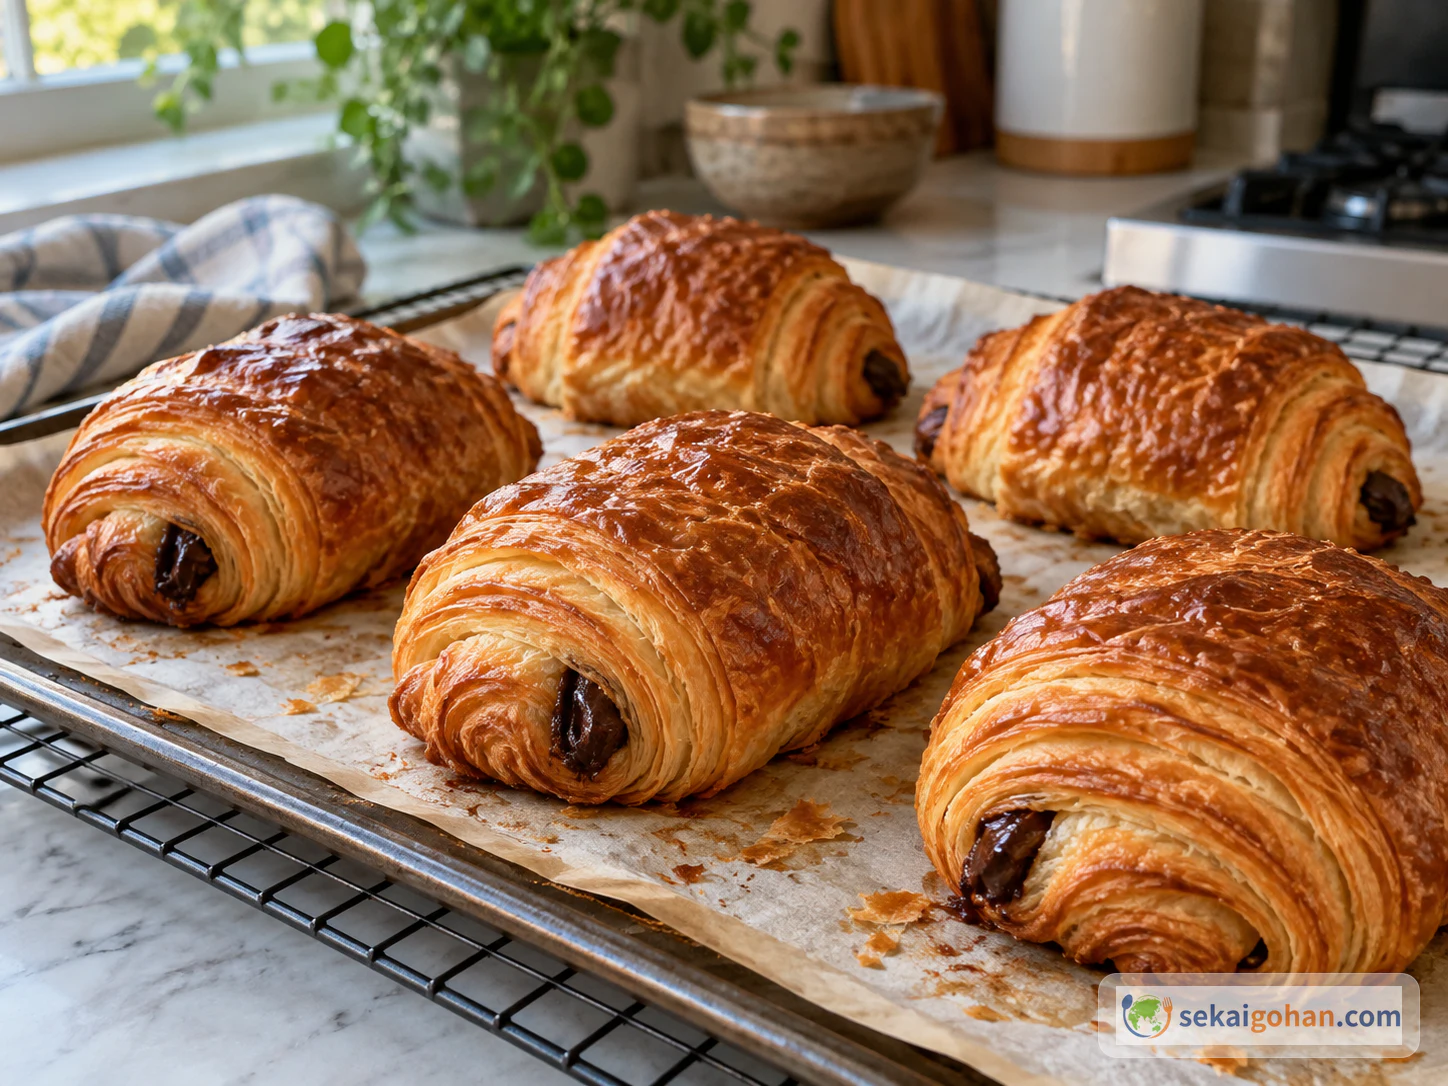
Bake each tray to a deep golden brown

Pain au chocolat baked to a deep golden color, cooling after leaving the tray
Bake until deep golden, then let the pastries cool

Bake one tray at a time at 350°F (180°C), no fan, for 25–30 minutes, until deep golden brown. This time is per tray, not for the whole batch. Home ovens vary, so let the color guide you as much as the timer. Let the pastries cool after baking before serving; the chocolate inside is very hot straight from the oven.

0 / 0
Ingredients

Ingredients

1 / 5

Dough

Ingredient Amount Role
Croissant flour (T55 type, about 11–12% protein) 1.5 lb (700g) Main dough flour
Plain (all-purpose) flour (about 9–10% protein) 10.5 oz (300g) Softens the dough flour blend
Salt 25g Dough
Sugar 4 oz (120g) Dough
Fresh yeast 1.5 oz (40g) Leavening. Use fresh yeast as listed
Whole milk 9.5 oz (265g), 41°F (5°C) Dough liquid
Water 9.5 oz (265g), 77°F (25°C) Dough liquid
Unsalted butter, softened 1 oz (30g) Dough butter
2 / 5

Butter block

Ingredient Amount Role
Regular unsalted butter 1 lb (500g) Laminating butter
Plain flour or croissant flour 1.75 oz (50g) Mixed into the regular butter for the block
3 / 5

Filling

Ingredient Amount Role
Chocolate batons 3 per pastry The chocolate core
4 / 5

Egg wash

Ingredient Amount Role
Whole eggs 2 Egg wash
Egg yolks 2 Egg wash
5 / 5

For working

Ingredient Amount Role
Flour for dusting As needed Keep to the minimum
0 / 0

In the morning, a rectangle of pastry lifts out of a paper bag and leaves a trail of flakes behind. By afternoon, the same pastry turns up again as the goûter, the light snack that bridges lunch and dinner. Pain au chocolat is buttery, crisp layers around a core of dark chocolate. In France, its shape is familiar long before anyone thinks about how it's made. Making it at home comes down mostly to temperature rather than any one difficult move. The recipe makes 16–20 pastries and takes 16–24 hours overall, though most of that is chilling and proofing rather than hands-on work.

Pain au Chocolat and Chocolatine

A laminated yeasted pastry

Despite the word "pain", this is a laminated pastry rather than bread. Pain au chocolat is a viennoiserie made from pâte levée feuilletée, a yeasted dough laminated with butter. Fermentation and tourage (folding butter into the dough) happen in the same dough. The yeast gives lift and aroma, the folds create the thin layers, and chocolate batons are rolled inside. The challenge is balance: the dough has to rise and develop flavor while the butter sheet stays flexible enough to stretch with it, without cracking or seeping out.

In much of France it's called pain au chocolat. In the southwest the same pastry is known as chocolatine, and there are other regional names as well.

Breakfast, goûter and everything between
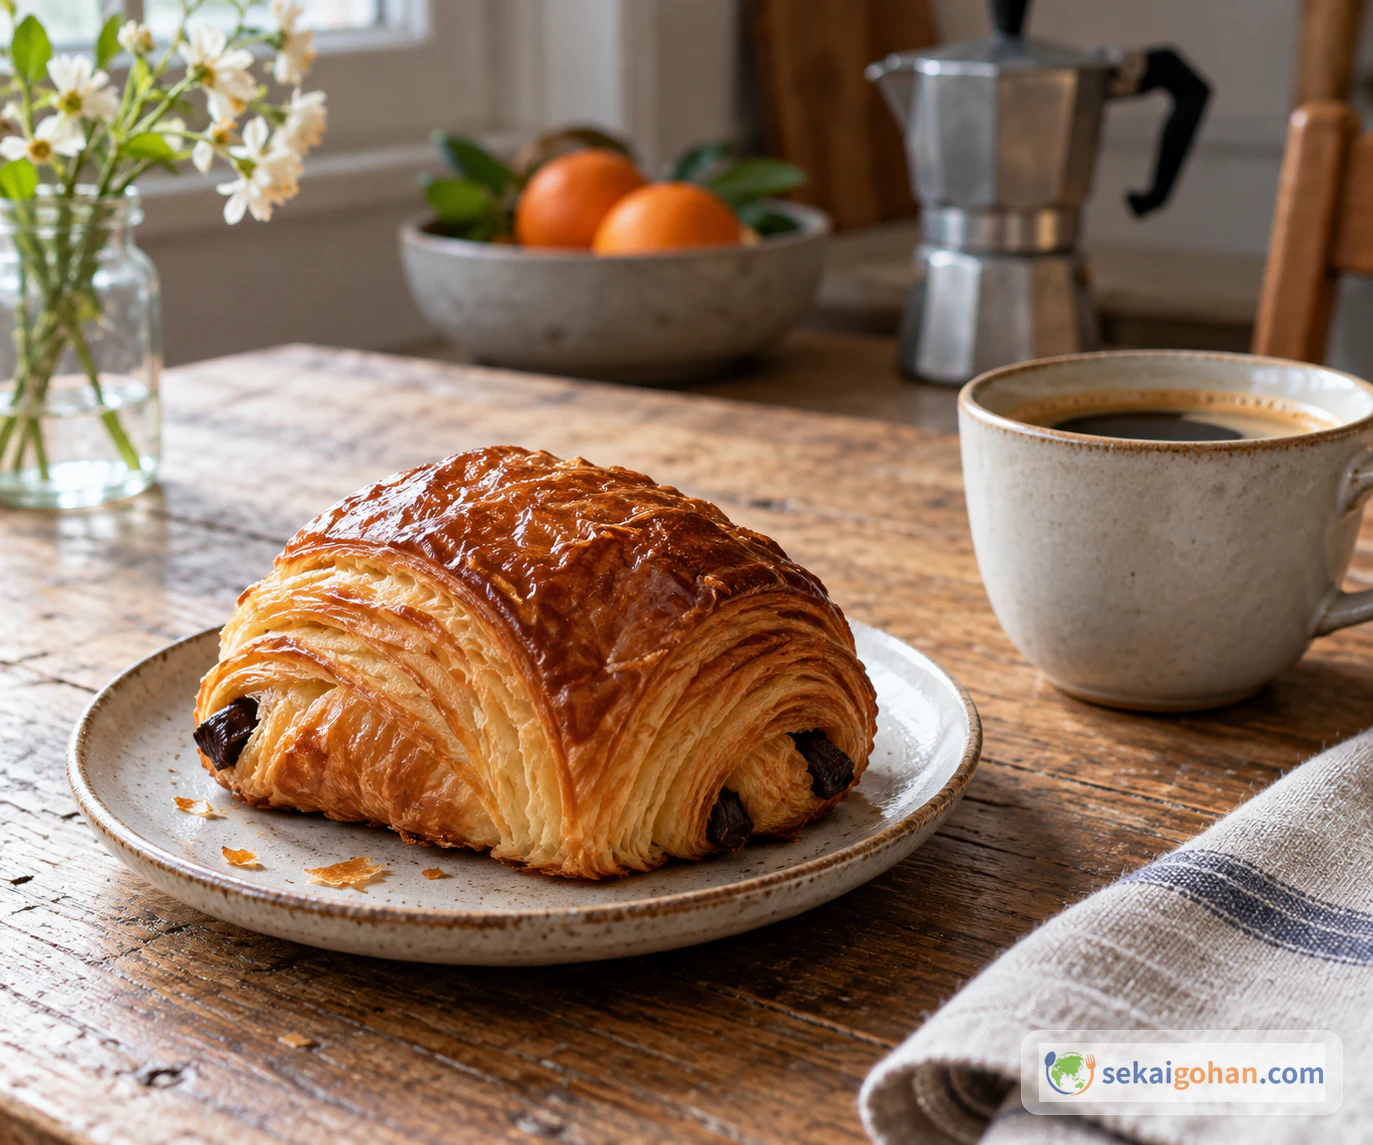
Pain au chocolat on a plate with a cup of coffee for breakfast or an afternoon snack
Pain au chocolat belongs to both the breakfast table and the afternoon goûter

People eat pain au chocolat at breakfast, at the afternoon goûter, or simply whenever a small hunger strikes. It's substantial enough to start a day, yet light enough for a mid-afternoon pause.

Bakers don't agree on one formula. Some use water, some milk; some add eggs and some don't; the number of chocolate batons varies too. What they all aim for is a balance between fermentation, butter and chocolate. This recipe uses both milk and water in the dough, with three batons per pastry.

Origins

Viennoiserie grew out of Viennese baking techniques that spread in France. August Zang is often linked to that story, though no inventor or date for pain au chocolat has been confirmed. The word chocolatine has several competing explanations, none of them proven. For more of the country's cooking, see the France page.

Ingredients: One Formula, Grouped by Dough, Butter, Filling and Wash
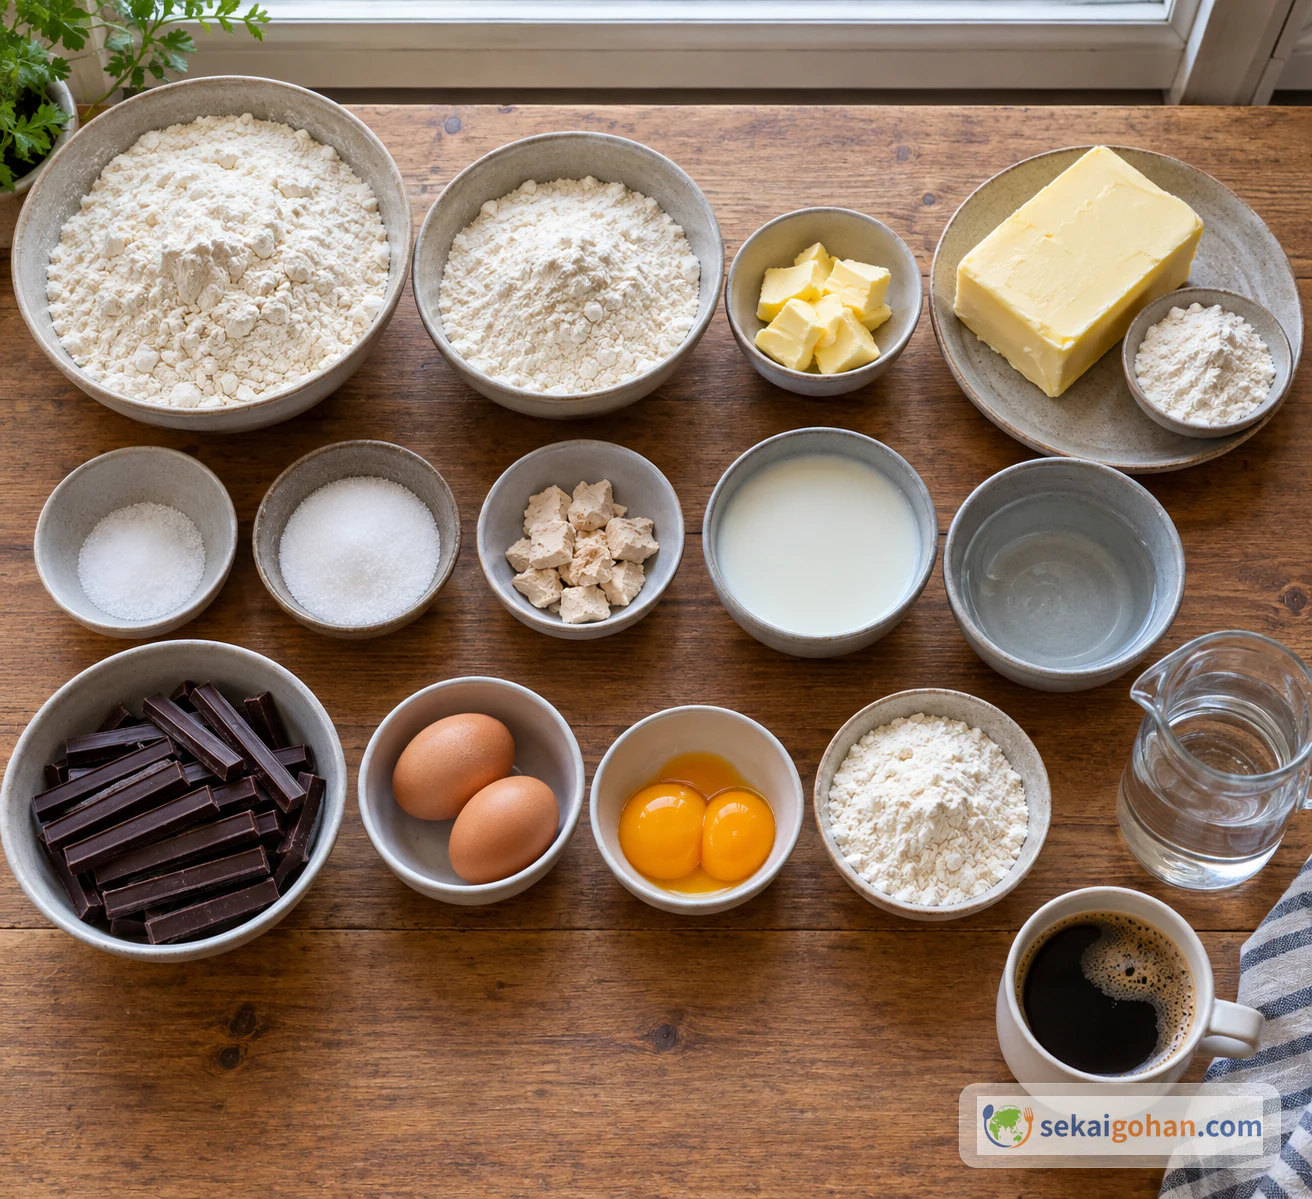
Measured flour, salt, sugar, yeast, milk, water, unsalted butter and chocolate batons laid out for pain au chocolat
Weigh everything before you start; the dough butter and the butter block are separate amounts

Use these amounts together, and do not mix them with other formulas. The butter block uses regular unsalted butter, which is why 1.75 oz (50g) of flour appears in the butter group. That 1.75 oz (50g) is separate from the dough flour, and the 1 oz (30g) of soft butter in the dough is separate from the butter block.

To serve, a cup of black coffee is an optional companion.

Allergens and raw ingredients

This pastry contains wheat, milk and egg. Chocolate products may contain milk, soy and other allergens, so read the labels on your batons, including any statements about shared facilities and cross-contact. Do not taste raw dough or raw egg wash. Prepare the listed egg wash, but use only as much as needed for brushing; leftover wash should never be poured over the pastries.

Choosing Flour, Butter and Chocolate

Flour. Use croissant flour (T55 type) with roughly 11–12% protein and plain flour with roughly 9–10%. Flour names alone won't tell you how a product behaves, so check the protein figure on the label. If you only have strong flour, you can replace both dough flours with 1 lb (500g) strong white bread flour and 1 lb (500g) plain flour.

Butter block. Professional laminating butter (such as Isigny Ste-Mère A.O.P.) is the first choice, used on its own. Otherwise, mix 1 lb (500g) regular unsalted butter with 1.75 oz (50g) flour.

Chocolate. Look for chocolate batons made for baking, so each pastry gets an even core. A chocolate bar cut into strips of similar width works too.

Yeast. Use fresh yeast as listed.

Batch size. This is a large batch, so check your mixer's flour capacity, your refrigerator space and how many trays you have before you start. Plan on about 6 pastries per tray. If you scale the recipe down or want to bake everything at once, adjust the method to match.

Equipment

  • Stand mixer with a dough hook
  • Rolling pin
  • Ruler
  • Bench scraper
  • Pastry wheel or sharp knife
  • Baking paper
  • Several baking trays
  • Pastry brush
  • Digital thermometer, for the butter and the proofing environment
  • Oven thermometer
  • A heatproof container for hot water (for the proofing setup)

Method: Cold Dough, Pliable Butter, Patient Proofing

How to read the timings

Your kitchen, flour and oven will differ, so treat every time and temperature below as a guide. When a time and the state of the dough disagree, go by the state: butter that bends without cracking, dough that has doubled and jiggles, a crust that is deep golden.

Start the dough and the butter block on the same evening. Both rest overnight in the refrigerator, and the folding, shaping, proofing and baking happen the next day.

Pain au Chocolat Troubleshooting

What this batch should keep

Keep the dough cold and the butter pliable but never melting. Protect the layers through every fold, let the shaped pastries proof until they have clearly doubled and jiggle, then bake them to a deep golden brown.

Most problems with laminated dough come back to temperature. When something goes wrong mid-process, the fix is usually to go back to the fridge rather than push on. Treat oven times as a guide and keep an eye on the pastry itself.

Problem Likely cause What to do
The butter cracks inside the dough The butter is much colder than the dough Wait until the butter is pliable and matches the dough before rolling again
Butter smears or leaks out The dough or the proofing environment is too warm Chill the dough between steps, and keep the hot-water proofing setup from heating the oven
The layers are squashed Too much dusting flour, heavy pressure, or butter melting Use minimal flour and roll evenly with steady, moderate pressure
The pastries stay small Underproofed Wait until they have doubled and jiggle, whatever the clock says
The color is pale or the base is heavy Oven temperature or baking time off for your oven Follow the set temperature and the deep-golden guide, and learn how your oven behaves

Serving, Storing and Variations

Serve the pastries once they've cooled, for breakfast or as an afternoon goûter, with black coffee if you like. They're at their best the day they're baked. To keep some longer, freeze them, then warm them in the oven before eating to bring the layers back to life.

Bakers vary the number of batons, and two instead of three is a common choice. It changes the chocolate ratio, so expect a different result from the three-baton version. And once a batch has cooled, break one pastry open: the layers and the chocolate show you how well your lamination held.

Frequently Asked Questions

Why chill the dough overnight?

Chill the dough for 8–15 hours in the refrigerator, ideally 12. The long cold rest develops flavor and gives you a cold, firm dough for laminating the next morning.

How many chocolate batons go in each pastry?

Bakers differ on this, but this recipe uses three per pastry: two rolled in at the starting edge and one at the first overlap.

How long does the final proof take?

About 2.5–3 hours as a guide, and sometimes as long as 5 hours depending on conditions. Room temperature varies a lot, so the real test is that the pastries have about doubled, look puffy and jiggle gently.
Sources