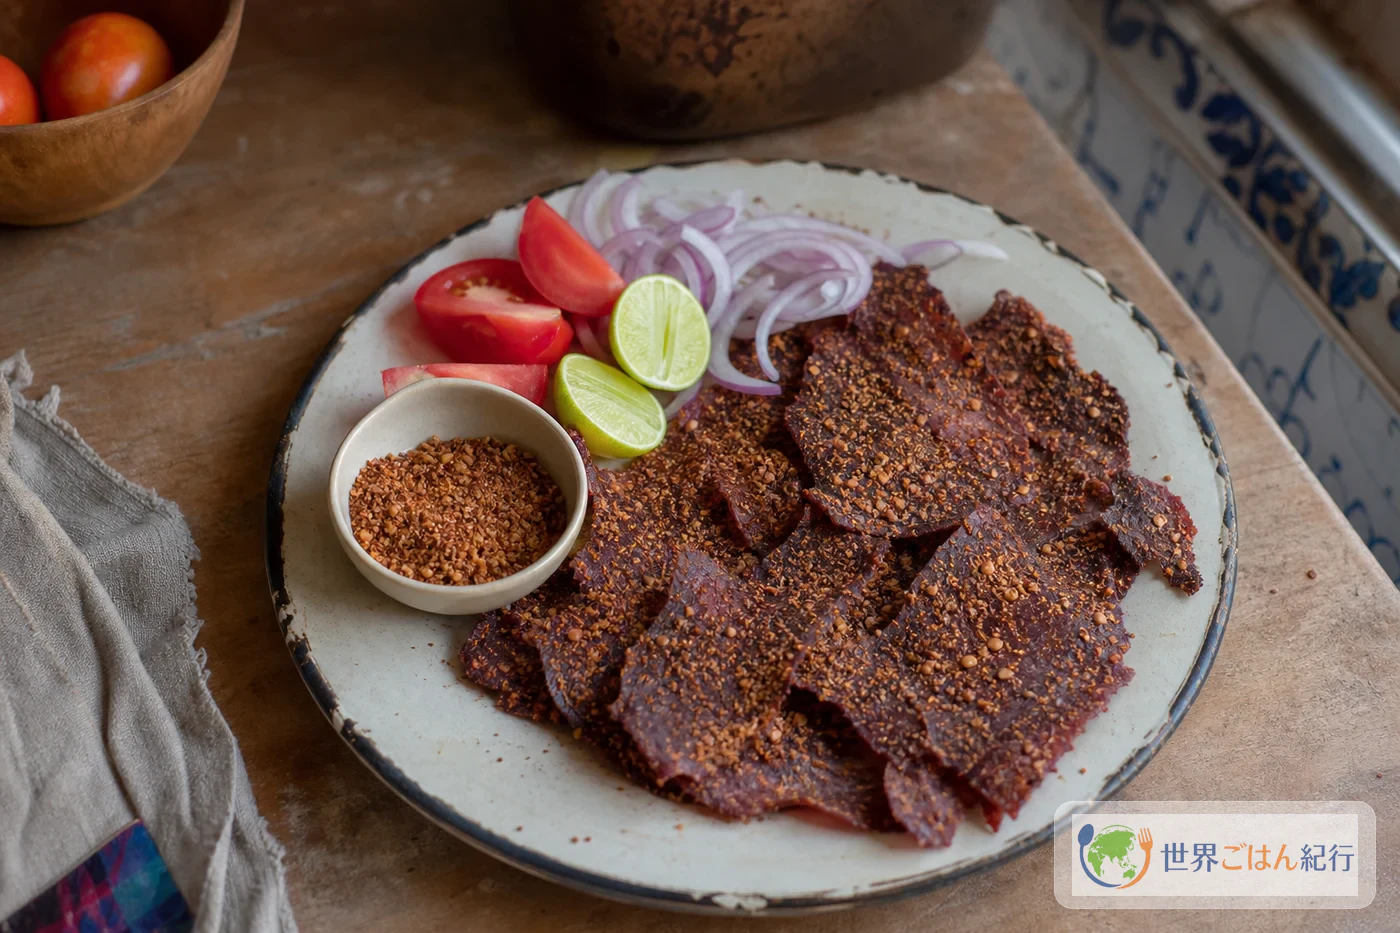
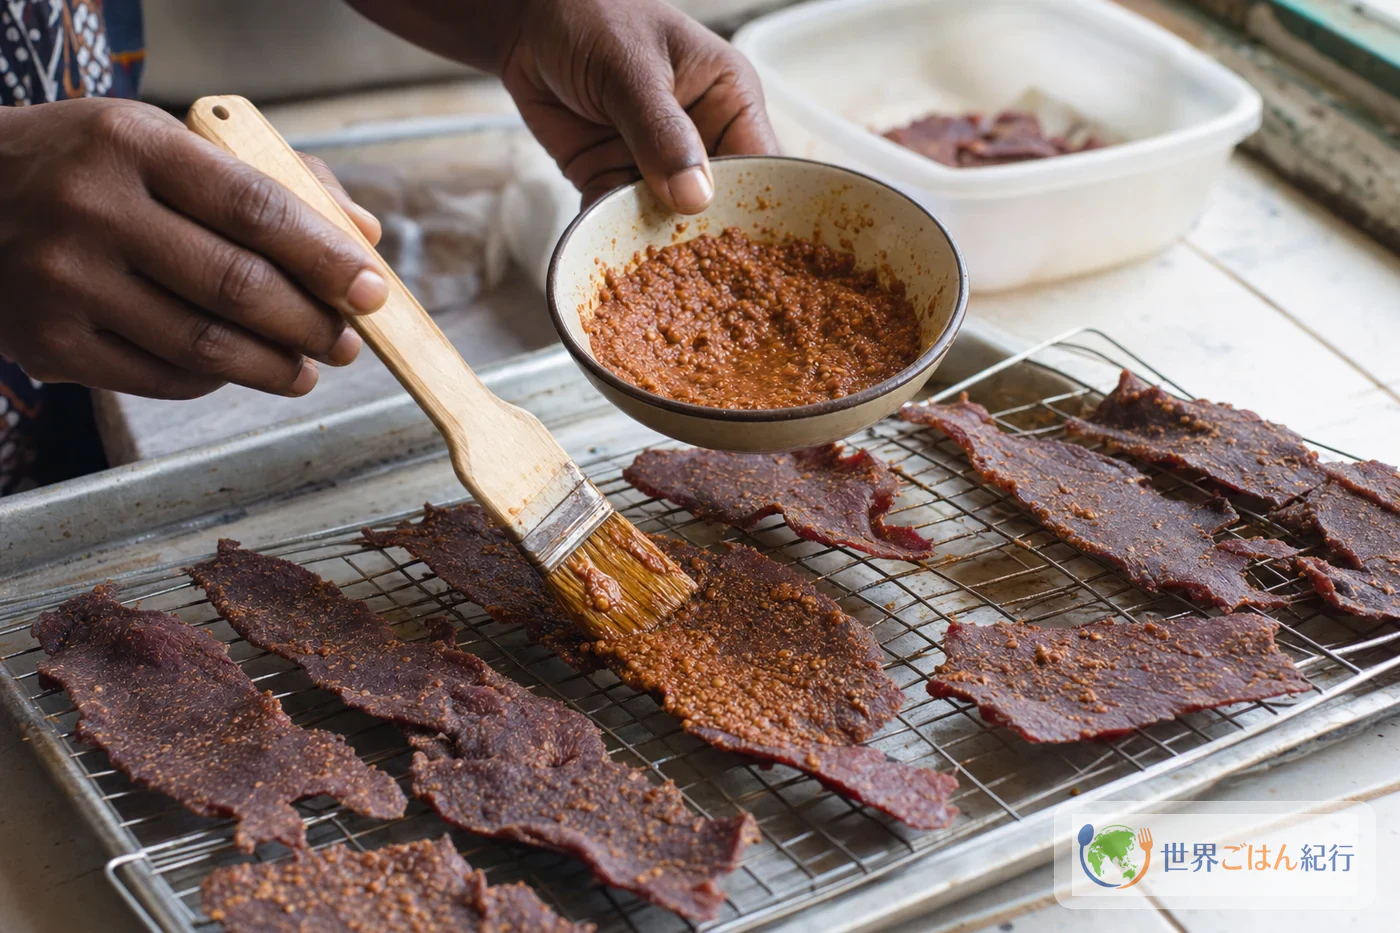
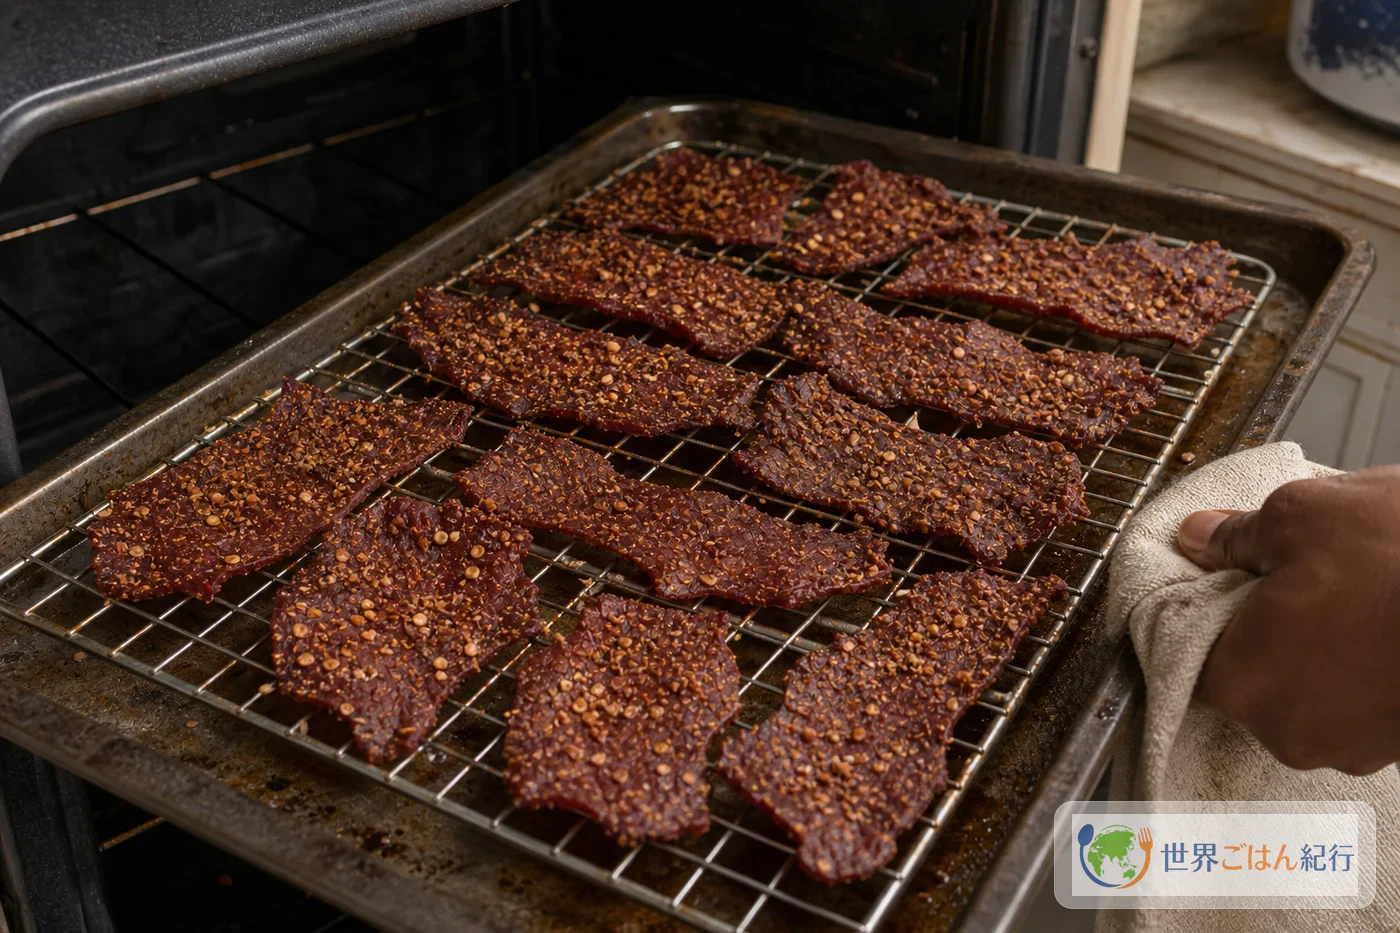
Thin sheets of beef dried until leathery, coated in a paste of peanut, chile, onion and ginger, then dried again and finished over high heat: that's kilishi. It's chewy, and the peanut and chile come back stronger the longer you chew. Cooks make this spiced dried meat across the Sahel, from Niger into northern Nigeria, and eat it a little at a time.
Kilishi in Niger and Northern Nigeria
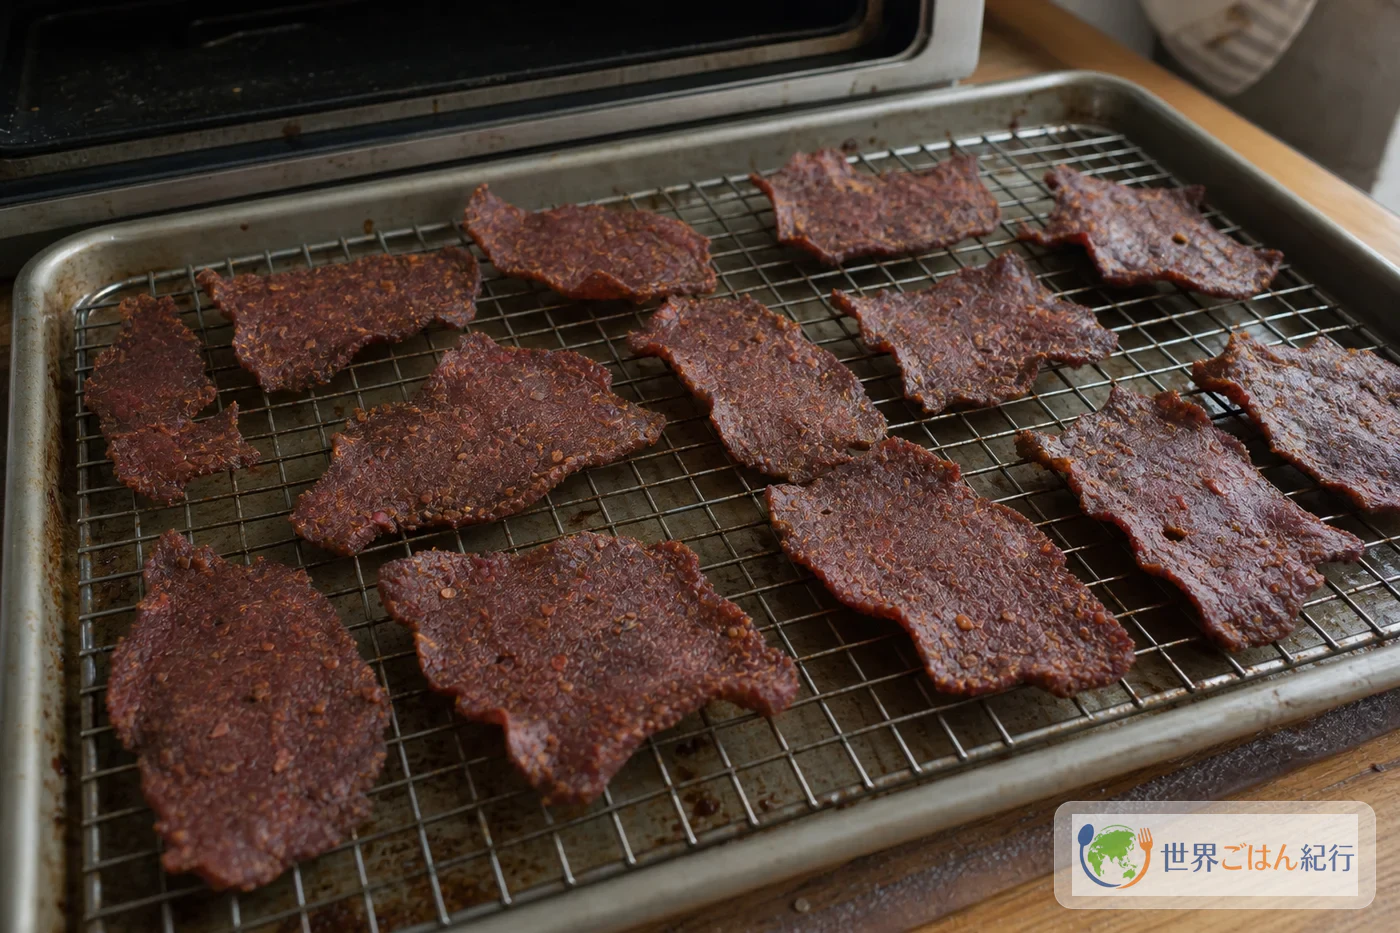
Kilishi is made in stages: slicing, a first drying, seasoning, a second drying and roasting. Lean beef, mutton or goat is dried, coated with a paste made from groundnuts (peanuts) called labu, dried again and then put over a fire. The core of kilishi is layering aroma by putting the labu between two dryings, rather than finishing the drying in one pass.
The dish isn't confined to Niger. It also belongs to northern Nigerian states such as Kaduna, Katsina, Adamawa and Borno. It grew out of a way of drawing water out of meat in the hot, dry season, handed down across the climate and food culture of the Sahel. It's best understood as a regional way of preserving meat and eating it fragrantly, shared across a broad food culture that includes the Hausa-speaking world.
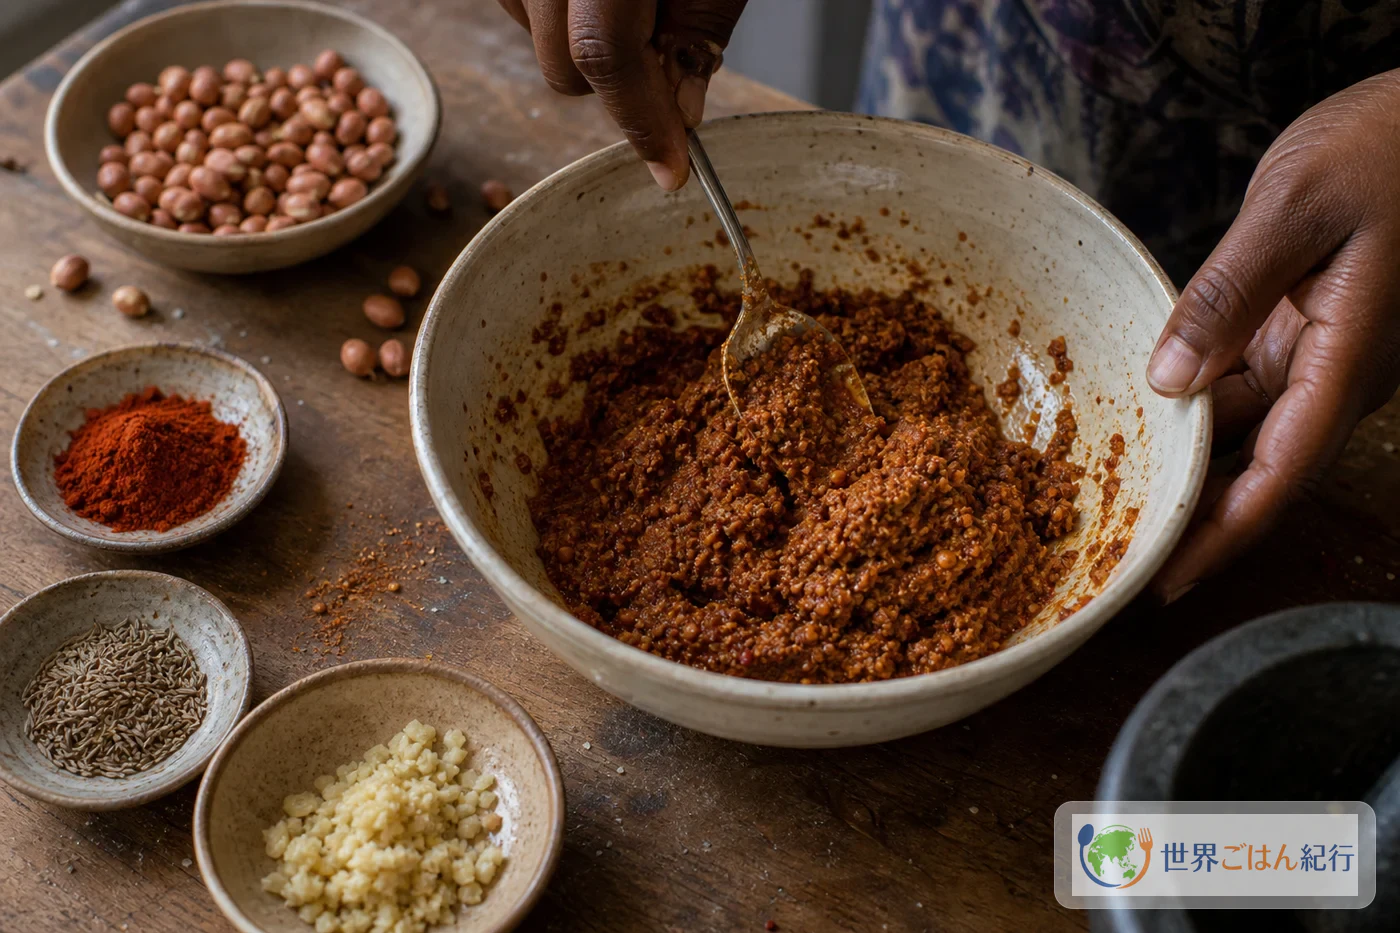
The paste combines groundnut meal with water, garlic, salt, chile, ginger, onion and so on. It's worked into the dried meat, and the second drying and roasting set the aroma on the surface.
Nigerian suya is seasoned meat eaten hot off the grill, while kilishi adds drying time to build chew. Choose suya on days you want that sizzling grilled aroma right away, and kilishi when you want something to nibble slowly. It also plays a different role from Kenyan nyama choma, meat in chunks eaten straight from the fire, and from a grain dish like Nigerien dambou.
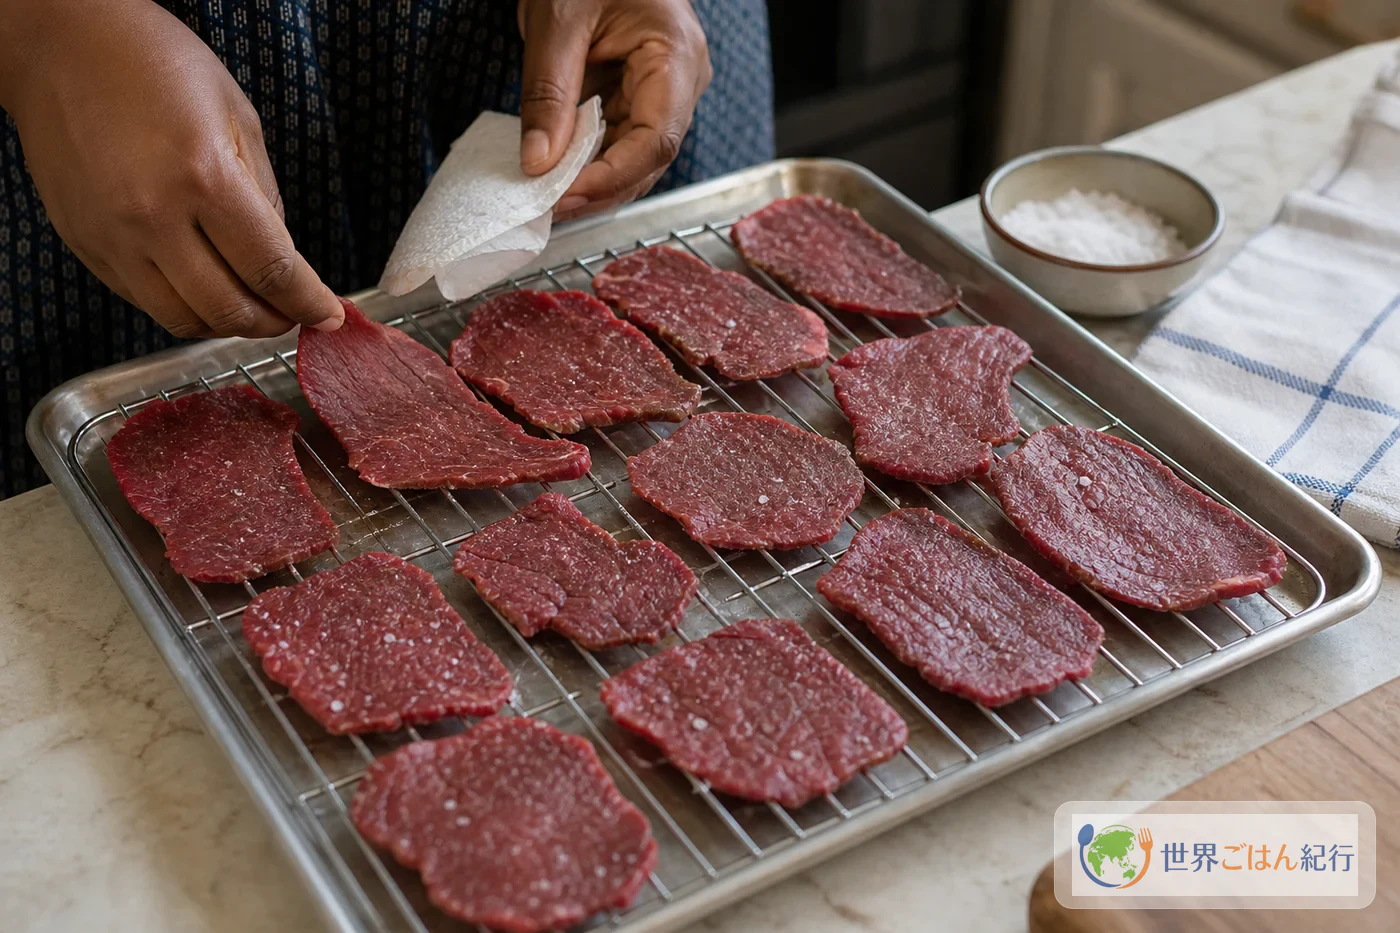
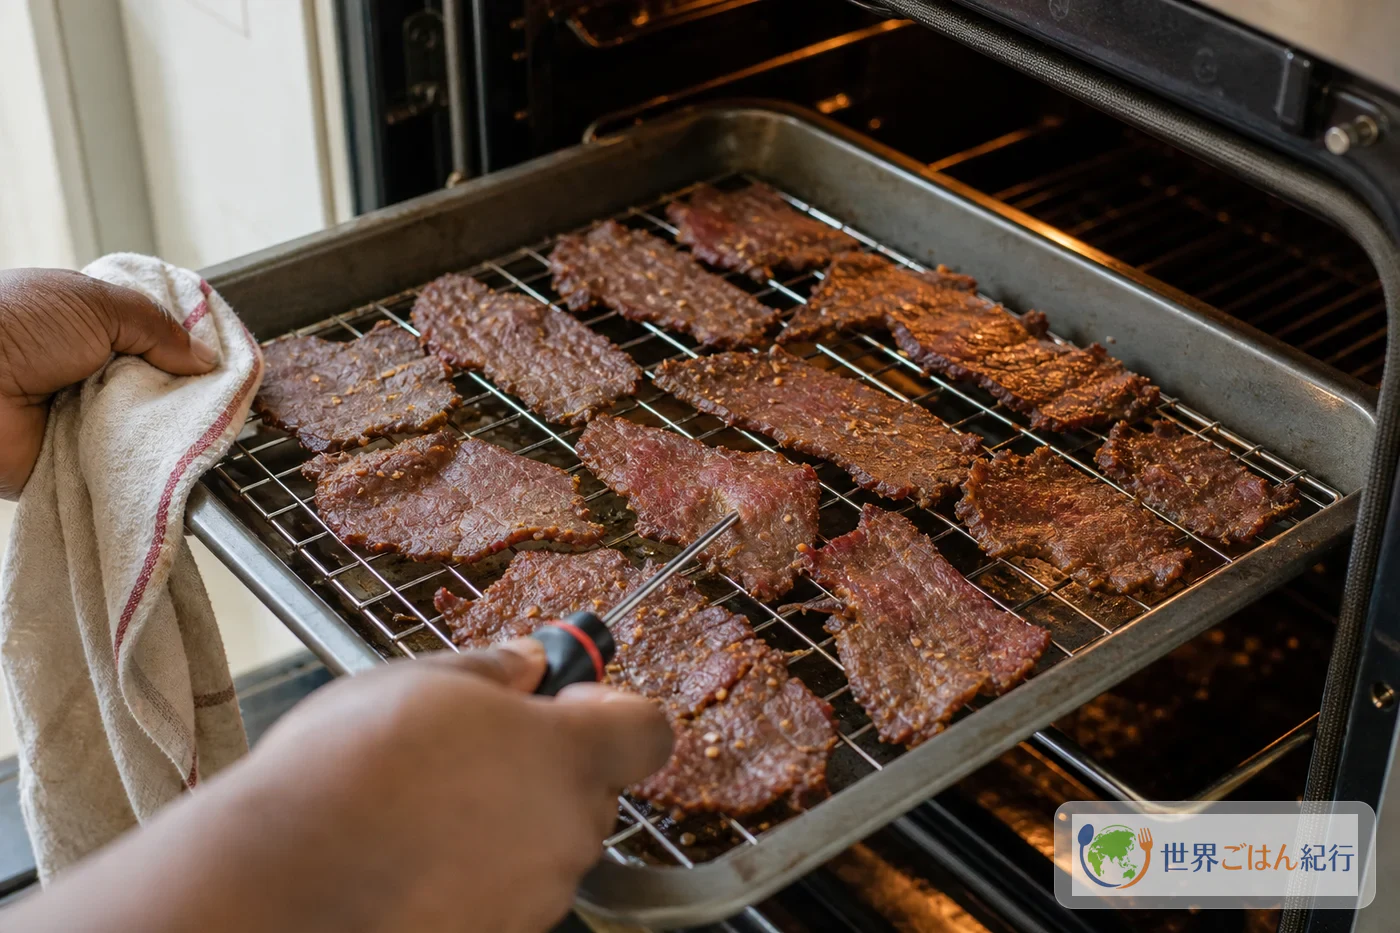
Traditionally, kilishi is dried in the sun and finished over fire. Hanging meat outdoors is hard to keep hygienic at home, so here it dries in the oven. The beef is heated first and its center temperature checked before the low-temperature drying begins. Each step still does the same job: thin lean meat, a groundnut paste, two-stage drying and a toasty finish.
Ingredients (serves 4): shopping so you can make the labu
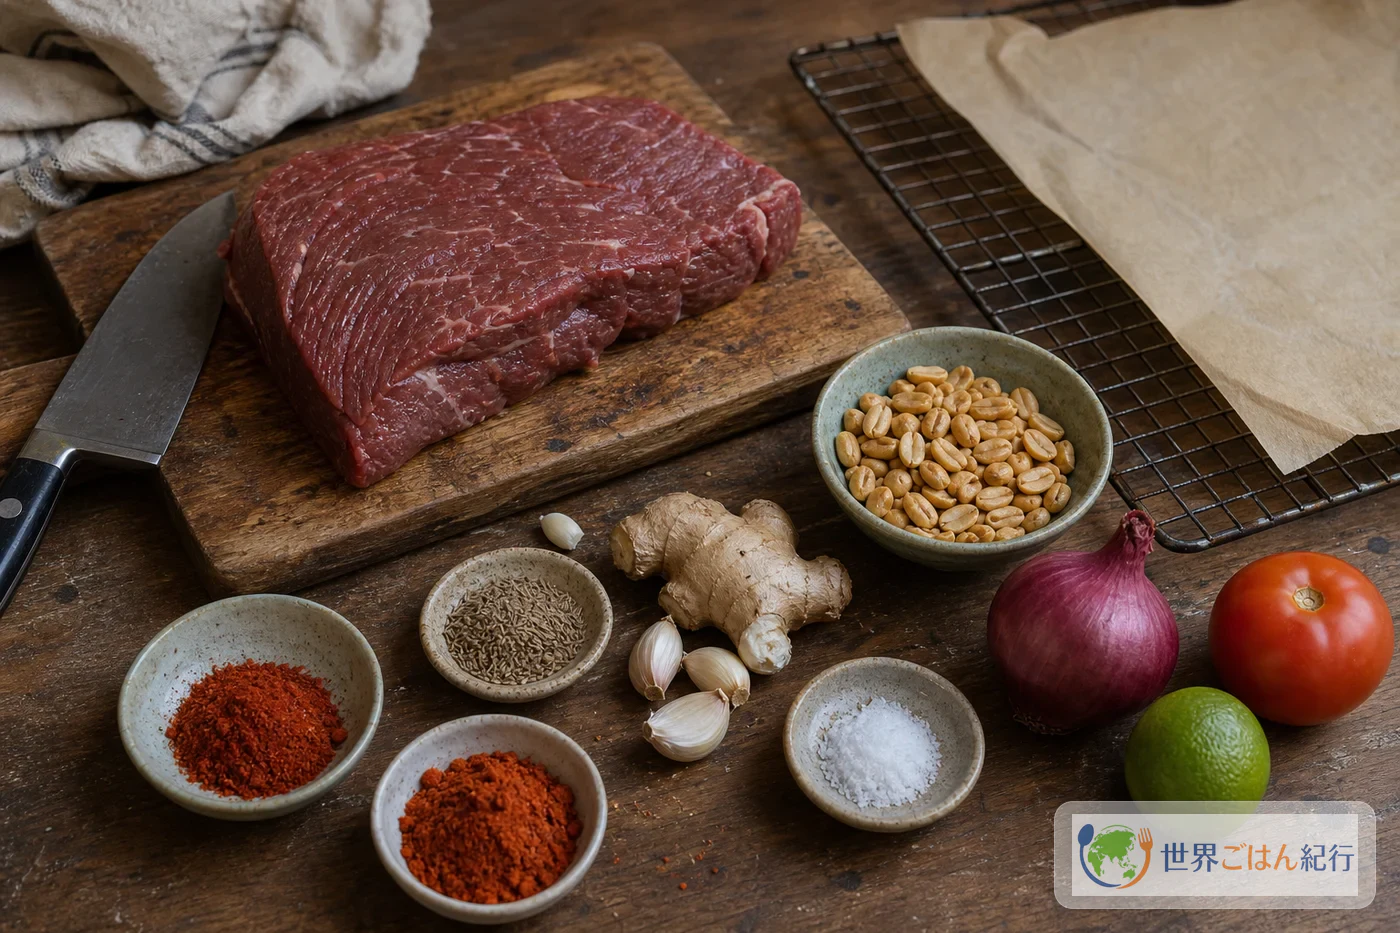
This amount serves four as a nibble. Don't heap it up as a main; set it beside onion, tomato and a grain dish. If the beef has a lot of fat, oil seeps out during drying and the labu won't hold. For a first batch, choose beef round or rump.
Choosing unsalted, oil-free peanuts lets you control the saltiness and viscosity of the labu. Beef, onion and tomato are easy to buy anywhere, so they need no special sourcing. Since only 2.75 oz (80 g) of peanuts is used, a 2.25 lb (1 kg) bag is not something to finish with this dish alone. It suits someone who will make labu several times or use peanuts in sweets and stir-fries too.
Cumin is optional, but it steers the aroma away from the sweet, heavy taste that peanut and chile alone tend to give, toward something better suited to a dry meat dish. If you grind whole spices yourself, the aroma comes out differently. Don't use the same amount as powder; start with a little and adjust.
A mortar works well for the labu. Grind the peanuts to a coarse flour with some pieces left, rather than a complete paste all at once. Crush 2.75 oz (80 g) in several batches in a small mortar. An electric mill or a mortar you already have is enough.
Choosing Meat and Peanuts for Kilishi
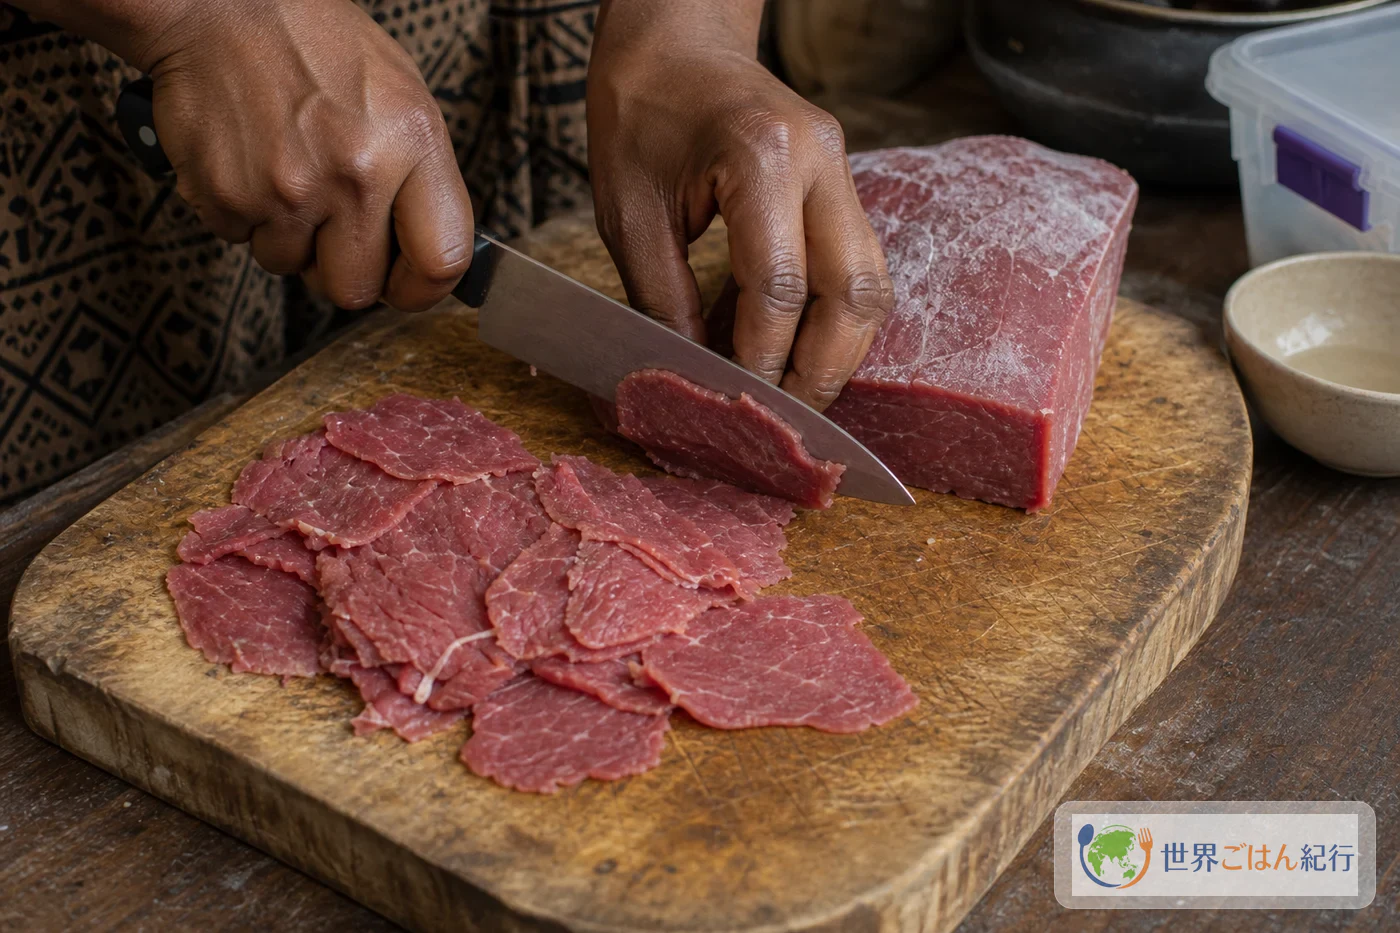
Thickness decides the texture of kilishi, more than browning does. Thick meat takes longer to dry, and its surface holds moisture under the labu. Cut lean beef round, rump or lean shoulder evenly to 2–3 mm. Mutton or goat works too, but only if you choose a lean cut and can slice it to the same thickness. With a fatty cut, oil seeps out during drying and the labu slides off.
For the paste, grind unsalted whole roasted peanuts. Peanut oil or a sugary peanut butter changes the viscosity and browning of the labu, and whole peanuts are easier to adjust. Cumin and paprika round out the aroma.
| What the cook changes | Range in local kitchens | Substitution at home |
|---|---|---|
| Meat | Beef, mutton, goat. Thin lean slices | Beef round or rump. Mutton or goat only if cut to the same thickness |
| Paste | Groundnut or groundnut cake, bean flour and aromatics, chile | Unsalted roasted peanuts, onion, ginger, spices |
| Drying | Sun, ventilated drying, solar dryers | An oven or food dehydrator where you can set the temperature |
| Finish | Roasted over fire after the second drying | Additional heating at 275°F (135°C), then 350°F (180°C) for just 2–3 minutes |
You don't have to match every local ingredient name. Learn the process with readily available beef round first, then change only the meat.
Method: heat safely, then dry
Kilishi goes in this order: slice thin, cook first, dry, apply labu, dry again. Don't try to make raw meat safe by drying alone; check the center temperature first. Jerky follows the same approach: heat before drying, and add heat after drying.
Kilishi Problems and Fixes
If only the parts of the meat thicker than 0.125 inch (3 mm) stay soft, keep drying at 158°F (70°C) in 10–15 minute steps. Judge by how dry the meat feels to your finger, not by browning. Once you move to high heat with a hard surface and a wet center, there's no undoing it. Meat that's thin and breaks has been overdried, so next time stop as soon as the surface is dry and apply the labu then.
When the labu drips onto the rack, add ground peanut 1 tsp at a time to bring back its body; adding water makes it worse. If it's already on the meat, give it another 5–10 minutes of low-temperature drying, and move to the 275°F (135°C) heating once the surface has set. If the aroma is weak, resist sprinkling chile or cumin on afterward, which tastes powdery. Instead, add a little cumin to the next batch of labu and keep the final 350°F (180°C) to just 2 minutes.
Serving and Storing Kilishi
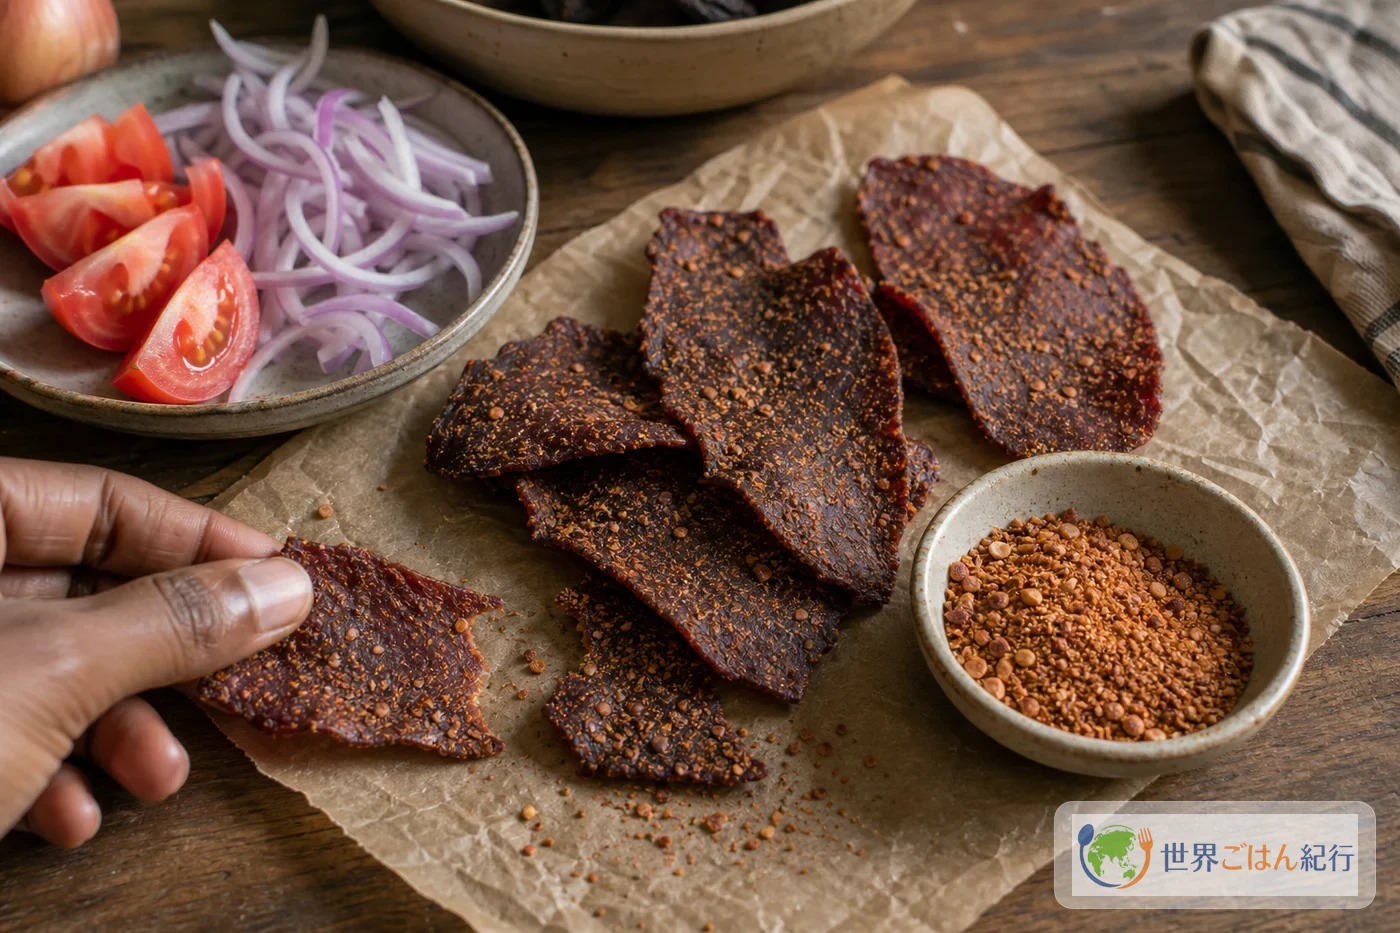
Serve kilishi with red onion, tomato and lime, beside a grain dish. It isn't meant to be piled up as a main. Eat it a little at a time between bites of moist onion and lime, so the peanut and chile don't feel heavy.
Storage
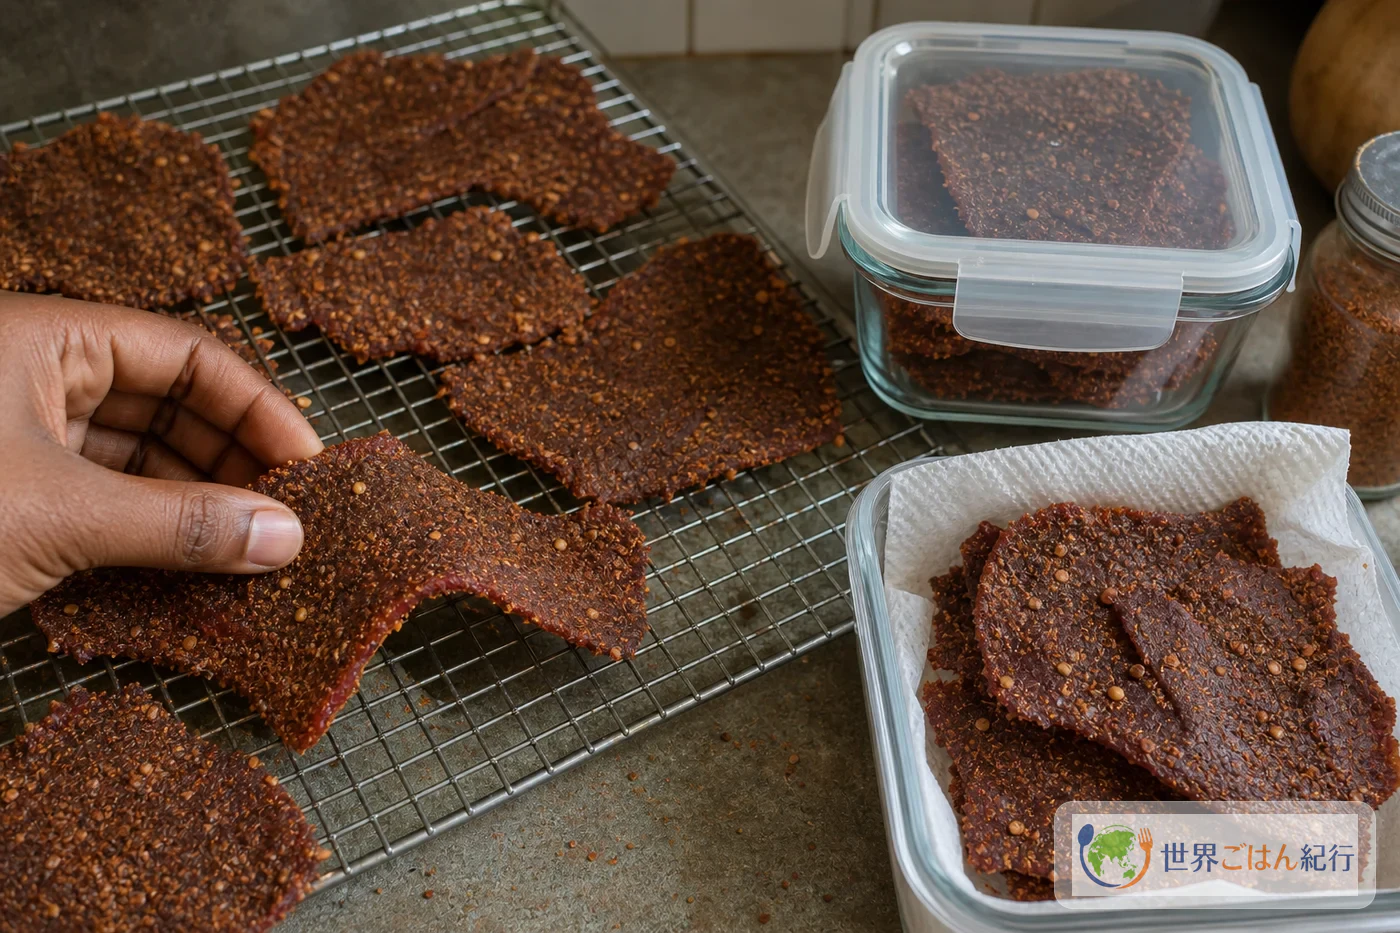
Cool the finished kilishi on the rack for about 15 minutes to let the surface steam escape, then transfer it to a shallow container. Keep the red onion, tomato, lime and cucumber in a separate container; moisture from the vegetables will soften the meat you worked so hard to dry. Home-made kilishi isn't shelf-stable, so keep it in the refrigerator or freezer.
| What is stored | Duration | Handling before eating |
|---|---|---|
| Finished kilishi | 2 days refrigerated | Warm in a toaster oven at 250°F (120°C) for 3–4 minutes |
| Frozen kilishi | 3 weeks | Thaw in the refrigerator and warm at 250°F (120°C) for 5 minutes |
| Labu alone | 1 day refrigerated | Contains raw onion, so use up by the next day |
| Side vegetables | Same day | Serve separately from the meat |
This recipe is not for shelf-stable dried meat. Home ovens, cutting boards and storage containers cannot control water activity and hygiene the way commercial production does. Cool it slightly once finished, and eat it within 2 days refrigerated or 3 weeks frozen. It contains beef and peanuts, so do not serve it to anyone with allergies.
A toaster oven reheats kilishi better than a microwave, which pulls moisture back to the surface and makes the peanut coating heavy. The coating scorches easily, so cover it lightly with aluminum foil and uncover it for the last minute to bring the aroma back. If you notice an off smell, sliminess or extra moisture in the container, throw it out, even within the storage period.
FAQ
Can I leave out the peanuts?
Not if you want kilishi. The peanuts give the labu its aroma, its coating and its slightly rough texture. If anyone eating has a peanut allergy, make a different spiced dried meat that uses no peanuts rather than a substitute version.
Can I make it in a food dehydrator?
Yes. First heat the meat in the oven and check that the center reaches 160°F (71°C) or higher. Then set the dehydrator to 158°F (70°C) or higher and dry until the surface is dry. Airflow differs by model, so judge by the meat's thickness and how dry the surface feels, not by time alone.
Can I carry it at room temperature?
Keep home-made kilishi cold. Even in a lunch box, pack it with an ice pack and finish it the same day.