Khanom Chan: Thai Nine-Layer Steamed Coconut Pandan Dessert

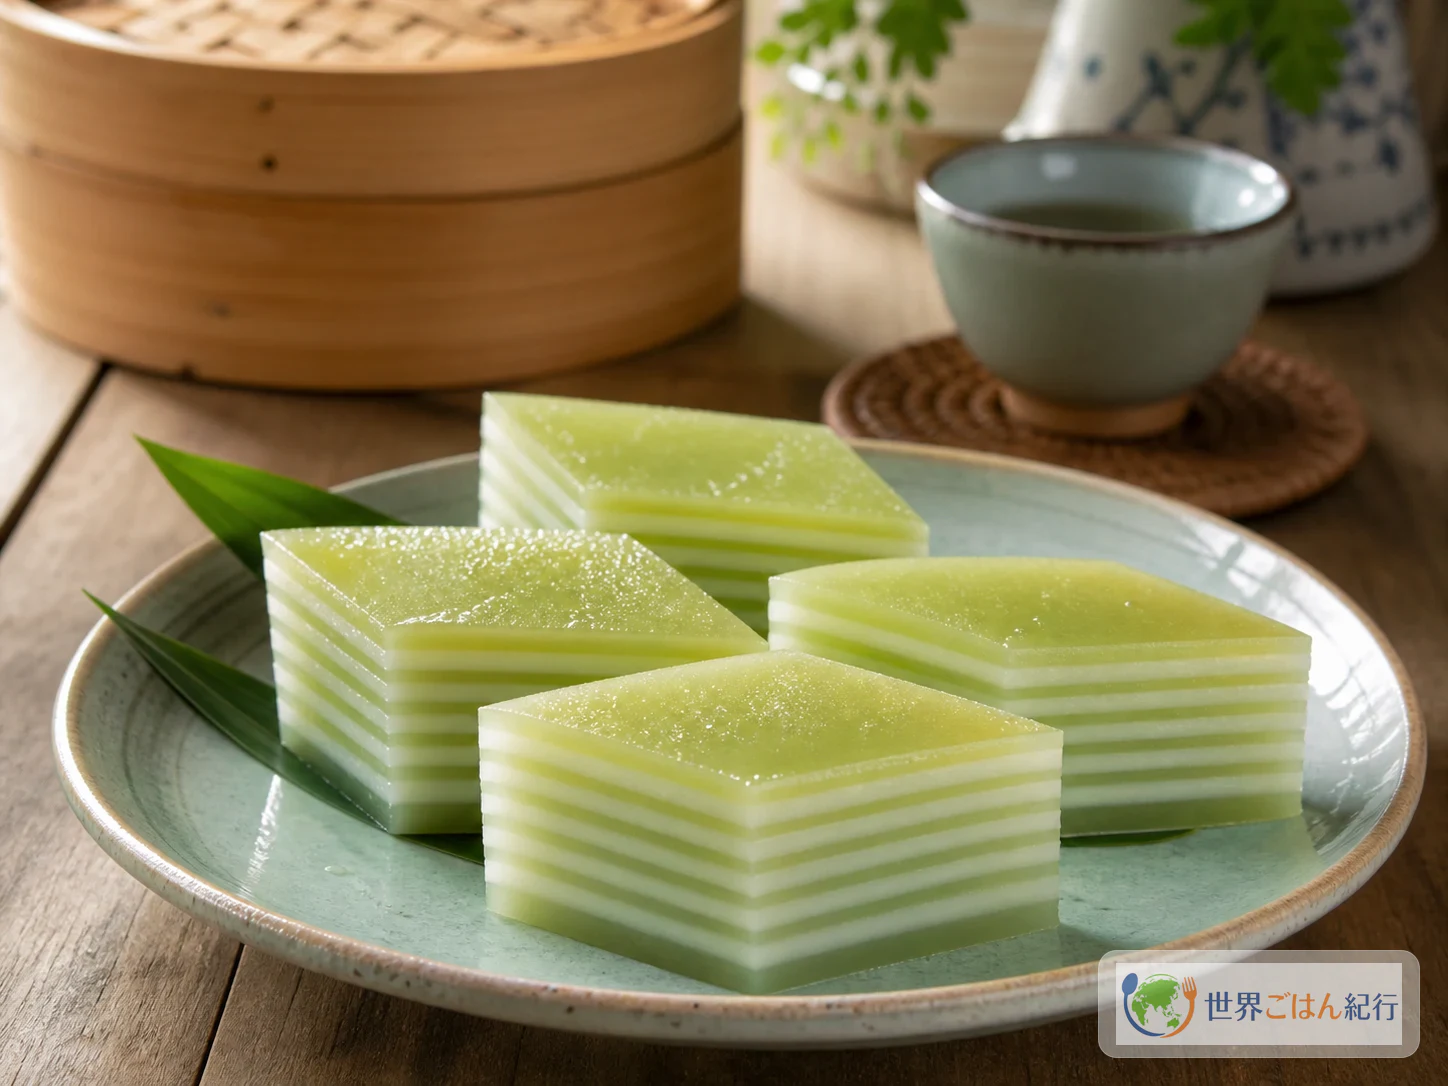
A plate of Thai khanom chan steamed in nine green and white layers and cut into diamonds
Prep
45 min
Cook
55 min
Total
1 hr 40 min
Serves
6 servings (one 18 cm square pan, 9 layers)
Level
Intermediate
Cuisine
Thai

A home recipe for khanom chan (ขนมชั้น), the auspicious Thai layered dessert, steamed in nine green and white layers in an 18 cm pan. Covers pandan substitutes, why tapioca starch matters, how to tell each layer is set, fixing cracks and drip marks, and storage.

Cooking flow

Cooking steps

STEP11 / 8

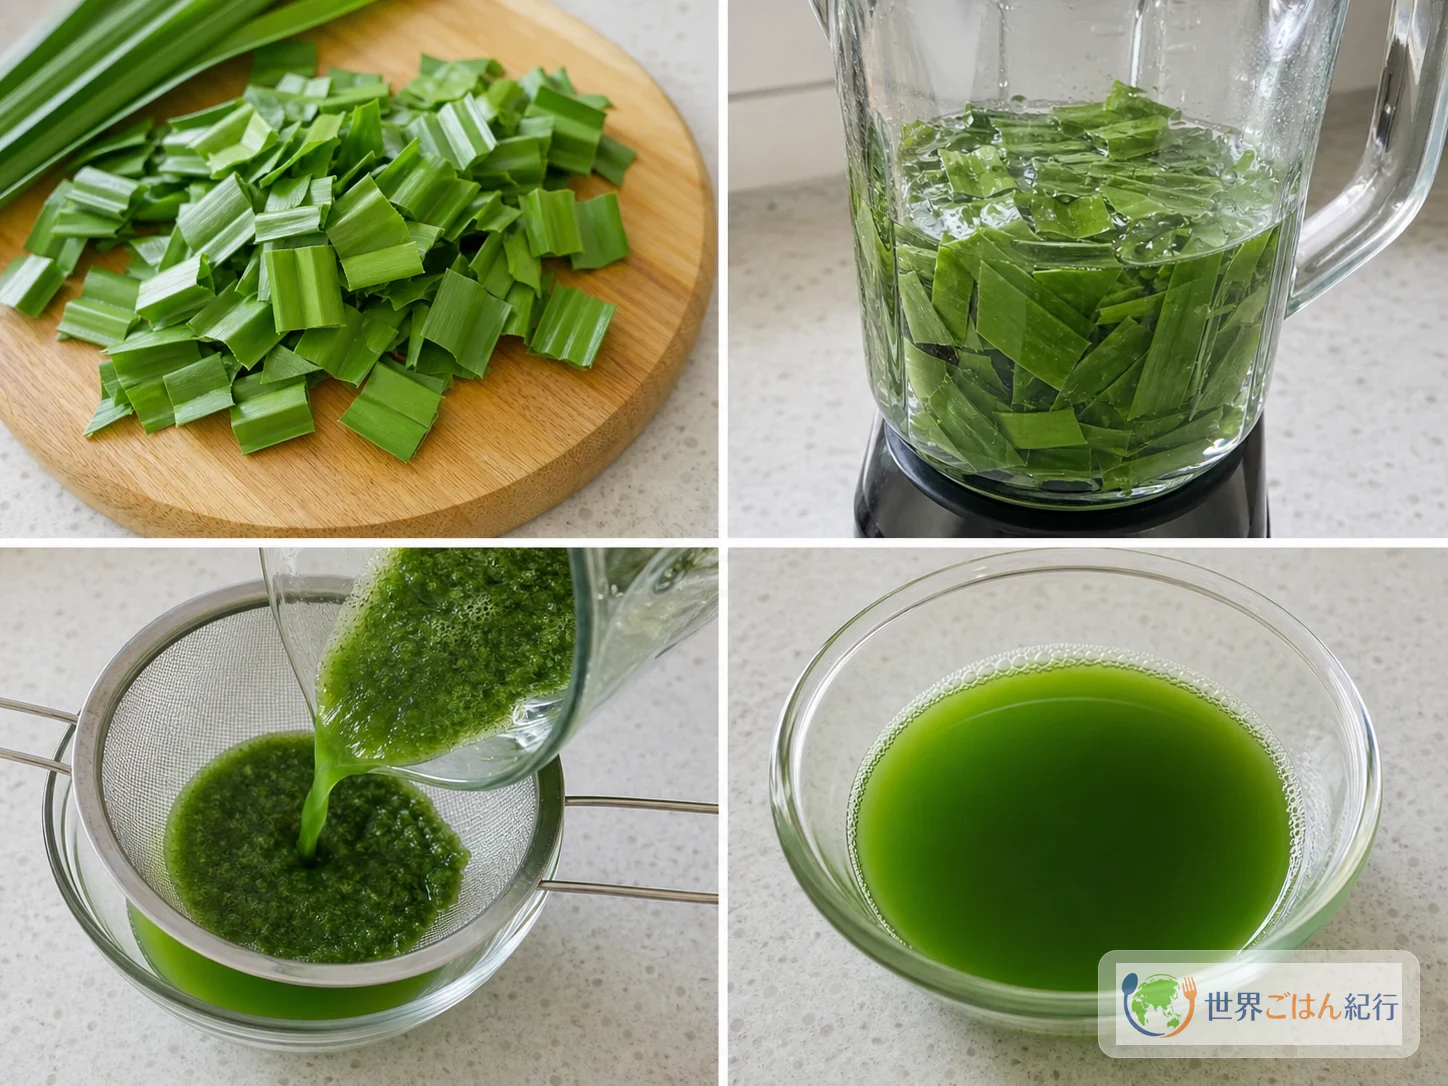
Make the pandan water

10 min

Blending pandan leaves with water and straining out the green liquid
Strain out the pandan fibers; the goal is to carry the aroma into the batter, even more than the color

Wash the pandan leaves and cut them into about 1 inch (2–3 cm) pieces. Put the leaves and the ¼ cup (80 ml) water in a blender and blend until no fibers are visible. Line a strainer with a paper towel and press the mixture through it to collect a smooth green liquid. It should run off a spoon in a thin line with no visible grit. Aim for ¼ cup (60–70 ml).

If you have no pandan, skip this step and use the ¼ cup (80 ml) water as is. Simply dividing a white batter in two works fine. If you use pandan extract, follow the dilution on the label and reduce the water by the amount of liquid you add. Adding too much in search of a stronger aroma can give a chemical smell, so start small.

STEP22 / 8

Make the coconut sugar syrup

8 min

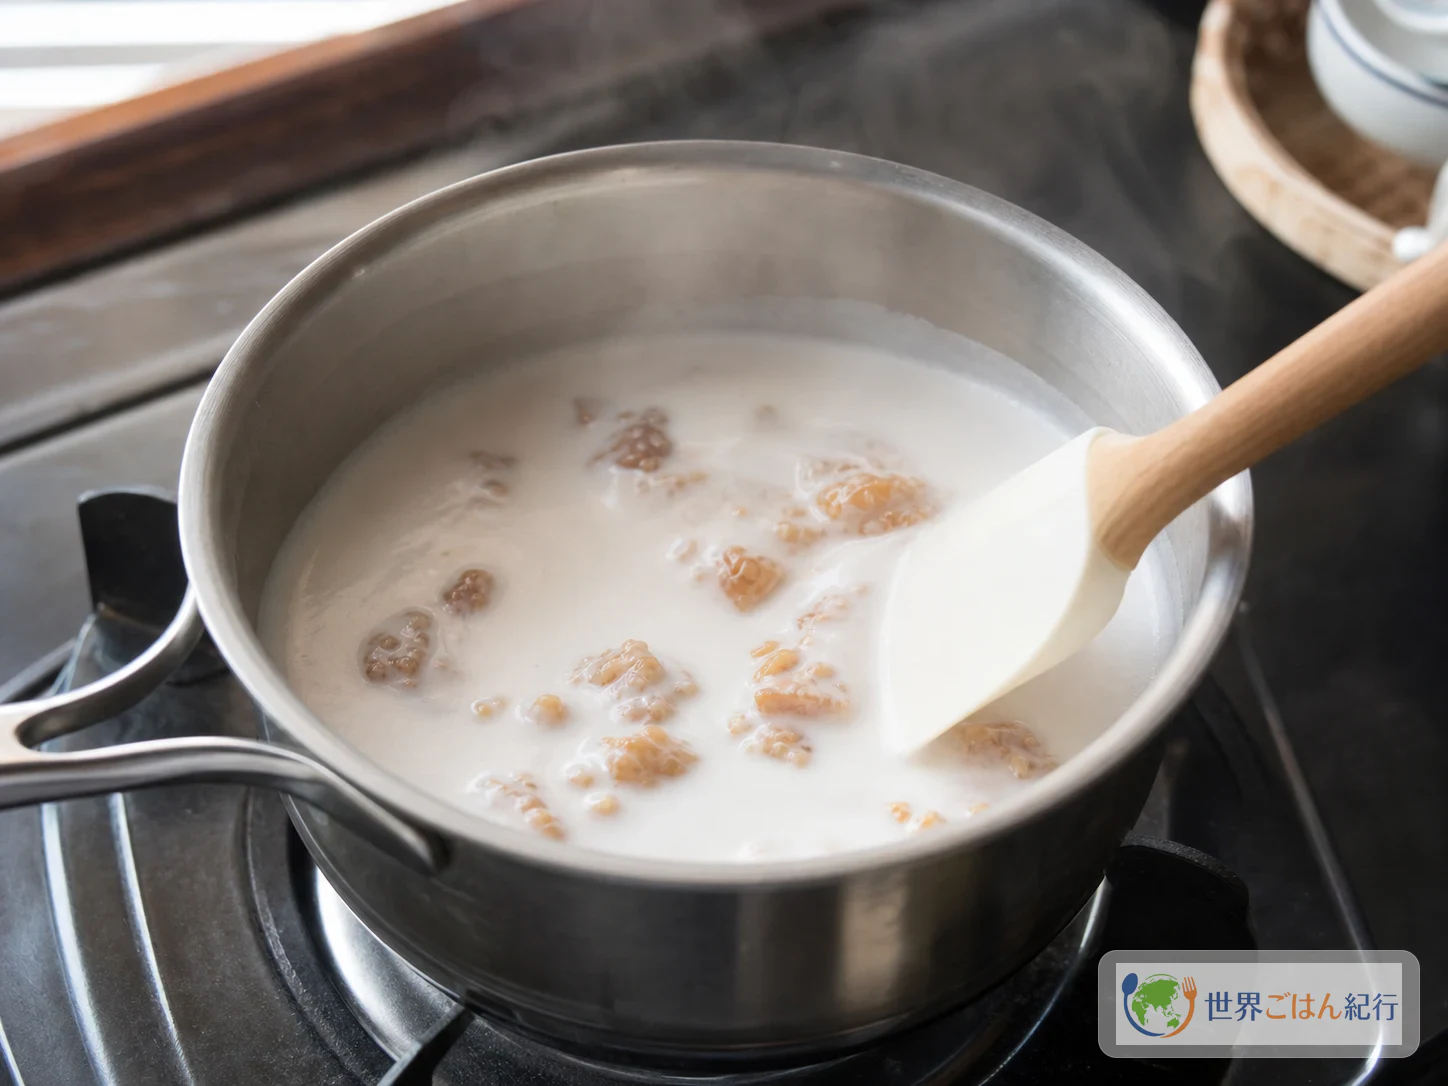
Melting palm sugar into coconut milk over low heat
Don't boil the coconut milk; take it off the heat as soon as the sugar disappears

Put the 400 ml coconut milk, 110 g sugar and 2 g salt in a small saucepan over low heat. Without letting it boil, warm it while running a silicone spatula across the bottom of the pan until the sugar granules disappear. You're aiming for about 60–70°C (140–158°F): steaming, but with the surface not bubbling.

Turn off the heat and let it cool to 40°C (104°F) or below. If you pour it into the flour while hot, some of the tapioca starch gelatinizes and forms lumps. At this stage it should taste just a little salty. Steaming softens the edge of the sweetness, and cooling brings the aroma together.

STEP33 / 8

Mix the flours and divide into two batters

12 min

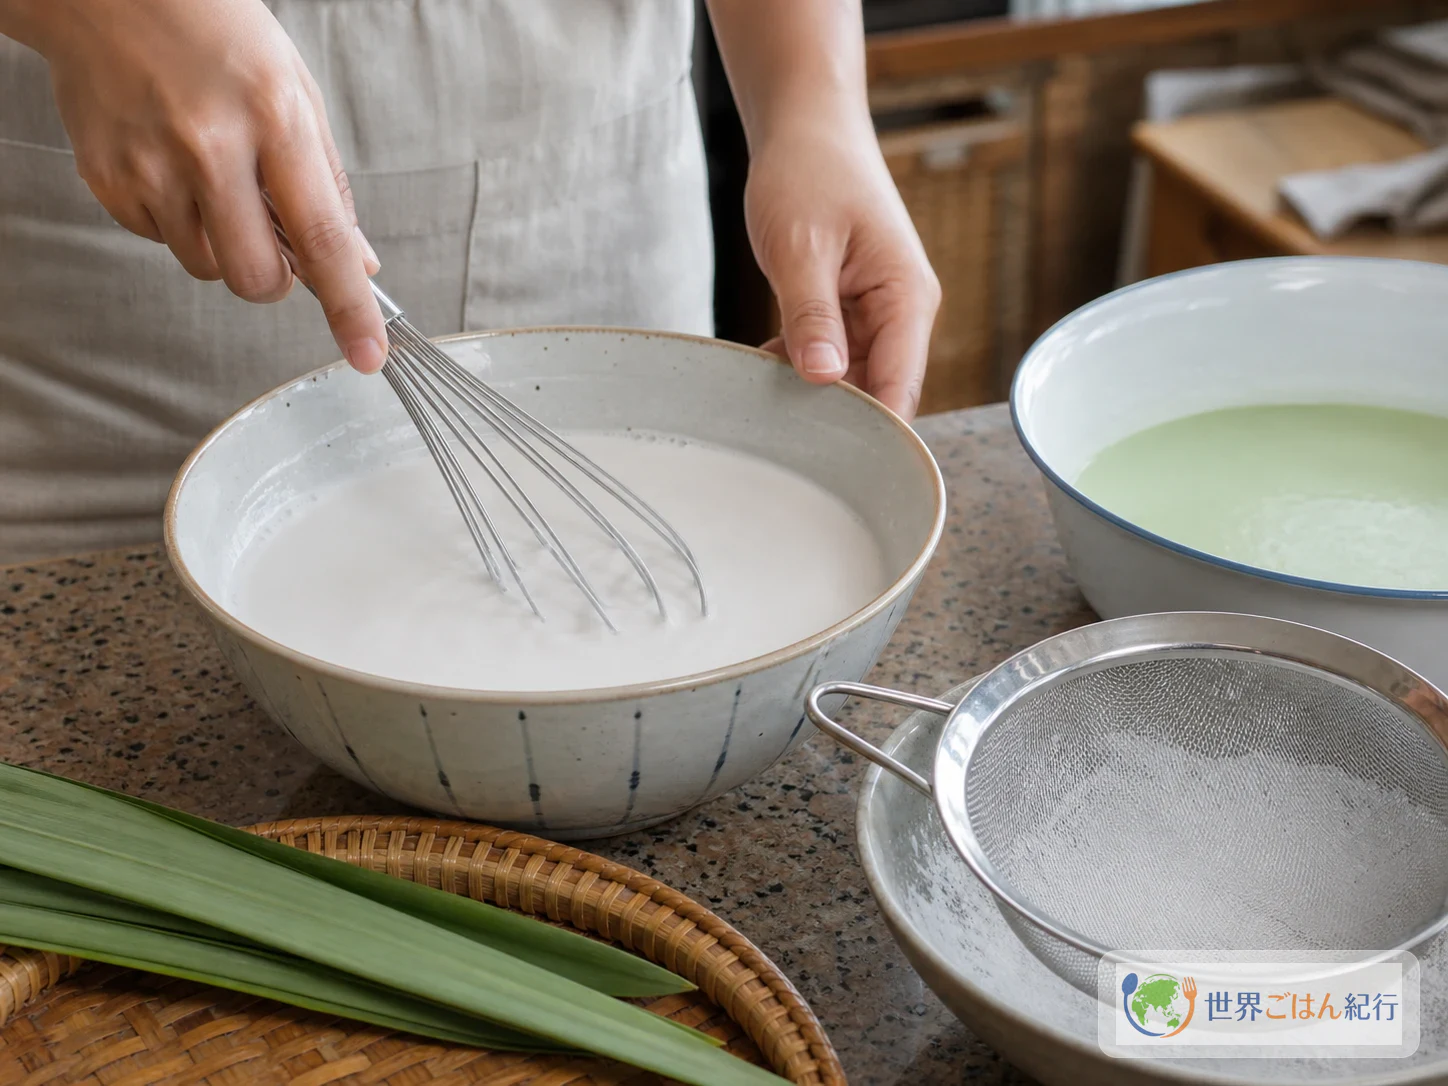
Pouring the coconut syrup into the flours and straining into a smooth batter
Strain the batter before dividing it into two colors, and add a little extra starch to the green batter to make up for the liquid

Put the 2.75 oz (80 g) rice flour, 4 oz (120 g) tapioca starch and 1.5 oz (40 g) kudzu or potato starch in a bowl and whisk for 30 seconds. Add the cooled coconut syrup in three additions, mixing each time to crush any pockets of flour. Add the ½ cup (120 ml) water too, bringing it to a consistency a little thinner than a loose pancake batter. When you lift the whisk, the batter should fall in a thin ribbon, and the trail should disappear in about 2 seconds.

Pour it through the strainer into another bowl. If it's too thick, add water 2 tsp at a time; if too thin, add rice flour 1 tsp at a time. It's easier to adjust if you hold back some of the water and match the consistency at the end.

Divide the batter evenly between two containers. Add the ¼ cup (60–70 ml) pandan water to one and leave the other white. If only the green batter has become thin, mix in the 8 g tapioca starch and 4 g rice flour set aside for adjusting to bring it back. Strain once more and check that no starch has settled at the bottom.

STEP44 / 8

Bring the steamer to a strong boil first

5 min

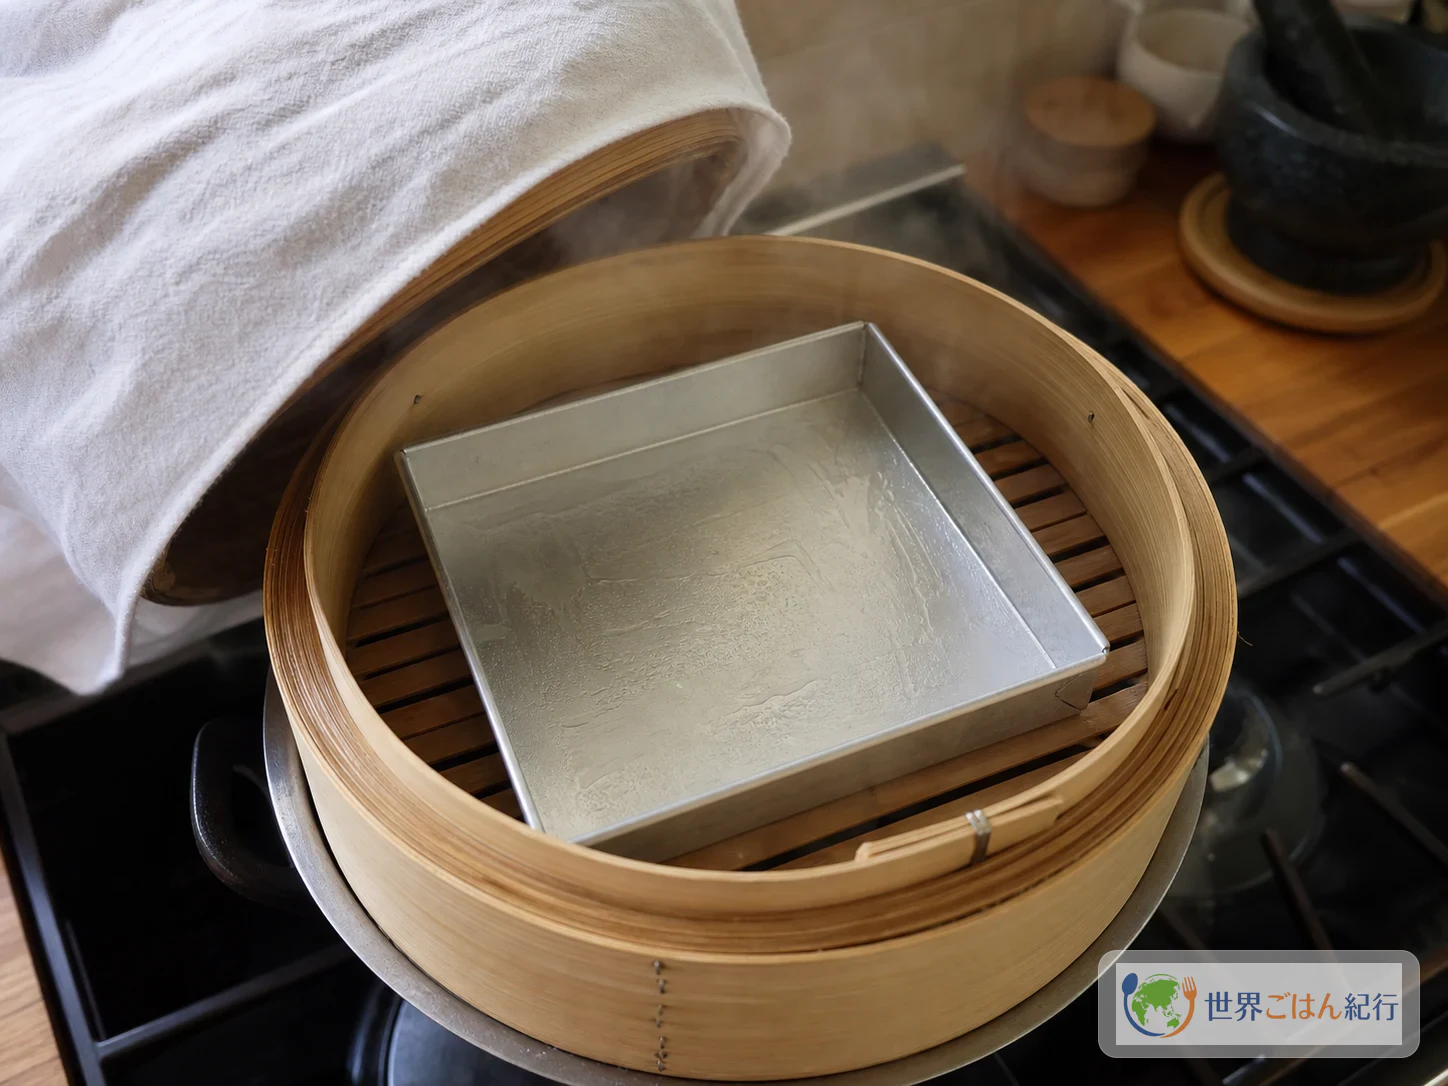
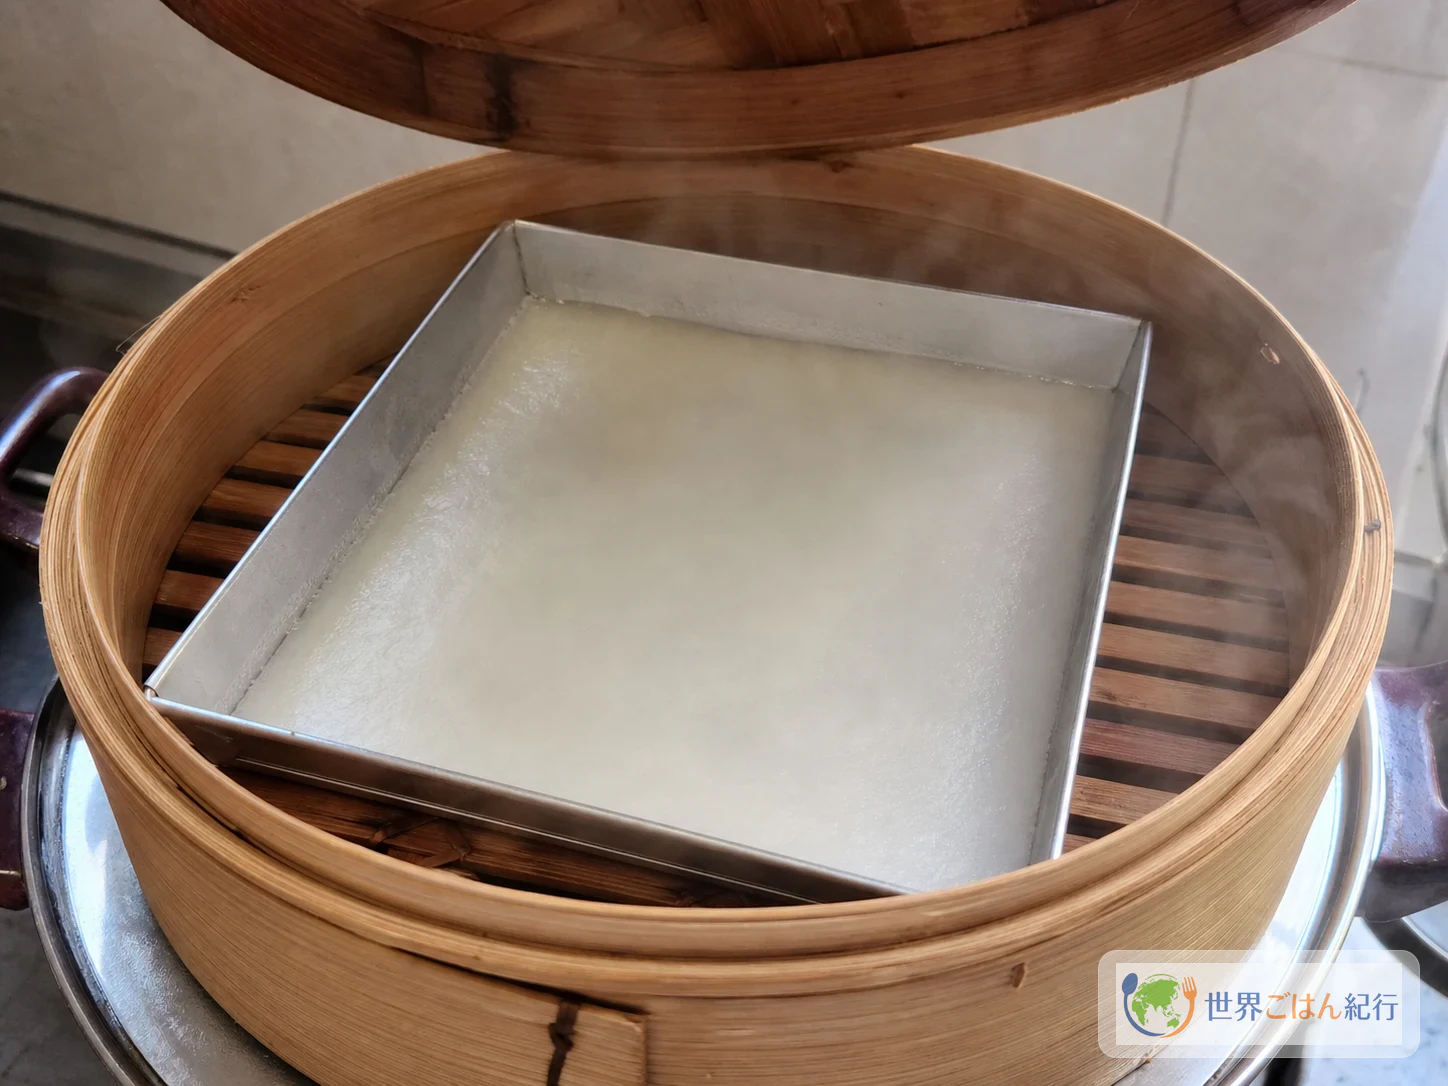
Heating an empty oiled square pan in a bamboo steamer with a towel-wrapped lid
Heat the pan level, and let the towel catch the drips from the lid

Put 1.5 quarts (1.5 L) water in the steamer and bring it to a boil over high heat. Stretch a clean kitchen towel tightly around the inside of the lid so the steam doesn't escape. Brush the inside of the pan thinly with vegetable oil, set it in the steamer and heat it for just 2 minutes. You're ready when steam rises steadily from the edge of the lid without stopping and the pan is hot.

Warming the pan helps the first layer spread thin and even. If you don't have a pot that fits a steamer, a deep pot with a metal steaming rack works. What matters is that the pan stays level and out of the water.

STEP55 / 8

Set the first layer

6 min

Steaming a thin first layer of white batter in an 18 cm square pan
Pour the first layer thin and steam until the surface no longer ripples

Stir the white batter well from the bottom, until no starch has settled and the surface is uniformly smooth. Measure 70 ml in a measuring cup, pour it into the warmed pan, cover, and steam over medium-high heat for 5–6 minutes. Move on when the surface turns from translucent to milky white, no liquid comes off on a light fingertip touch, and the surface doesn't ripple when you shake the pan.

Keep each layer at about 70 ml (a little under 1/3 cup). If a layer is too large, the next one goes on before the center has set, and the stripes blur. The first layer only needs to be thick enough that you can't see the bottom of the pan through it. Not trying to make it thick is the shortcut to a clean cross-section.

STEP66 / 8

Alternate green and white layers

40–45 min

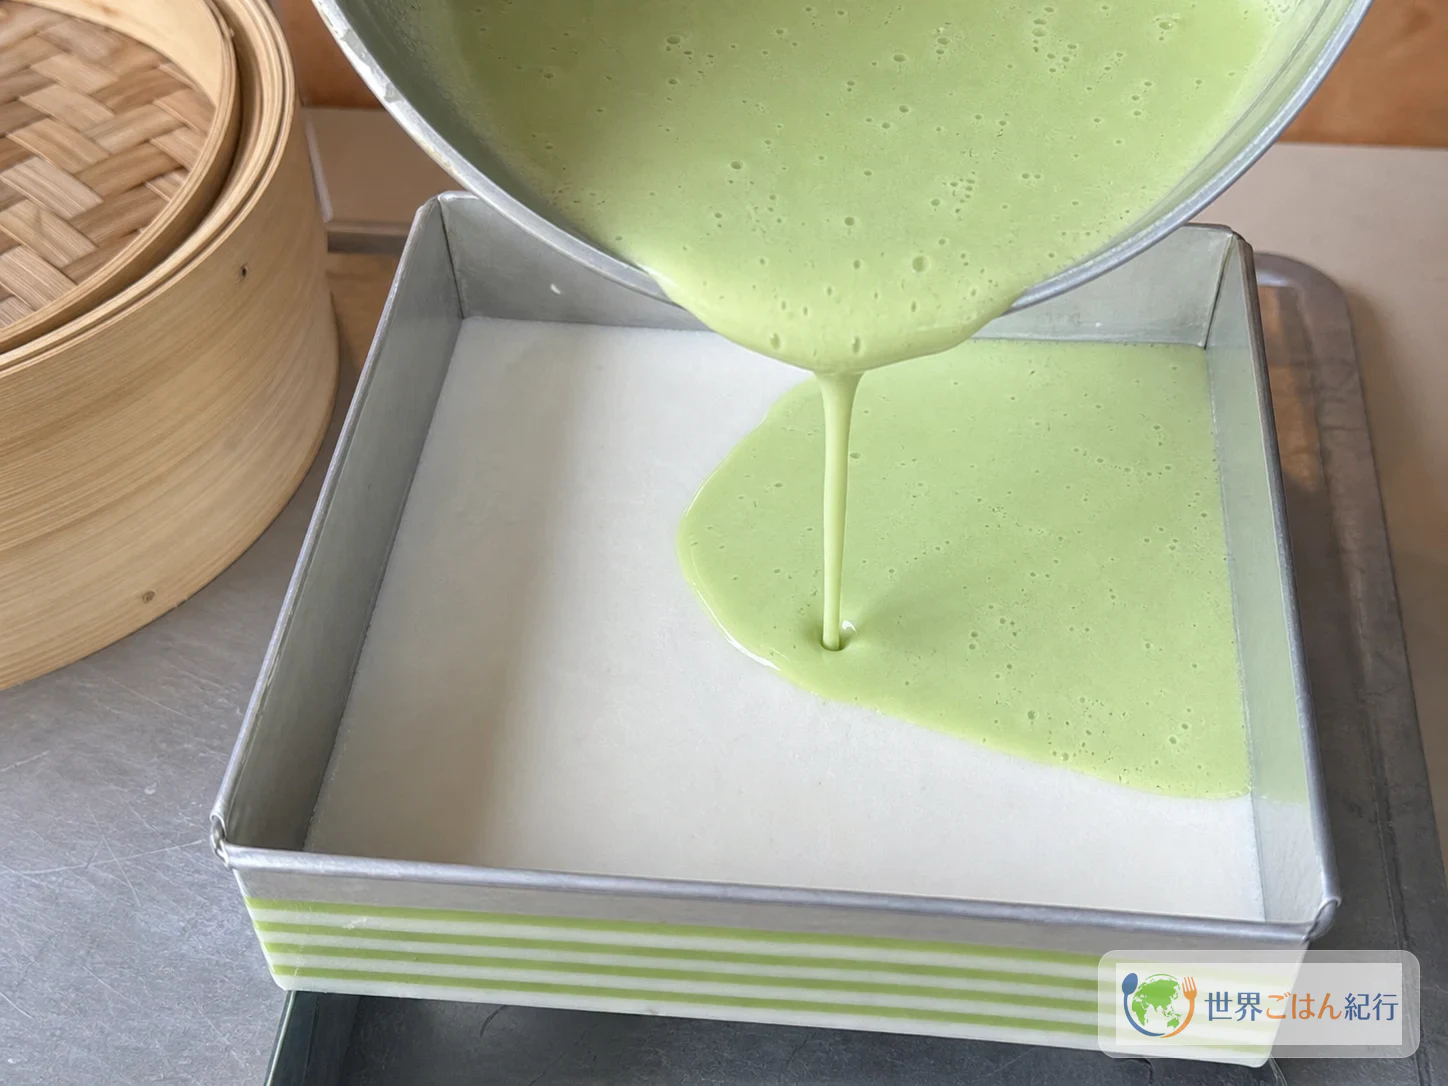
Measuring white and green batter and pouring them in turn over the set layers
Keeping each layer at about 70 ml makes the nine stripes thin and even

Once the first layer has set, stir the green batter from the bottom. Check that it has the same consistency as the white and pours from the measuring cup in a thin ribbon, then measure 70 ml and pour it gently into the center of the pan. Dropping it hard onto one spot punches a hole in the layer below, so pour from close to the surface and let it spread slowly. Cover and steam for 5 minutes, and once the surface has set, add the same amount of white batter.

The nine layers go white, green, white, green, white, green, white, green, white. Each time you open the lid, wipe the condensation from the inside with the towel. The starch settles at the bottom of the batter, so always stir about 10 times before pouring. If only the green batter has thickened, stir it gently in the measuring cup; don't add more water.

If the surface hasn't set in 5 minutes, the heat is too low or the layer is too large. If liquid is still there after 7 minutes, don't rush the next layer; extend the steaming 2 minutes at a time until it sets. Conversely, if layers dry out and crack, the steam is too strong or the lid is open too long. Bring the heat back to medium-high and pour quickly.

STEP77 / 8

Steam the final layer through

8–10 min

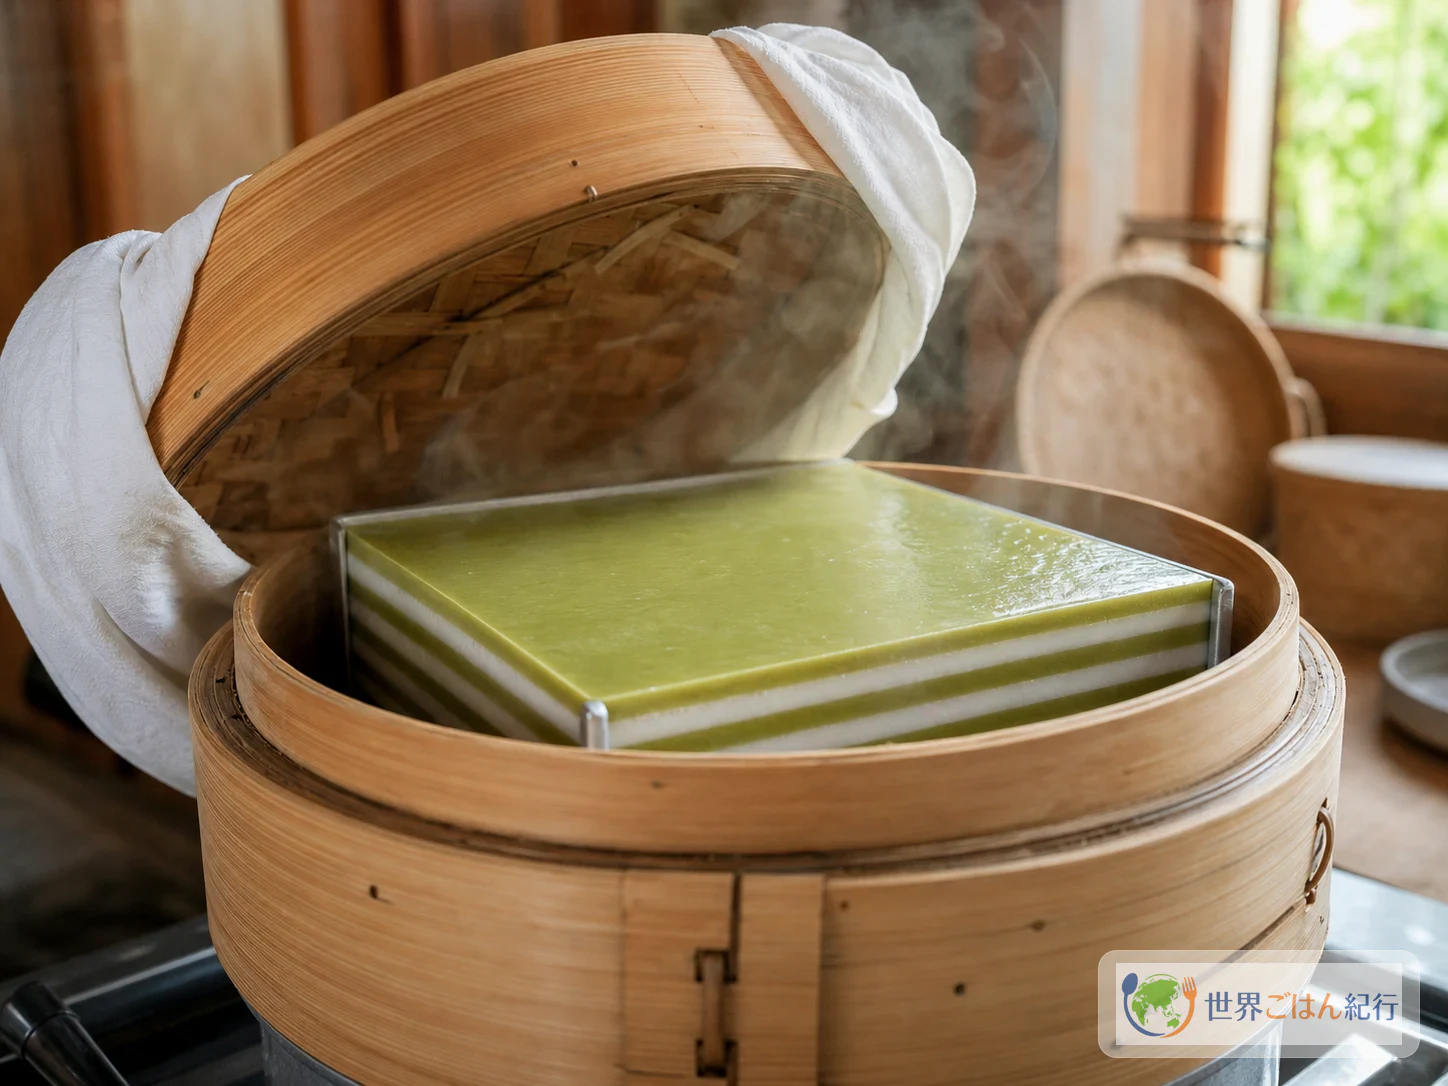
Steaming the nine-layer khanom chan under a towel-wrapped lid
Set the last layer all the way to the center, and open the lid a little before cooling

After pouring the ninth layer, pop any surface bubbles lightly with a bamboo skewer and close the lid. For this last layer only, don't judge at 5 minutes; steam for 8–10 minutes so it sets all the way to the center. Turn off the heat when the surface is a glossy milky white and only the very center wobbles slowly when you shake the pan.

Taking the lid off suddenly can let cold air dent the surface. Turn off the heat, open the lid 1 inch (2 cm), wait 1 minute, then open it fully. Remove the pan and cool it on a rack for 20 minutes. If you cut it while hot, the layers slide and the green bleeds into the white, so wait until the center is below body temperature.

STEP88 / 8

Cool and cut into diamonds

15 min

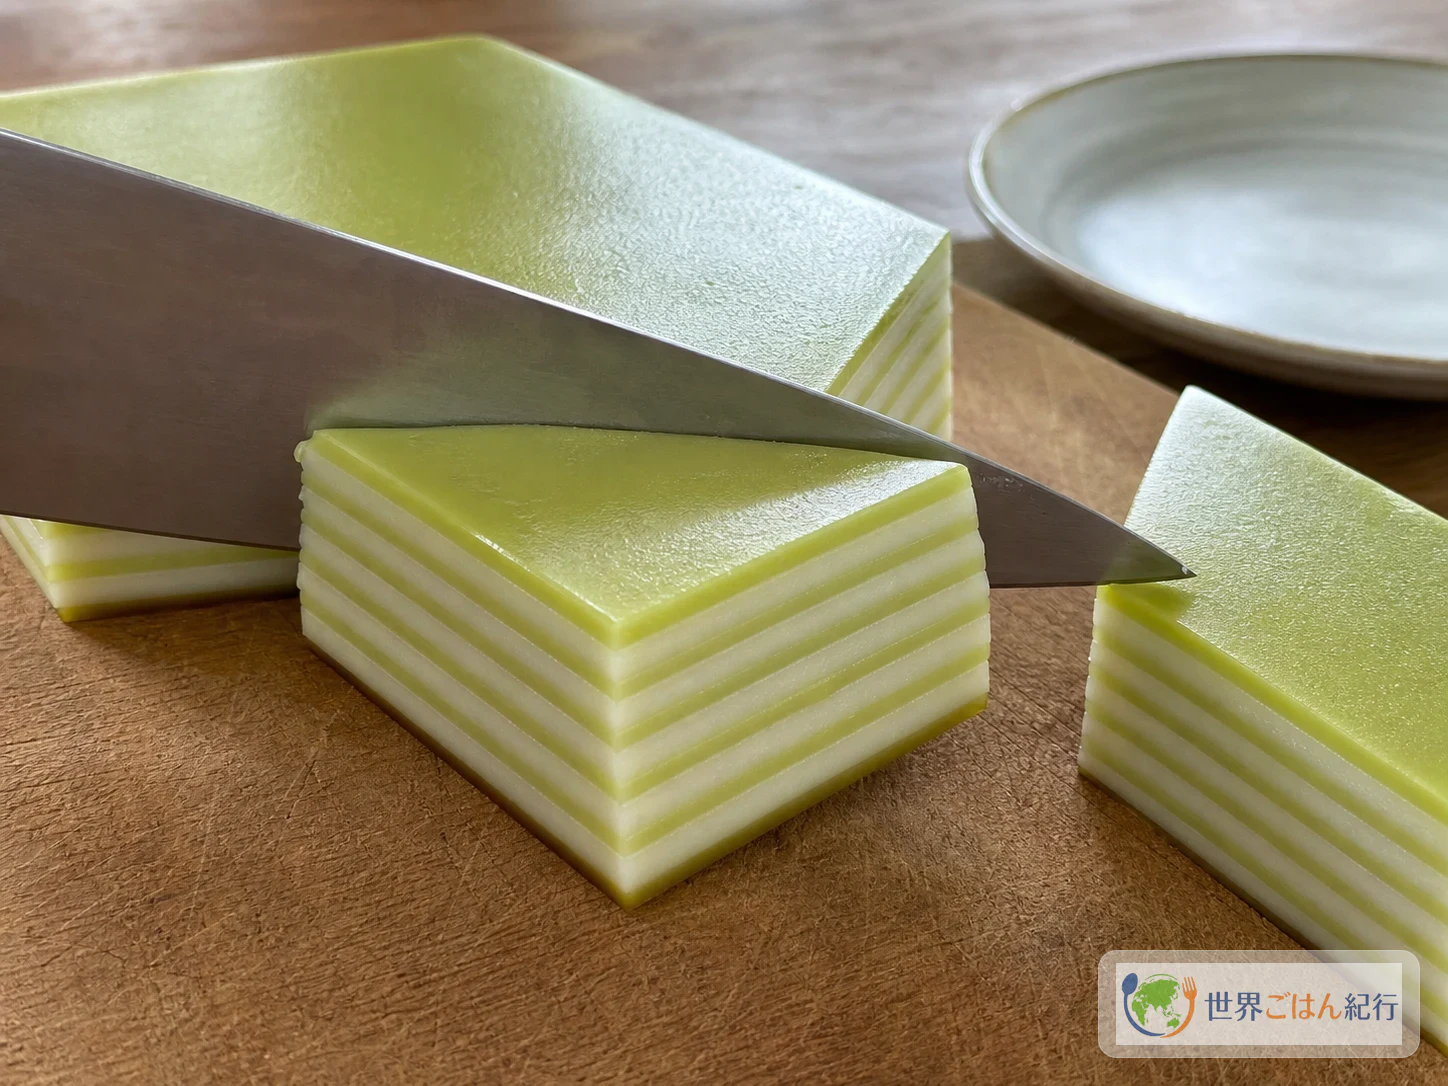
Cooled khanom chan cut into diamonds showing nine green and white layers
Cutting after a short cooling with an oiled knife keeps the layers from getting crushed

Run a thin knife around the sides of the pan, dip the bottom in warm water for a few seconds, and turn it out onto a cutting board. With a lightly oiled knife, cut it into strips 1 inches (3 cm) wide, then cut on the diagonal into diamonds. Wiping the knife with a damp cloth after every cut keeps the green from smearing onto the white.

It's ready to cut when the surface isn't dry and springs back slowly when pressed. Chilling it too much in the refrigerator hardens the tapioca bounce, so let the portions you're serving sit at room temperature for 15 minutes. Nine visible layers in the cut face, white layers that aren't cloudy and green that isn't dull mean success.

0 / 0
Ingredients

Ingredients

1 / 1

Basic batter

Ingredient Amount Role and how to choose
Rice flour (joshinko or fine rice flour for baking) 2.75 oz (80 g) The structure of the white layers. Avoid mixes that contain wheat
Tapioca starch 4 oz (120 g) Gives a supple bounce and translucency
Kudzu starch or potato starch 1.5 oz (40 g) Kudzu gives a smoother result, potato starch a slightly lighter one
Coconut milk 1¾ cups (400 ml) Unsweetened, canned. Shake well before opening
Palm sugar or light brown cane sugar 4 oz (110 g) Palm sugar has a deeper aroma; cane sugar tastes lighter
Salt 2 g Sharpens the sweetness and lifts the coconut
Water ½ cup (120 ml) Brings the batter to a pourable consistency
Pandan leaves 1 oz (30 g) Frozen is fine. Provides the aroma and green color
Water for pandan extract ¼ cup (80 ml) Blend with the leaves and strain. Not needed if using store-bought extract
Vegetable oil 1 tsp For a thin coat on the pan
Tapioca starch / rice flour (for adjusting) 8 g / 4 g Use only if the green batter turns thin
0 / 0

Picture it: you lift the steamer lid just a crack, and behind the white steam you see a pale green surface. You pour in the next layer of batter and close the lid again. After the ninth round of steam, when you slice into it, all that patience shows on the cut face as stripes. Thailand's khanom chan (ขนมชั้น) is made from rice flour, tapioca starch, coconut milk and sugar, steamed one layer at a time. It has a supple, chewy give from the rice flour and a light bounce from the tapioca. The green pandan layers bring a fresh, grassy aroma that arrives before the sweetness.

What khanom chan is and where it comes from

The Thai word chan means a level or tier. That is why khanom chan is a dessert for promotions and celebrations, and for wishing for them. It is well known in central Thailand. The overview of central Thai food culture and the guide to auspicious foods (both in Japanese) show how a dish's name can carry a wish as well as look good.
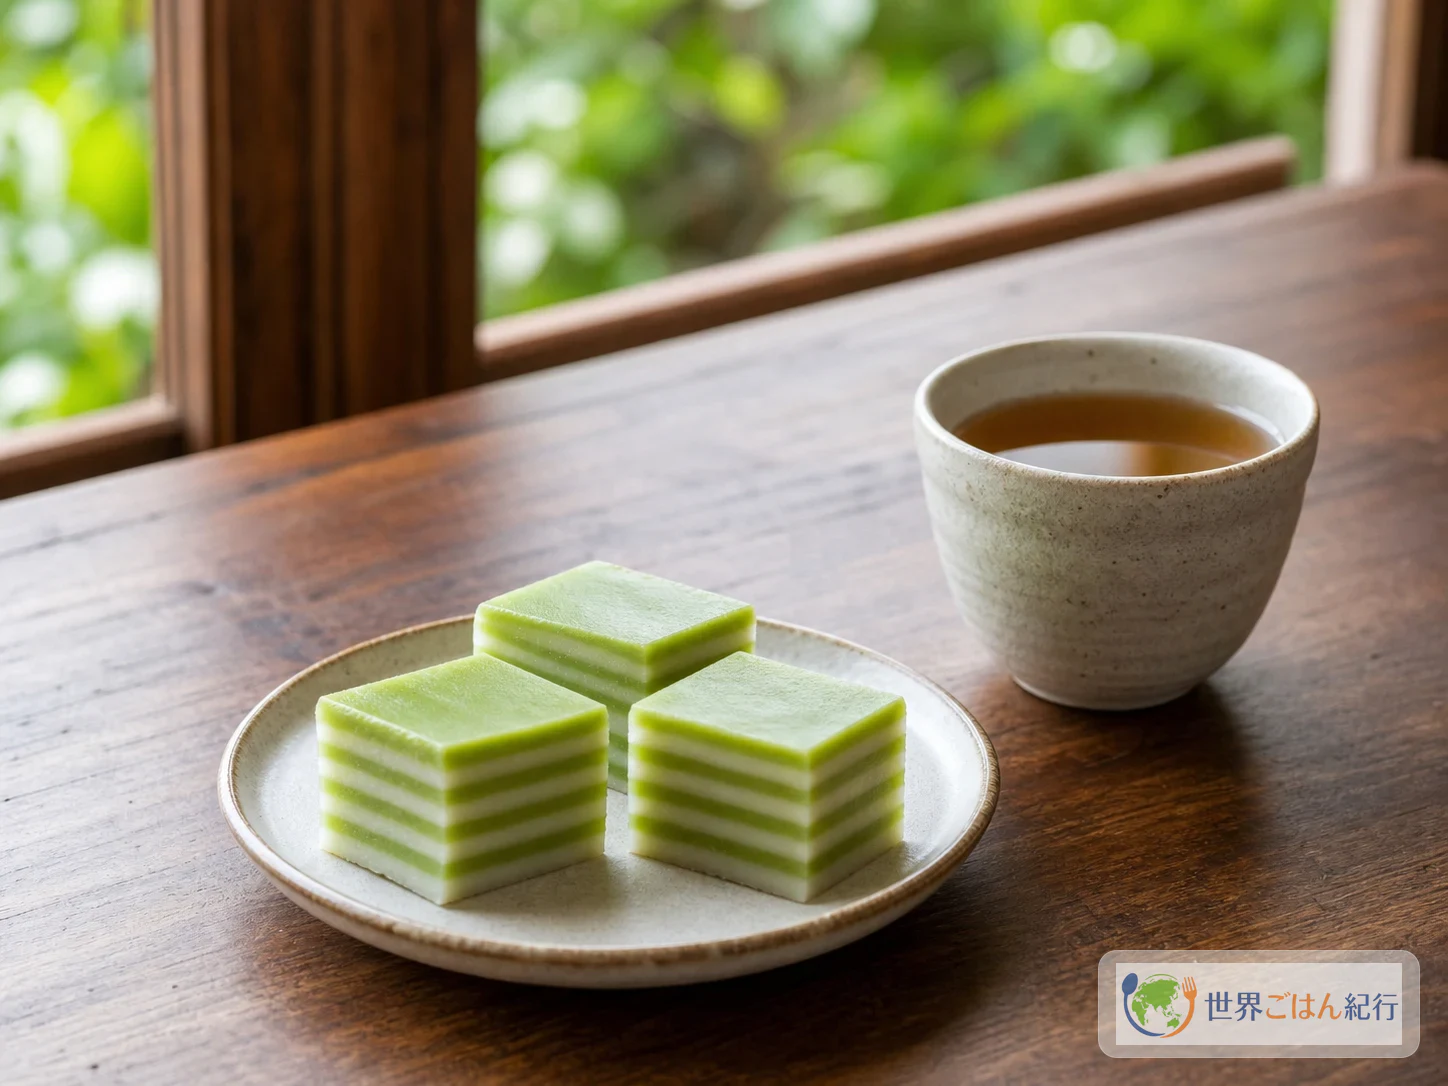
Green and white khanom chan set beside a steamer on a Thai dessert table
Khanom chan is a Thai celebration dessert that gains another green or white layer with every round of steaming

Thai celebration desserts aren't a contest of sweetness. The roundness of coconut, a thin line of salt and the grassy scent of pandan stack up, and the rice flour gives a quiet finish. The pandan also keeps the coconut in the white layers from feeling heavy. This version makes nine layers in a 7-inch (18 cm) square pan. Success comes down to three things: keeping the starch from settling, setting each layer before you pour the next, and not letting condensation drip from the lid.

Ingredients (7-inch (18 cm) square, 9 layers, serves 6)

These amounts keep the sweetness restrained, with a flour ratio that holds up the layers and a clear coconut aroma. Use a 7-inch (18 cm) square pan at least 1.5 inches (4 cm) deep. Metal or heatproof glass both work, as long as it sits level inside your steamer.
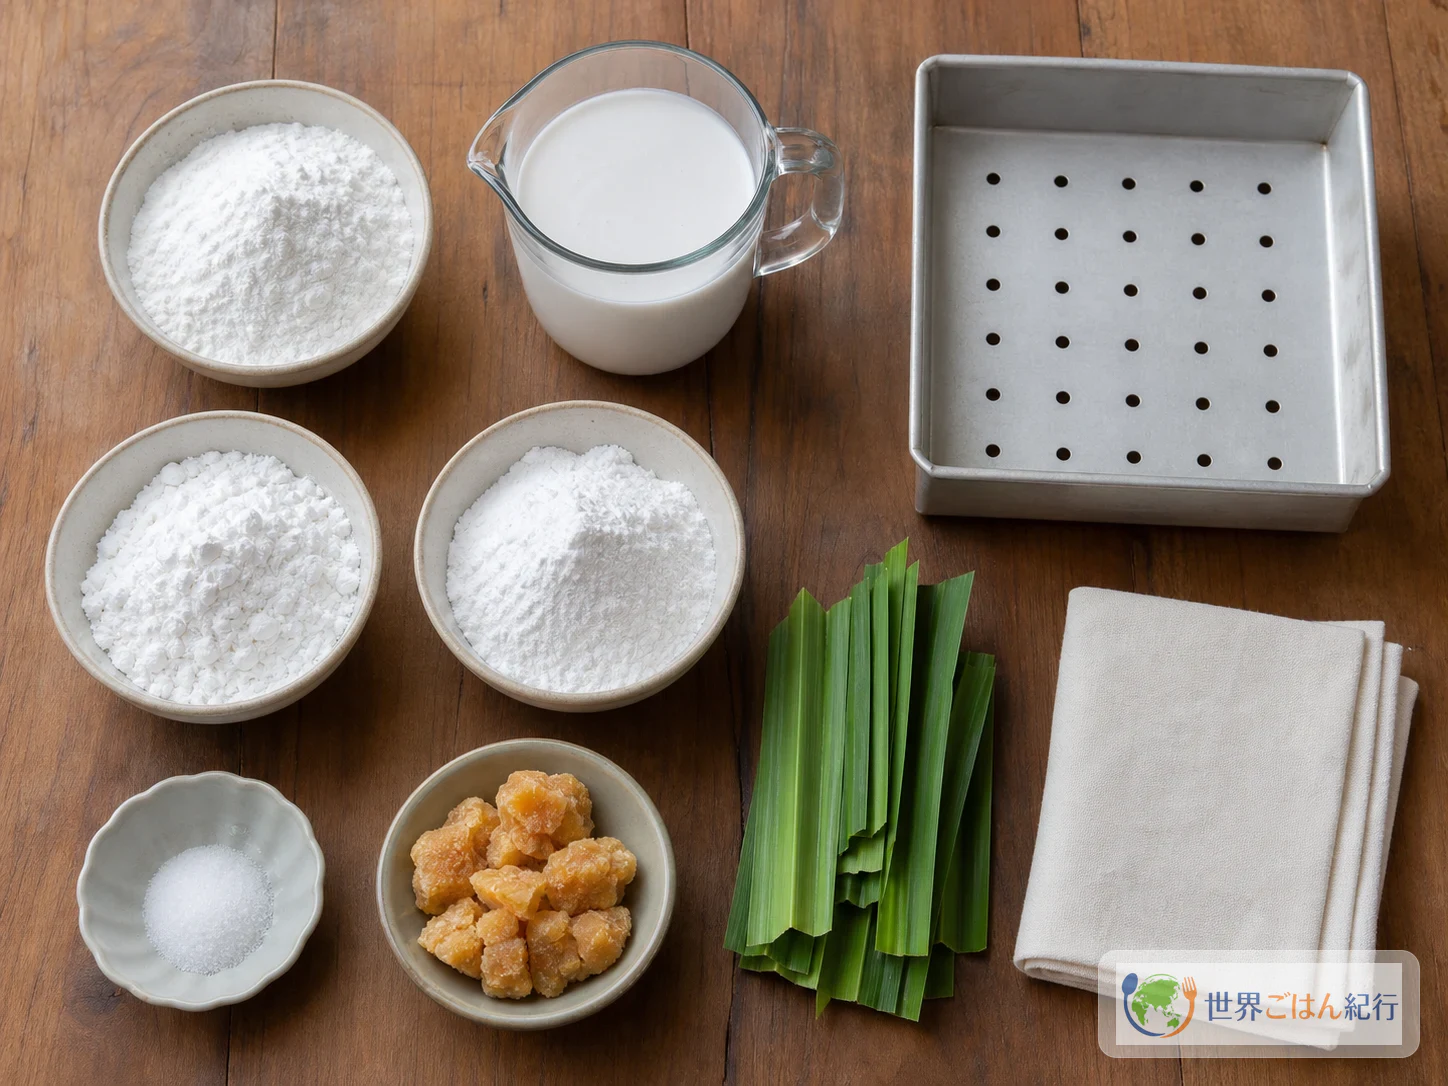
Rice flour, tapioca starch, coconut milk, palm sugar and pandan laid out for khanom chan
The texture of khanom chan comes from the flour ratio and the aroma of coconut

What you need for steaming

Tool or item Guideline What to check
18 cm square pan 1 Low enough not to touch the lid inside the steamer
Steamer or bamboo steamer 24 cm or larger Inner diameter wide enough to hold the pan level
Water for the steamer 1.5 L About 6 cups; enough not to boil dry over nine rounds of steaming
Kitchen towel to wrap the lid 1 Clean, so condensation doesn't drip onto the batter
Fine-mesh strainer 1 Removes pandan fibers and lumps of flour
Allergies and food safety

This recipe uses coconut, rice and tapioca. Kudzu starch, potato starch and coconut milk can be made on lines that also handle wheat, dairy, peanuts or tree nuts, so check the labels if you need to. Check the ingredient list too if you use pandan extract or food coloring. Once steamed, move it to a clean plate and store it after it has cooled. If you avoid wheat, check the packaging of the kudzu, potato and tapioca starches for a "contains wheat" statement as well.

Choosing ingredients and substitutes for khanom chan

Food coloring can recreate the green of pandan, but not its grassy aroma. Without the aroma, though, a cleanly steamed white batter will still show you what the khanom chan texture is about. Don't treat color and aroma as the same problem, and shopping gets much easier.

What you want Closest choice If you can't get it What changes
Pandan aroma 1 oz (30 g) frozen pandan leaves Make white layers only Less aroma and no green
Pandan green Pandan extract, used as the label directs A tiny amount of food coloring Color, but no aroma
Tapioca bounce 4 oz (120 g) tapioca starch 2.75 oz (80 g) potato starch, and raise the kudzu to 2.75 oz (80 g) Less translucent, with a slightly different bite
Palm sugar aroma 4 oz (110 g) palm sugar 4 oz (110 g) light brown cane sugar Sweet enough, but less of the caramel aroma
Kudzu starch 1.5 oz (40 g) kudzu starch 1.5 oz (40 g) potato starch Lighter rather than smoother

If you're making it only once, a version with potato starch will still hold its shape. If you're after the springy rebound of nine layers when you cut them, tapioca starch earns its place. With potato starch alone, the texture drifts toward a different dessert.

For coconut milk, choose an unsweetened can of about 1¾ cups (400 ml) whose ingredients are mainly coconut and water. Flavored coconut drinks won't work.

A 24 cm (9.5 in) bamboo steamer leaves room around an 18 cm square pan, with space to wrap the lid in a towel. A deep pot with a steaming rack works too. If you're buying a bamboo steamer, check the inner diameter (not the outer one), the number of tiers, the height of the lid, and whether it fits a pot you own.

Judge doneness by three signs, not the clock

Timing changes with your steamer and pan. The liquid on the surface is gone, the surface doesn't ripple when you shake the pan, and it springs back when touched. When all three line up, it's safe to move on to the next layer.

Common khanom chan problems and fixes

One mistake won't ruin the whole dessert. Each layer shows you what went wrong, so you can fix it on the next one.
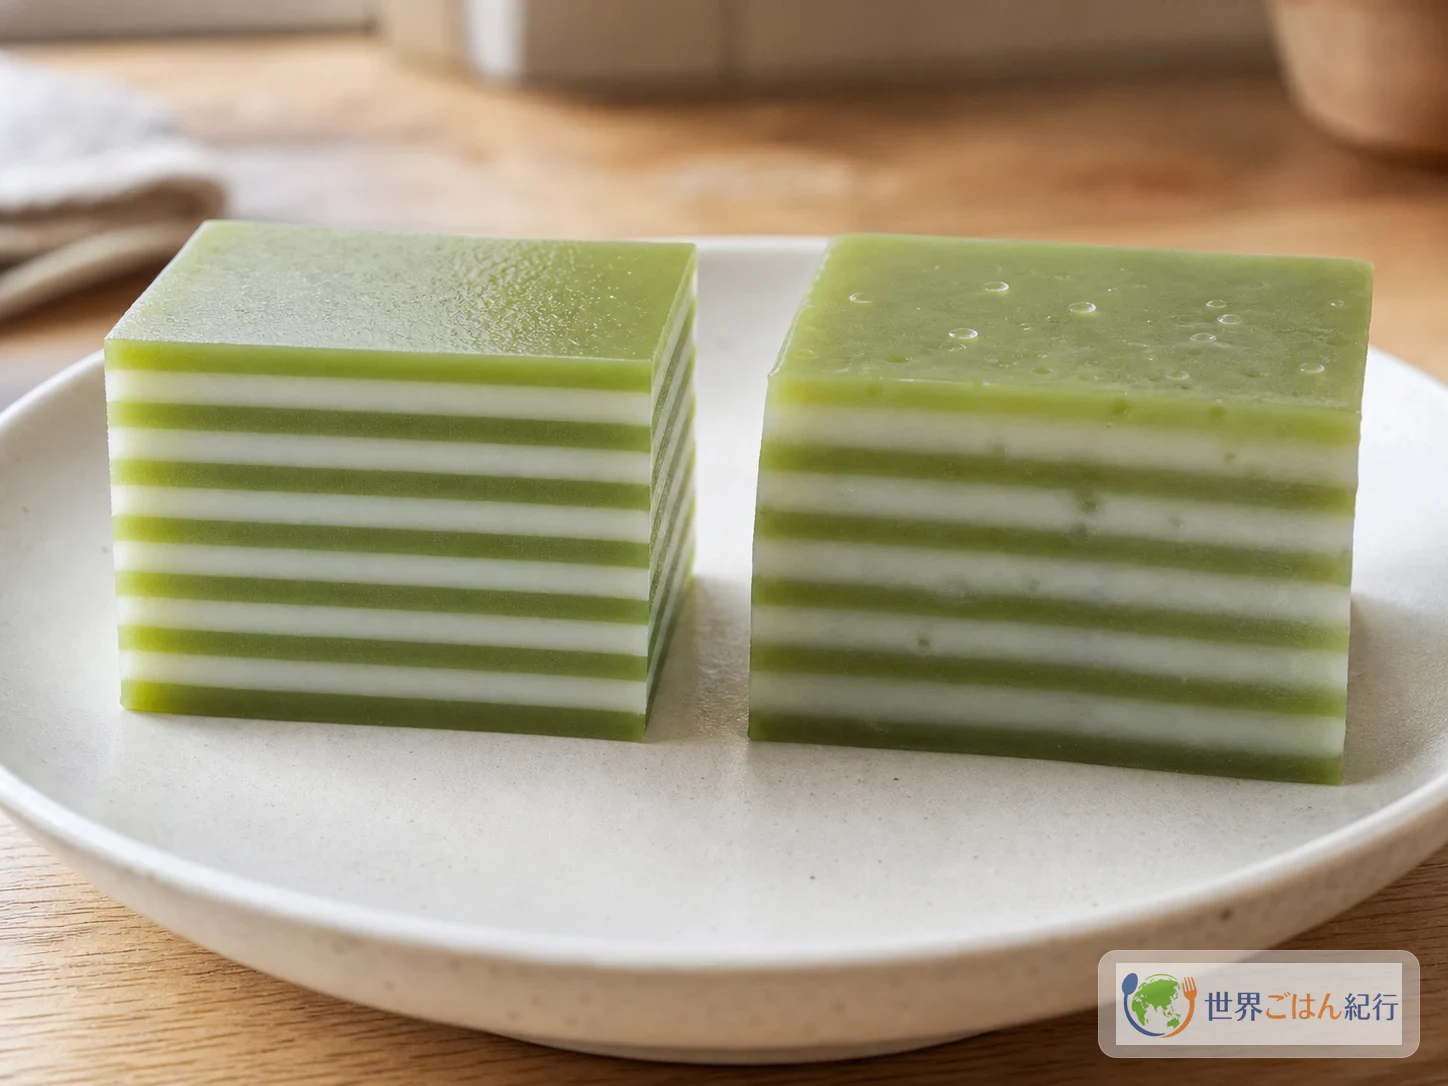
Cut khanom chan comparing blurred layers with cleanly separated ones
Blurred layers and cracks can be traced to settled starch, drips or the strength of the steam

The layers blur together

Either the next layer went on before the previous one had set, or you poured from too high. If liquid is still sitting on the surface, steam 2 minutes longer and cut the following layers to ¼ cup (60–65 ml). Layers that have already blurred can't be fixed, but if you cut the dessert once it cools, it still holds together and tastes fine.

The layers are thick and heavy, like mochi

Either a layer was too big, or the tapioca starch settled to the bottom and made a dense patch. Next time, measure each layer with a measuring cup and stir from the bottom before pouring. If you used potato starch, it loses translucency, so serve it as a white-only dessert.

Holes or drip marks on the surface

Condensation most likely dripped from a lid that wasn't wrapped in a towel. When you wipe the lid, keep it open only briefly. If the holes are small, cutting the dessert into diamonds hides them.

The green looks dull, or the aroma is weak

Either the pandan water sat too long, or the coconut syrup was too hot. Use the pandan water right after you make it, and cool the coconut syrup to 104°F (40°C) or below before mixing. If you have no leaves, white layers taste more natural than layers with color alone.

Serving, storage and variations

Right after cutting, the boundaries between layers look a little damp. Move the pieces to a plate and let them sit for about 10 minutes. The surface sheen settles, and they hold their shape when you pick them up with your fingers. The green aroma isn't overpowering, so it's an easy piece to offer even to people who don't care much for sweets.
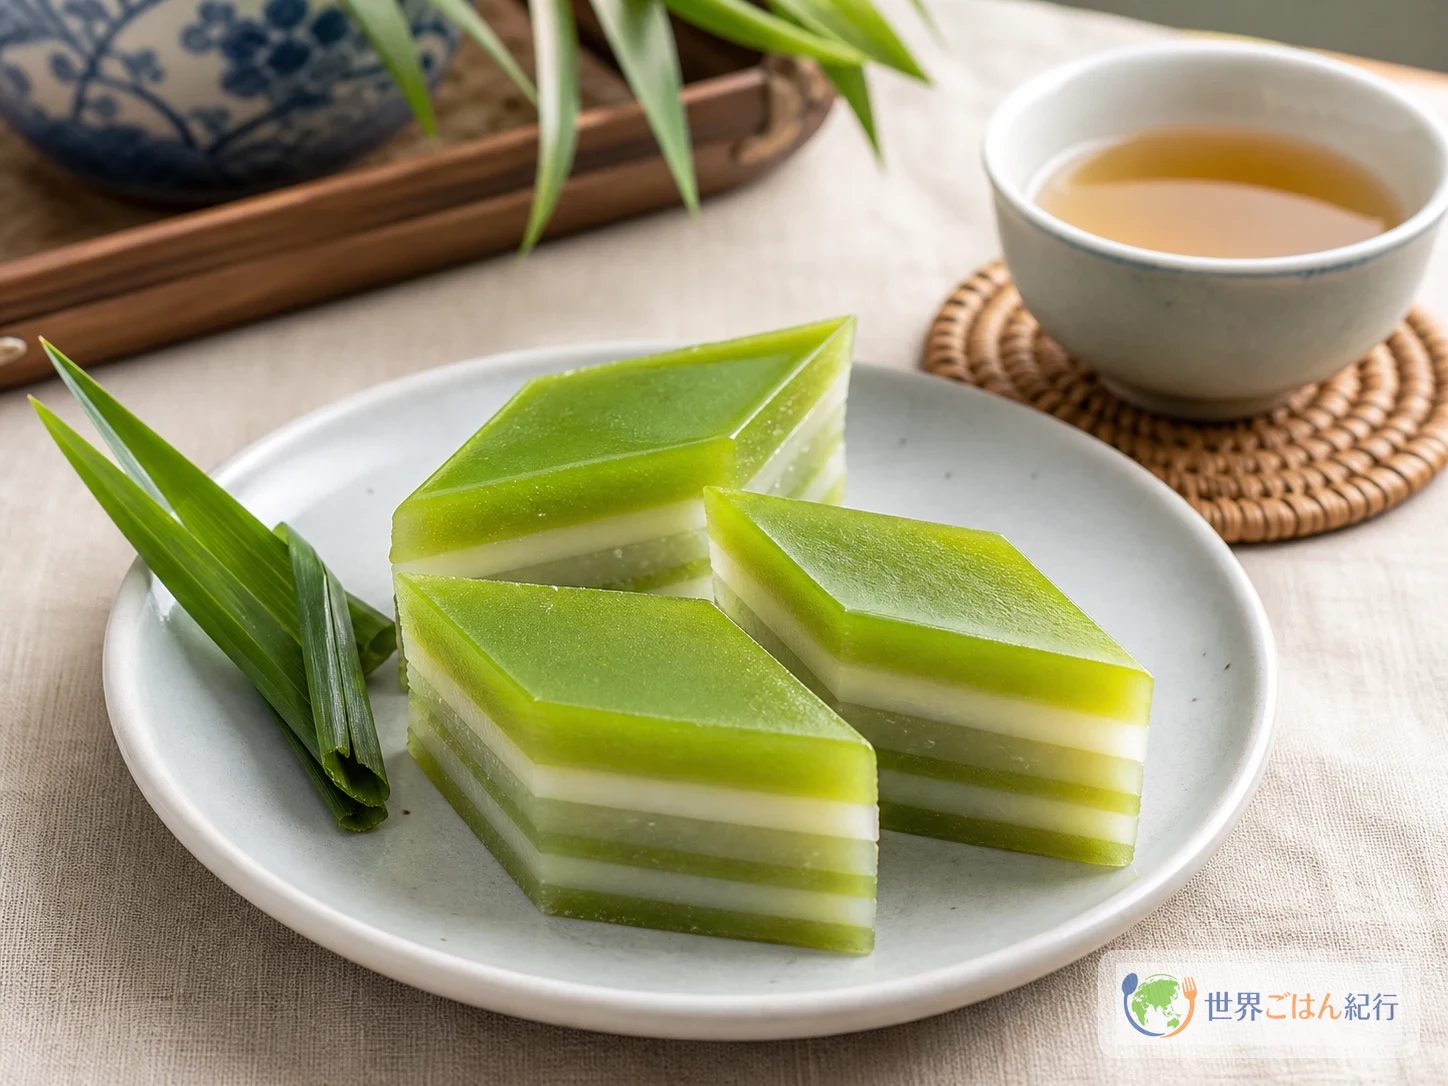
Diamond-cut khanom chan served with Thai tea
Cut khanom chan into diamonds and serve small portions with unsweetened tea to appreciate the layered texture

Serving khanom chan in a Thai menu

Served in small pieces after spicy dishes, khanom chan shifts the table toward something sweet and fragrant. Serving pad thai or tom yum goong first gives a natural flow from sour to sweet. On days when getting the steamer out feels like a chore, the griddle-cooked khanom krok is the easier choice, and making both is a good way to compare their bounce and aroma.

How long khanom chan keeps

Once it has cooled, wrap each piece in plastic wrap and put the pieces in an airtight container. Eat it the same day at room temperature, or within 2 days refrigerated. Refrigeration firms up the starch, so take it out 15 minutes before eating. If it still feels firm, warm it in the steamer for just 2 minutes. A microwave dries it out. If you do use one, cover the dessert loosely with a damp paper towel and heat at 600 W for 10–15 seconds at a time, checking as you go.

Freezing tends to change the texture, so skip it for your first batch. If you must freeze it, wrap each piece individually once it is completely cool and use it within 2 weeks. Warm it from frozen in the steamer for 5–6 minutes, and eat it once the center has softened again. Do not refreeze.

Starting simple

You can try the method without buying everything. White layers only, potato starch as a substitute, and a deep pot you already own are enough for a first try. If you want to make it again, add tapioca starch and pandan. Khanom chan rewards practice more than perfect shopping, and your judgment improves one layer at a time.

Frequently asked questions

Does it have to be nine layers to count as khanom chan?

Nine is the classic auspicious number. At home, the pan size and the amount of batter set the count, and seven layers teaches the same technique. This recipe's amounts assume nine layers. For seven, use about ½ cup (90 ml) per layer and steam each one for 6–7 minutes.

Can I replace all the tapioca starch with potato starch?

It will hold its shape, but the bounce and translucency weaken. Instead of replacing all 4 oz (120 g) with potato starch, use 2.75 oz (80 g) potato starch and 2.75 oz (80 g) kudzu starch so the layers don't set too hard. If the dessert cracks when you cut it, check that you aren't chilling it too much.

Why wrap the steamer lid in a towel?

The towel keeps condensation from dripping onto the surface and leaving holes or streaks. Keep the ends of the towel away from the flame, and leave the steam vent partly open. If you don't have a lid cover made for this, a clean, thin cloth works.

Can I make it with kids?

Kids can help mix the batter, count the layers and cut the dessert once it has cooled. An adult should handle the steamer lid and the hot pan. If you use pandan extract or food coloring, read the labels together.

Sources