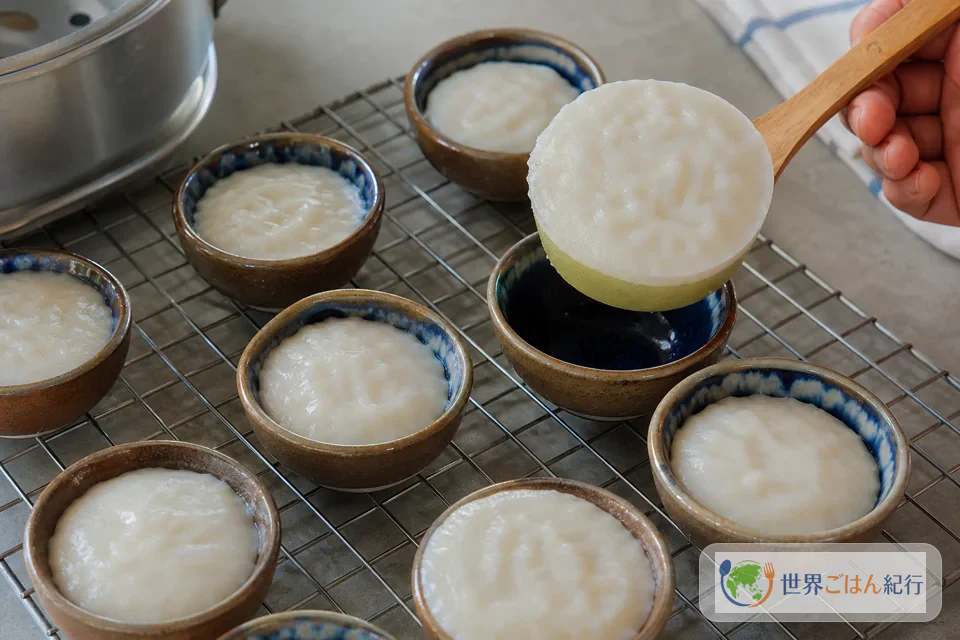
In one small cup, sweet gives way to salty
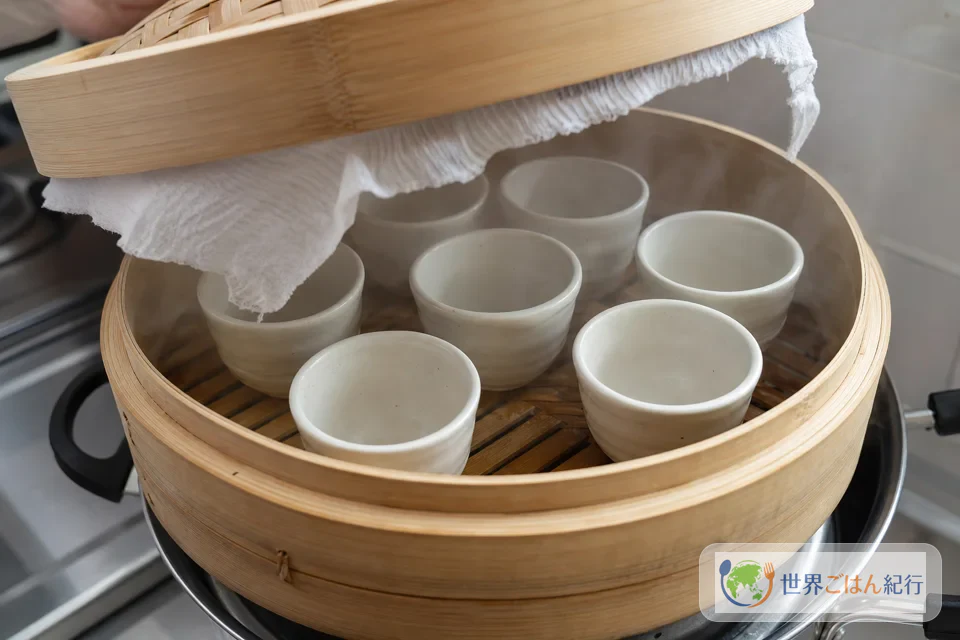
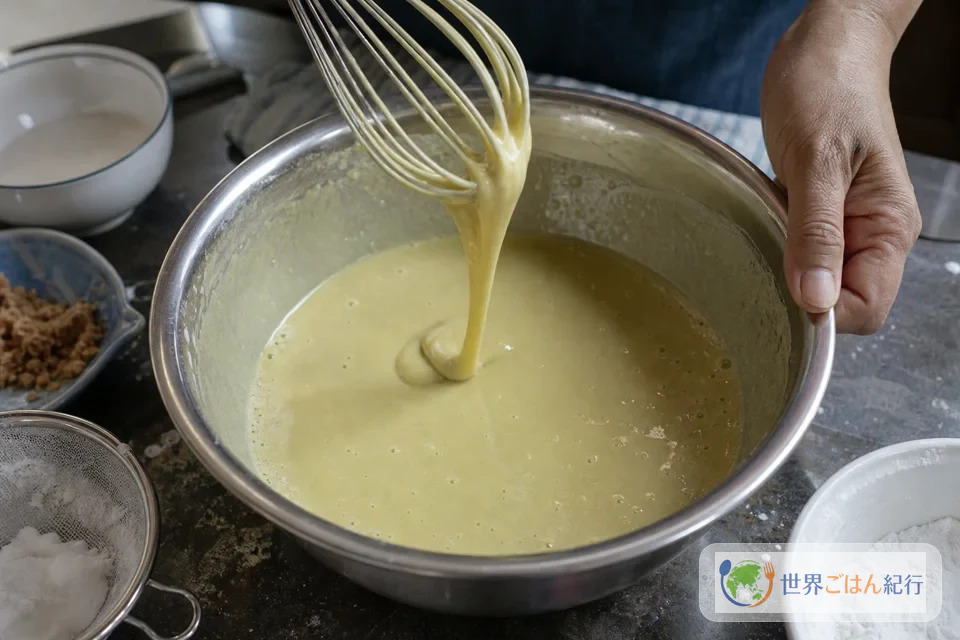
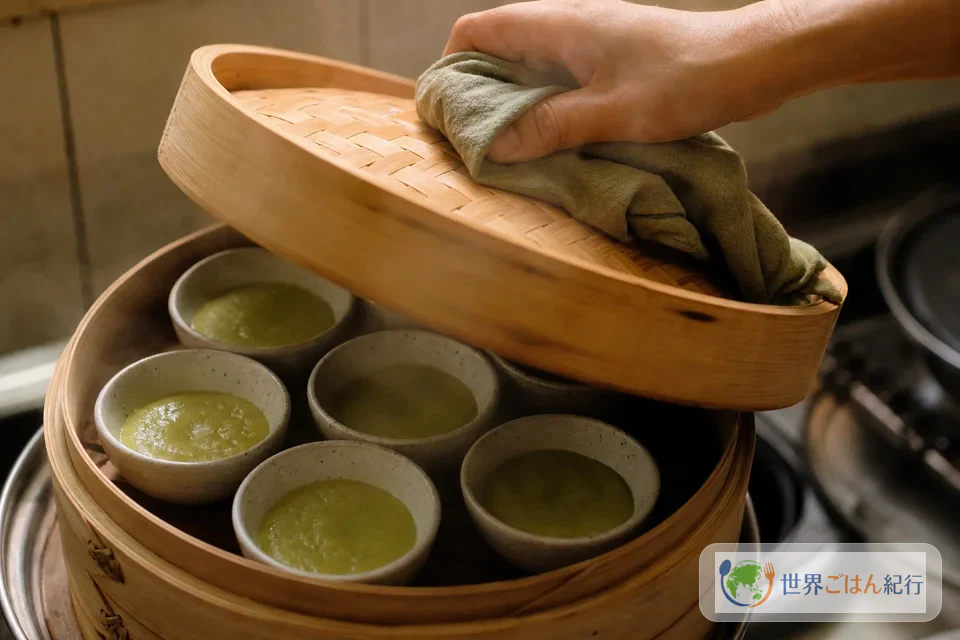
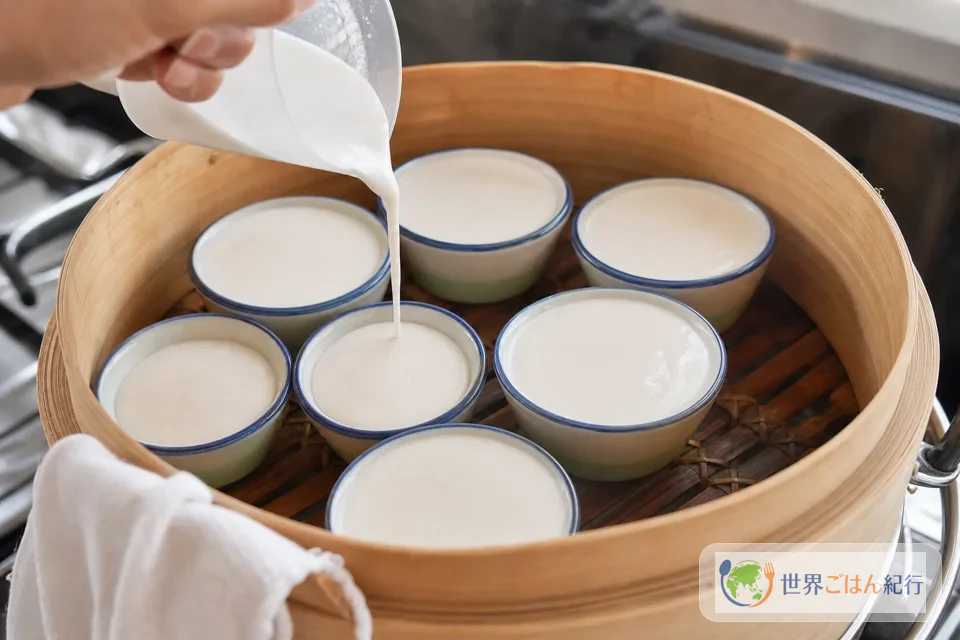
Lift the steamer lid a little, and deep in the white steam, bubbles the size of rice grains quietly disappear. So far the small cups hold only the sweet brown batter. Pour the white coconut batter on top, and the same little sweet changes direction.
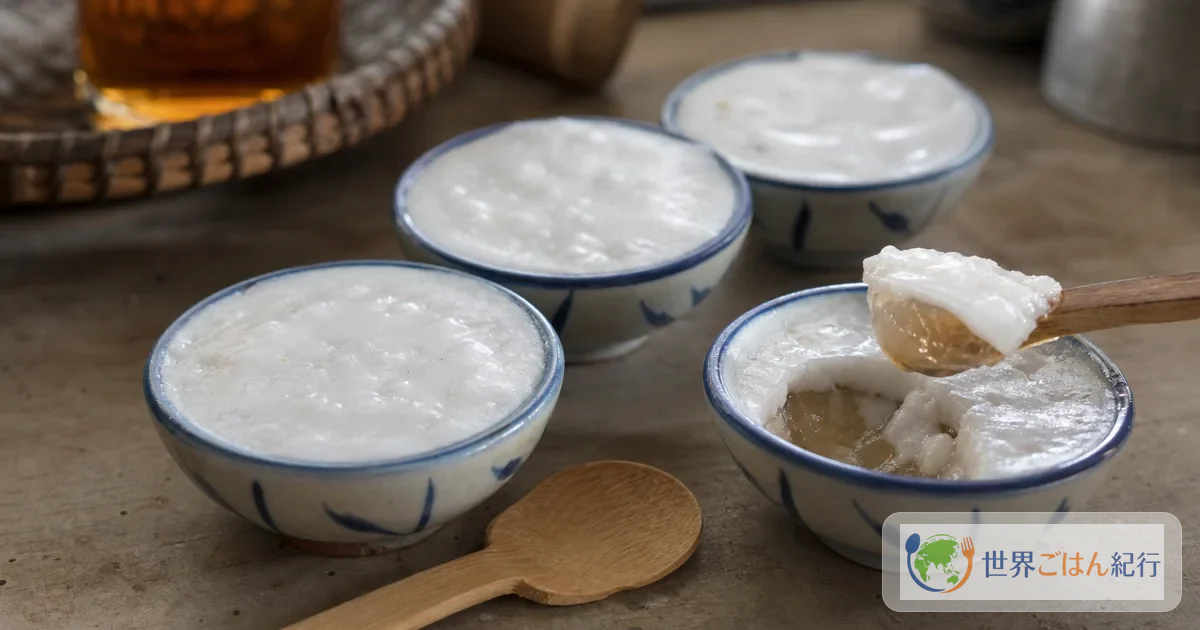
This is Thailand's khanom thuai (ขนมถ้วย). The bottom layer has a soft, bouncy sweetness carrying the scent of palm sugar. The top layer is a salted coconut cream. Each bite leaves you with a curious feeling: you're eating something sweet, yet the salt at the end makes your mouth feel light.
At home, the biggest challenge isn't the type of flour. It's when to pour the top layer. Pour while the bottom is still rippling and the two layers blend; wait too long and the surface dries, so the top peels away. Go by the color of the surface, how it wobbles, and the spring you feel under a fingertip, not just the clock.
You don't need tiny Thai cups. Set out 16 heatproof cups of 30–40 ml (about 1–1 1/3 fl oz) each, and you'll enjoy how small they look on the table and the two layers from steaming twice. Buy the Thai-style flour or a bamboo steamer only if you'll make this again. If you already have potato starch and a deep pot, you can skip both.
- The heart of the flavor is the contrast between the sweet bottom and the salty top. Don't make the top too sweet.
- When choosing substitutes, match the coconut milk and the texture of the flour before worrying about the cups.
- The sign that the bottom layer is set: no liquid remains on the surface, and ripples don't spread when you jiggle the cup.
- If you're only trying it once, use heatproof cups and a deep pot you already have. Buy extra flour or a steamer once you know you'll make it again.
With khanom thuai, the cup is part of the dish
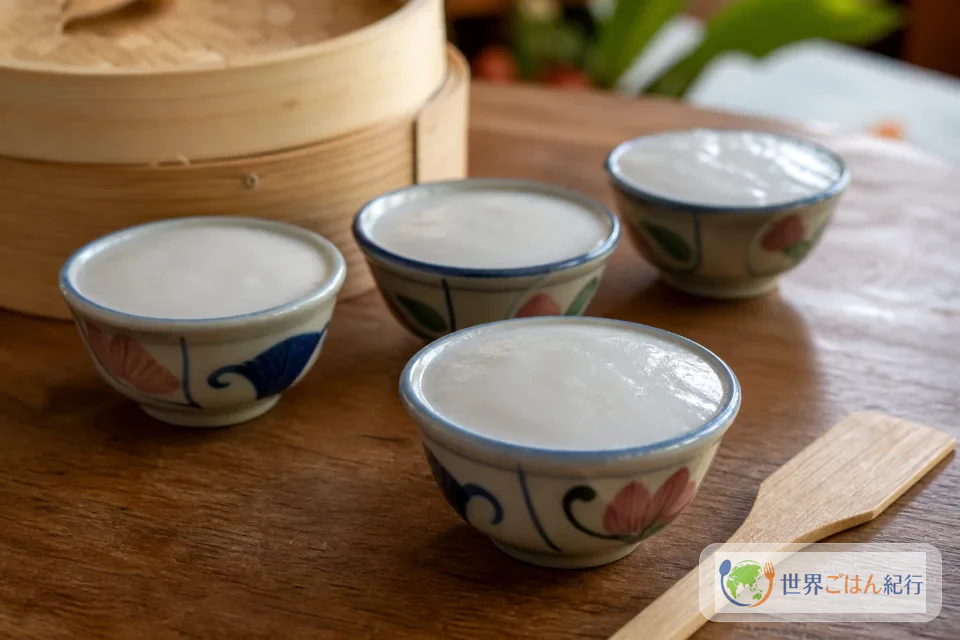
In Thai, khanom (ขนม) means a sweet or snack, and thuai (ถ้วย) means a cup. The batter is poured into small ceramic cups called thuai talai, steamed right in them, and scooped out with a small spatula to eat. Because the name comes from the vessel, it's designed from the start differently from sweets that are sliced and shown off in large pieces.
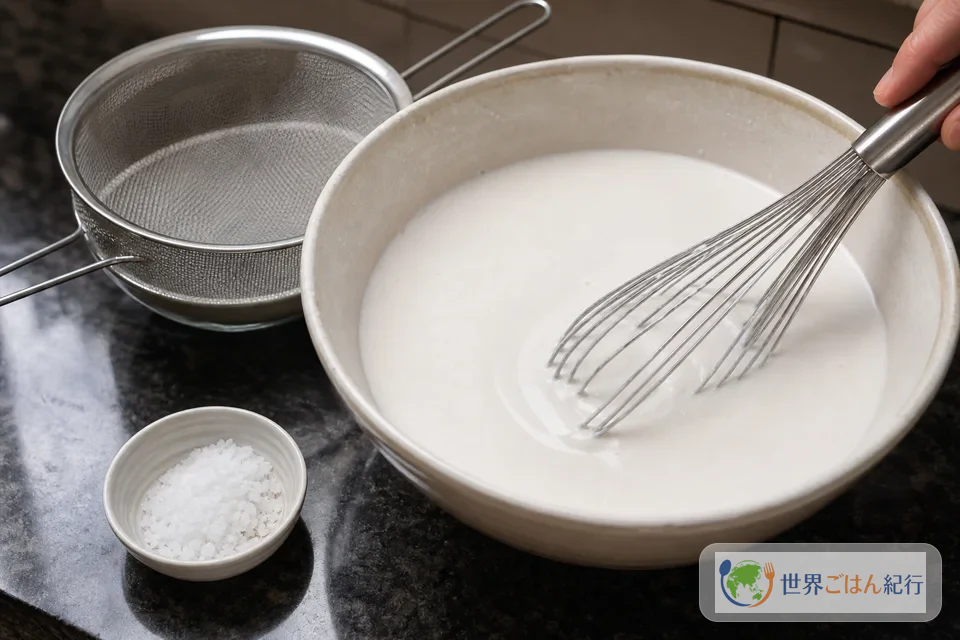
The bottom layer uses rice flour, a traditional Thai starch, palm sugar and thin coconut milk, while the top layer combines thick coconut milk, salt, sugar and flour. The cups are heated, the bottom layer is steamed, and once its surface sets, the top layer is poured in and steamed again. The standard formula makes about 30 cups. Here it's scaled to 16 cups, with the sweetness and texture adjusted for home cooks. For quantities and steps, check the Thai-language recipe.
If you think of this sweet only as "coconut pudding," the saltiness of the top will surprise you. Khanom thuai is a traditional sweet set in small talai cups, with a sweet bottom layer and a rich, salty top layer. After the second steaming, the top ripples slightly, and the coconut fat gives the surface a sheen. For shelf life at home or in small-scale sales, see these notes.
Think of it as an everyday sweet: steam a small batch and eat it right away. It's a home favorite, with a sweet bottom layer and a salty top. For more on the cups and flavor, see this explainer.
Ingredients (16 heatproof cups, serves 4)
For the bottom layer, tapioca starch adds a little more bounce than rice flour alone. It stands in for the traditional starch because it's easier to find. For the top layer, don't add too much flour; aim for a consistency where the salty coconut spreads in a thin layer.
You'll need 16 heatproof cups of 30–40 ml each. If you don't have Thai thuai talai, use small heatproof custard cups or ramekins, or small ceramic cups that fit in your steamer. Cups of the same height make it easier to keep the bottom and top layers even.
What you need for steaming
| Equipment / item | Guide | What to check |
|---|---|---|
| Bamboo steamer, or a deep pot with a steaming rack | 1 set | The cups can sit level |
| Water for the steamer | 1.5 L | About 6 cups. It won't boil dry during 30 minutes of steaming |
| Kitchen towel to wrap the lid | 1 | A clean, thin cloth to catch condensation |
| Fine-mesh strainer | 1 | Removes lumps of flour and pandan fibers |
| Small spatula or teaspoon | 1 | For scooping without scratching the bottom of the cup |
This recipe uses coconut, rice and tapioca, and contains no eggs or dairy. However, flours and coconut milk are sometimes made on production lines that also handle wheat, milk, peanuts or tree nuts. If this matters to you, check the allergen statement and ingredients when you buy. If you switch to pandan extract, also confirm it's food-grade and check the additives on the label.
This recipe uses 400 ml of coconut milk. Buy unsweetened coconut milk for cooking in a 400 ml can (13.5 fl oz), with coconut and water at the top of the ingredient list. If you already have some, there's no need to buy more. Coconut milk beverages and sweetened versions change the moisture and sweetness, so make sure the can is labeled "coconut milk."
Method
The order of the two steamings is simple, but how you judge the waiting time decides the flavor and the look. Keep the steam fairly strong and open the lid as few times as possible. Pouring the top only after no liquid remains on the bottom layer's surface is the most important condition for keeping the two layers separate.
The size of your steamer, the thickness of the cups and the heat all change the timing. For the bottom layer, look for three things: no liquid, no spreading ripples, nothing sticks when touched. For the top layer, look for three more: milky white, only the center wobbles slightly, a faint sheen on the surface.
Three adjustments for clean layers
The same formula can turn out differently. You can't tell whether the bottom batter is "too thin or too heavy" from the recipe alone. Connect the ribbon falling from the spoon with how the cups wobble when steamed.
When the bottom layer is hard
There's too much rice flour and starch, or you over-steamed the bottom trying to set it all the way to the center. Next time, add just 2 tsp water to the bottom batter, so the ribbon falling from the spoon disappears a little faster. Touch it once at 8 minutes of steaming, and if the surface has set, move on to the top layer. If they've been refrigerated, the texture firms up, so let them sit at room temperature for 15 minutes before eating.
When the bottom and top layers blend
Liquid was still on the bottom layer's surface, or you poured the top from too high. Next time, reduce the bottom layer to 18 ml per cup and steam it 2 minutes longer. Pour the top slowly from the rim of the cup, and don't press the surface with a spatula or spoon. You can't undo this batch, but the flavor holds up, so enjoy the blended ones as "steamed coconut cakes."
When the top layer is too salty
Check whether you used the same weight of fine salt instead of coarse salt. Fine salt is denser, so even 3 g can taste too salty. Next time, start at 1.5 g and taste a tiny bit of the liquid before steaming. The salt in the top layer is there to sharpen the sweetness of the bottom, so re-measuring the salt brings the flavor back better than adding more sugar to mask it.
When there are water-drop marks on the surface
Condensation is dripping from the lid. Wrap a towel around the lid and let the ends hang outside so they don't block the steam vent. When you open the lid, don't shake off the drops, and keep the time spent checking the cups short. Small pits matter little to the texture once cooled and scooped with a spatula.
Buy tapioca starch, or skip it and use potato starch?
Tapioca starch doesn't define the overall flavor. Just 10 g in the bottom layer reduces the floury feel of the rice flour and adds a bounce that springs back a little when you lift it with a spatula. It's a practical substitute for the traditional starch.
If you're only making it once, you can skip the tapioca starch and try the same amount of potato starch. Keep in mind that potato starch firms differently as it cools, and the bottom layer's translucency and bounce will be weaker. If you plan to make another Thai sweet, want a chewier bottom layer, or know you'll use up the starch, that's reason enough to buy it. If potato starch is good enough, or you don't want more flours in the pantry, skip it.
When buying, check that it's a food-grade tapioca starch (sometimes labeled tapioca flour) and look at the ingredient list.
Buy a bamboo steamer, or make do with a deep pot?
The 16 cups here are easy to fit in one batch in a bamboo steamer, or in two batches in a deep pot. Buying a steamer makes sense if you plan to make steamed sweets or dim sum beyond khanom thuai and need a lid and an inner diameter that holds the cups level. If you're trying it once, or already have a deep pot and a steaming rack, you can skip it.
When choosing, don't decide on the outer diameter alone. Check for an inner diameter of around 24 cm (about 9 1/2 in), whether it has two tiers, whether the lid is included, and whether it sits stably on a pot you own. Some bamboo steamers are sold as a basket only, so confirm whether there's a lid.
If you don't buy one, set a steaming rack in a deep pot and adjust the water level so the cups don't touch the water. Using aluminum foil in place of a lid lets steam escape and changes how drops fall, so don't use it for this sweet. Prioritize equipment you can wrap a clean towel around.
Substitutes for aroma, and making it again
You don't need to gather pandan, palm sugar and tapioca starch all at once; the core flavor remains without them. Stacking several substitutes at once makes it hard to tell what changed, so the safe approach is to swap one thing at a time in the bottom or top layer.
| What you're trying | Swap | What changes |
|---|---|---|
| White khanom thuai | 2.5 tbsp (40 ml) water instead of pandan water | The green color and grassy aroma disappear. The texture holds |
| Using sugar you have | 3.5 oz (100 g) light brown cane sugar instead of palm sugar | You get the sweetness, but the syrupy aroma is lighter |
| Without buying starch | 10 g potato starch instead of tapioca starch | A bit less bounce; it firms up more as it cools |
| Adding aroma | Pandan extract, only the amount on the label | The color comes through, but the aroma can get strong. Start small |
| A lighter top layer | Regular coconut milk instead of a thick type | Less creamy; the top layer tastes thinner |
| Less sweet | Reduce the palm sugar in the bottom layer to 3.25 oz (90 g) | The bottom layer's flavor is softer. Don't increase the salt in the top |
You can also replace pandan water with food coloring, but matching the color doesn't add the aroma. Making it white also lets you taste how rice flour and coconut work together in khanom thuai.
Store it mainly for the same day, and bring it back to eating temperature
Once the steamed khanom thuai have cooled slightly, put them, still in their cups, into a lidded container. Made at home or sold on a small scale, they keep for about 1 day on average, and quality changes with temperature. Even at room temperature, eat them the same day, and avoid hot rooms or carrying them around for long periods.
In the refrigerator, keep them for up to 2 days, though the rice flour and starch will firm up. Let them sit at room temperature for 15 minutes before eating to bring back the sheen of the top layer and the bounce of the bottom. To warm one in the microwave, loosely cover a single cup with a damp paper towel and heat at 600 W in 10-second bursts, checking as you go. Heating until the center is hot makes the top layer prone to separating, so don't overdo it.
If water droplets form inside the container, shift the lid slightly to let steam escape, then close it again once cooled. A sticky surface comes from under-steaming or a sudden temperature change. If clear liquid remains, don't reheat it on the spot. Steam the bottom layer 2 minutes longer next time to keep the layers clean.
FAQ
Can I make it without Thai thuai talai cups?
Yes. Use heatproof cups of 30–40 ml and arrange them so they sit level in the steamer. Mixing cups of different thicknesses makes the setting time uneven. Don't fill the bottom layer past two-thirds of the cup, so there's room left for the top.
Can I use a coconut milk beverage instead?
Use unsweetened coconut milk for cooking. Beverages differ in moisture and sweetness, which changes how long the top takes to set. If you must use one, don't reduce the sugar in the recipe. Instead, watch the bottom and top layers and extend the steaming 2 minutes at a time. For your first batch, canned cooking coconut milk makes it easier to pin down the cause if something goes wrong.
Without pandan leaves, can I just add the green color?
You can, but the aroma won't come back. If color is your priority, use the tiniest amount of food coloring; if aroma is your priority, leave them white. With pandan extract, follow the amount on the label and reduce the water by the same volume of liquid you add.
Can I steam them in a deep pot without a bamboo steamer?
If you have a deep pot and a steaming rack, yes. Keep the water level below the cups, wrap a towel around the inside of the lid, and put the cups in once the steam is steady. If the pot is shallow and the lid touches the cups, switching to smaller heatproof cups is safer than buying a steamer first.
Can people who avoid wheat or dairy eat them?
The ingredients contain no eggs or dairy. Check the labels on the rice flour, tapioca starch and coconut milk for allergen and shared-equipment statements. If cross-contact from shared equipment is a concern, prepare them separately. If you have a food allergy, don't make more substitutions on your own.
Buy or skip? Decide after making it once
If you're trying khanom thuai just once, unsweetened coconut milk, rice flour, the potato starch you have and small heatproof cups are enough. You'll still see the bottom layer bounce a little and the salty top sharpen the sweetness. Even without tapioca starch or pandan, you can taste it and then decide what's missing.
If you want to make it again, buy tapioca starch. If you want to keep making steamed sweets, buy a bamboo steamer around 9.5 inches (24 cm).
For coconut milk, the criteria are clear: an unsweetened can for cooking. Check for the 1¾ cups (400 ml) size and the ingredient list. For tapioca starch, make sure it's food-grade; for a steamer, check for an inner diameter of 9.5 inches (24 cm), two tiers and a lid.
On the other hand, if a white finish is fine, you already have a deep pot and steaming rack, and you don't want leftover flour, you can skip the extra purchases. If you just want to explore texture, try a layered sweet like Thailand's khanom chan next and compare how rice flour and tapioca starch behave. When you want to place a steamed sweet within the flow of a meal, set it beside the Philippines' puto, and you'll see the balance of coconut saltiness and rice-flour sweetness shift. And on a day for a browned coconut sweet, compare the texture with Thailand's khanom krok, and the point of steaming becomes clear.