

Lift the steamer lid a little, and deep in the white steam you can see a pale pink surface. Pour more batter over it, close the lid, and wait a few minutes for it to set. Kuih lapis is built this way, one pour and one short steaming for every layer.
When you open the lid for the eighth time, the pan still holds what looks like one big steamed cake. The white and pink stripes only appear once it cools and you slice it, and the cut face tells you which layer got too much steam and where you forgot to stir the batter. Made from rice flour, tapioca starch, coconut milk and sugar, this Malaysian favorite is soft, gently sweet and springy. A neat cross-section comes down to two things: a batter whose thin layers don't slip, and knowing when it's safe to pour the next one.
Kuih lapis in Malaysia
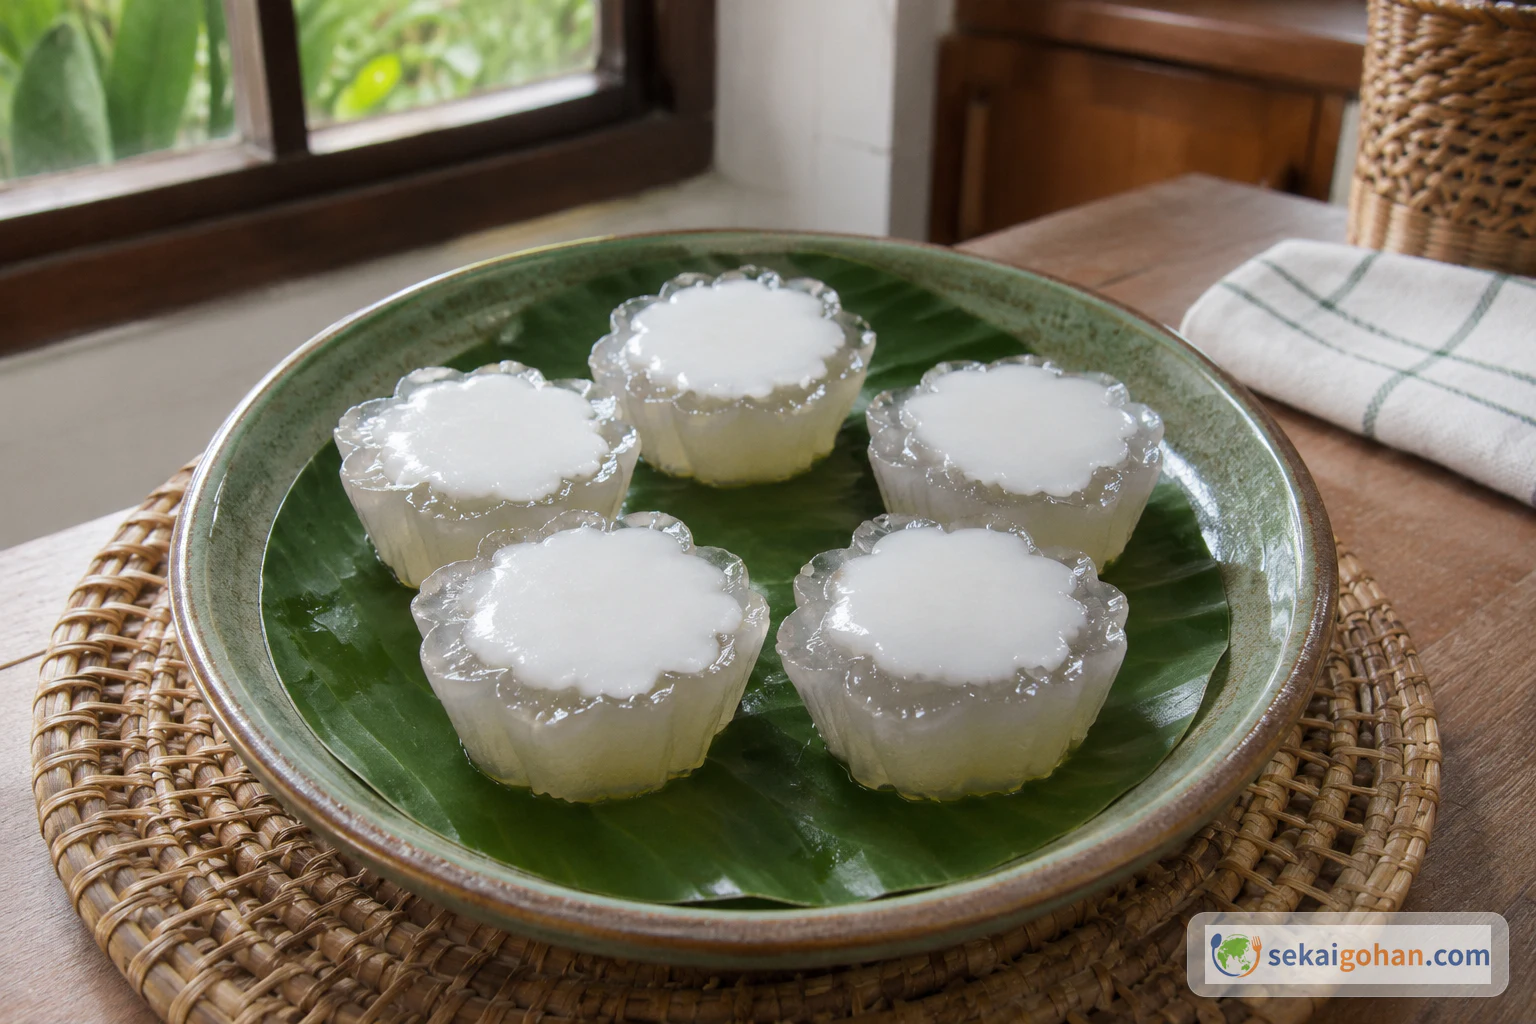
In Malay, kuih is a broad term that covers sweets and also light snacks made with rice, flour and coconut. Kuih lapis is basically rice flour, tapioca starch, coconut milk and sugar, steamed one layer at a time in the same pan. Versions of about 8 or 9 layers turn up at markets, celebrations and family gatherings, and some Malaysian recipes go to 10 layers or more.

At a market stall, kuih sits side by side in white and pink, but also in green, yellow and deep red. In Malay and Peranakan homes, white and pink is only one of many combinations; some households make green layers with pandan. Color is sometimes tied to aroma or ingredients, and some recipes use food coloring for the look and pandan for aroma.
Texture matters more than color. Good kuih lapis comes apart in layers when you pinch it lightly and springs back a little when you bite.

Kuih lapis, kue lapis and lapis legit
Thailand's khanom chan is also a steamed cake of layered starch and coconut. In Indonesia, kue lapis includes steamed cakes made with local fruits, wheat flour and eggs; the cempedak version uses santan (coconut milk), wheat flour and eggs, and is a treat for regional gifts and family occasions. Lapis is a shared name, but the flours and aromas differ from place to place.
Indonesia's lapis legit, or spekkoek, is a different layer cake altogether, baked with butter, eggs and spices. Keeping steamed kuih lapis and baked lapis legit separate in your mind makes it easier to know what to buy and what texture to expect.
Ingredients: 8 layers in a 7-inch (18 cm) square pan, 8 servings

These proportions are for a small pan. Weigh the strained batter and divide it into 8 equal portions before steaming, and the layers will come out even.
Rice flour varies in fineness and absorbency from brand to brand. Don't adjust the water from the start; aim for a strained batter that flows easily and where the trail of a spoon disappears right away.
For tapioca starch, choose the white powdered starch, not the granules for tapioca pearls. Don't switch entirely to potato starch: the cake will still set, but the bounce once it cools, and how the layers peel apart by hand, will change.
Look for tapioca starch, cooking coconut milk and pandan leaves at Asian grocery stores or international food shops. Pandan is also sold as "bai toey," "rampe" or "pandan leaf." Fresh or frozen leaves are ideal, but you can leave them out if you can't find any. Dried leaves and powder release aroma and absorb liquid differently, so don't swap them in at the same amount in this recipe.
Dividing the batter into 8
Right after mixing, the starch holds onto the liquid, so a slightly heavier layer remains at the bottom of the bowl. Strained, the batter weighs about 2 lb (920 g) in total. Weigh it in its container, subtract the container's weight, then divide it into 8 bowls of about 4 oz (115 g) each. Weighing the portions you'll color separately prevents the mishap of only the pink layers coming out thick.
Even sitting still, the starch settles. Just before steaming, stir slowly from the bottom and scoop out 4 oz (115 g) without whipping in air. If you steam it full of bubbles, little holes are left on the surface, the next layer seeps into them, and the stripes blur.
The recipe uses 1¼ cups (320 ml) coconut milk, so a 1¾-cup (400 ml) can leaves about ¼ cup (80 ml). Use the rest in a curry or soup, or buy a smaller can. Use unsweetened cooking coconut milk; coconut drinks or sweetened milk change the sugar and water content, so the surface won't set in the same steaming time.
If you look for pandan online, choose leaves clearly labeled as food. Potted plants and tea powders are sold under the same name, but they're not what this recipe simmers.
Choosing a steamer and ingredients for kuih lapis
The steamer
Check first that the pan fits. The pot needs to fit a 7-inch (18 cm) square pan, with at least 1 inch (3 cm) between the bottom of the pot and the bottom of the pan. Start with about 1.25 quarts (1.2 L) of water, adjusted so it doesn't touch the pan.
With a bamboo steamer, make sure the pan fits inside its walls and under the lid. A deep pot with a steaming rack that holds the pan level works just as well.
Pandan and its substitutes
Pandan is there for aroma more than for green color. If you can't find frozen leaves, leave it out; white and pink layers still give you the texture. A few drops of vanilla extract is one stand-in, though the aroma is entirely different. For a first try, white and pink is the easiest pairing, since each layer's doneness is easy to see.
Potato starch instead of tapioca
Potato starch will hold its shape, but it tends to give too much bounce once cooled, or leave a starchy feel. Keep tapioca starch for the 6 oz (165 g); if you really want to experiment, swap in no more than 1 oz (30 g) of potato starch.
Allergens
The recipe uses no wheat, eggs or dairy. Rice flour and tapioca starch can be made on shared production lines that vary by product, so check the allergen warnings on the package. If you react to coconut or want to avoid food coloring, read the ingredient list before you buy.
Instructions: don't pour the next layer until the surface sets
From start to ready-to-eat takes about 3 hours 30 minutes. Hands-on prep and steaming take about 80 minutes; the rest is cooling the syrup, letting the cake settle in the pan, and chilling it in the refrigerator to firm up the layers. Skip the cooling to save time, and the knife drags the layers sideways. Work back from when you want to eat, and set aside about 2 hours for cooling.
Kuih lapis tips and fixes
- Weigh 4 oz (115 g) every time: by eye, the last portions tend to run short and only the top layers end up thin. Stir the batter, then weigh, returning any excess to its bowl.
- Watch the shine: wait until the wet gloss right after pouring disappears and the whole surface goes matte before adding the next layer. If only the edges have set and the center wobbles, it's still too early.
- Lift the lid straight up: tilt it and the water droplets on the lid all fall in one spot. If you can't wrap the lid in a cloth, wipe its underside every time you open it.
- Don't unmold until you cut: warm cake spreads sideways under its own weight. Stick to the order of 45 minutes at room temperature, then 1 hour in the refrigerator, and you can flip it out without crushing the layers.
Timing and heat
The first two layers set your steaming time for the rest. Even if the first layer sets in 4 minutes, the pan and batter have changed temperature by the second, and the center can still wobble after the same time. If so, extend it to 5 minutes and use that as the baseline from the third layer on; matching the surface makes straighter stripes than matching the clock.
Stronger steam won't get you there faster. Over high heat the edges set first, while water dripping from the lid pools in the center. Keep a medium heat with steam rising steadily, and when the pot needs water, move the pan aside and add boiling water, since cold water stops the steam.
Eight layers of about 3 to 4 mm each suit a home steamer, whose pan size and steam strength won't match a shop's. At that thickness it's easy to see whether the surface has set, and you can recover if the steam weakens partway through. A neat cross-section comes from catching the right moment to pour, more than from thin layers.
Cracked or watery layers

Kuih lapis hides its mistakes until you cut it. Judge a layer by its surface alone and you may stack the next one while there's still a lot of moisture inside; steam it too long and the layers fuse and are hard to separate by hand.
| Problem | Likely cause | Fix and what to do next time |
|---|---|---|
| Water seeps out between layers | Droplets fell from the lid, or the steam was too strong | Blot the surface with paper towels and keep to medium heat from the next layer. Lift the lid straight up |
| Layers slide sideways | The layer below was still liquid, or the batter was poured from too high | Steam for 1 more minute, and pour the next layer low, down the side of the pan |
| Cut face is rubbery and hard | Each layer was steamed too long | Next time, check the surface at 4 minutes, and give only the last layer 8 minutes |
| Only the bottom is watery | The pan touched the water, or water from the pot got into the pan | Set the pan higher than the rack and lower the water level |
| Blotchy color | Starch settled at the bottom of the bowl | Before scooping each 4 oz (115 g), stir slowly from the bottom about 10 times |
Serving, storing and varying kuih lapis
When to eat it and how to store it
In a Malaysian day of eating, kuih lapis is an afternoon teatime snack. Breakfast might be nasi lemak, coconut rice, and roti canai is the one for days you want fresh-cooked food-stall fare.
Once the cake is completely cool, wrap each piece in plastic wrap, put them in an airtight container and refrigerate. The texture is best until the next day; eat it within 2 days at most. Bring it to room temperature 20 minutes before eating to soften the batter that firmed up in the fridge. Freezing tends to make the water separate, so keep it out of the freezer.
Pandan green and white
Pandan leaves alone won't reach the vivid green in photos. If natural aroma is your priority, use the syrup as is and add green food coloring to one batch, about as much as fits on the tip of a toothpick. Pandan essence varies in strength by product, so start with the smallest amount on the label, and keep it to a few drops even if the color is pale, since extra liquid changes the water ratio.
Green layers bring Southeast Asian aromas to mind, but the color itself doesn't make it authentic. The fat of the coconut milk, the bounce of the tapioca starch and setting each layer before pouring the next come first.
Three colors, or plain white
For white, pink and green, dividing the batter into thirds by color won't line up with 8 layers. Instead, divide it into 8 containers of about 4 oz (115 g) each, then color them in the order "white, pink, green, white, pink, green, white, pink." Portioning one layer at a time keeps the thickness even.
Plain white is a good choice, too. The stripes are harder to see, but you still get the layer-by-layer peel, and with no coloring step it's easier to pinpoint what went wrong while you're learning your steamer's heat.
Less sweet, or palm sugar
Sugar affects how moist the cooled cake stays as well as its sweetness. Halving the 6 oz (175 g) makes it firm up more after chilling, so go no lower than 5.5 oz (150 g) at first. If it still tastes sweet, drop to 5 oz (140 g) next time and note the steaming time and texture.
Swapping all of it for palm sugar or dark brown sugar deepens the aroma, but turns the white layers brown and changes the translucency of the steamed cake. To try it, split the sugar into 4.5 oz (125 g) granulated sugar and 1.75 oz (50 g) palm sugar. It's a fun Malaysian sweetness to layer in, just not for a batch where white and pink stripes are the priority.
FAQ
Q1. Do I use all 3 pandan leaves?
Yes. Tie all 3 together and put them in the syrup with ¾ cup (200 ml) water. If the leaves are too big for a small pot, fold them in half before tying. Chopping them leaves fibers in the syrup, so simmer them tied and then remove them.
Q2. Can I use dried pandan in the same amount as fresh?
No. Fresh and frozen leaves work out to about 3, but dried leaves differ in both weight and how they release aroma, so follow the directions and amounts on the package. Start modestly and increase next time if the aroma is faint. Powder absorbs the batter's liquid and leaves green specks, so keep it out of the batter in this recipe.
Q3. Can I use a 7-inch (18 cm) round pan?
Yes, if it's a metal round pan without a removable bottom; batter can leak through the seam of one that has it. A 7-inch (18 cm) round pan has a smaller base than a 7-inch (18 cm) square pan, so the same 4 oz (115 g) makes a thicker layer. Steam the first layer for 5 minutes, and if the center wobbles, extend 1 minute at a time. Silicone pans transfer heat slowly and their sides flex, so a metal pan is easier the first time.
Q4. Can I chill it in the refrigerator overnight?
You can leave it overnight before cutting, but the tapioca starch firms up and it will feel harder than on the day it was made. Cover the pan with plastic wrap pressed close to keep out odors. Take it out 30 minutes before cutting, and use a lightly oiled knife. For safety, don't leave it out at room temperature for long; take out only what you'll eat.
Q5. Is it a failure if the layers don't peel apart?
If the cut face is evenly set and it has a soft bounce when you bite, it's fine to eat even if the layers don't peel cleanly. Recipes with more rice flour, or layers steamed for a long time, bind more tightly. For layers that come apart with your fingers, keep the full amount of tapioca starch, and from the second layer on, pour the next layer as soon as the surface turns matte, while moisture still remains inside.